Photoshop 101: Layers
In Photoshop, use of layers make it easy to manage multiple elements simultaneously.
You can apply a wide variety of non-destructive edits, i.e. without irreversibly altering the original pixel composition of your elements. This makes it a lot simpler to adjust or undo any of your changes at later time.
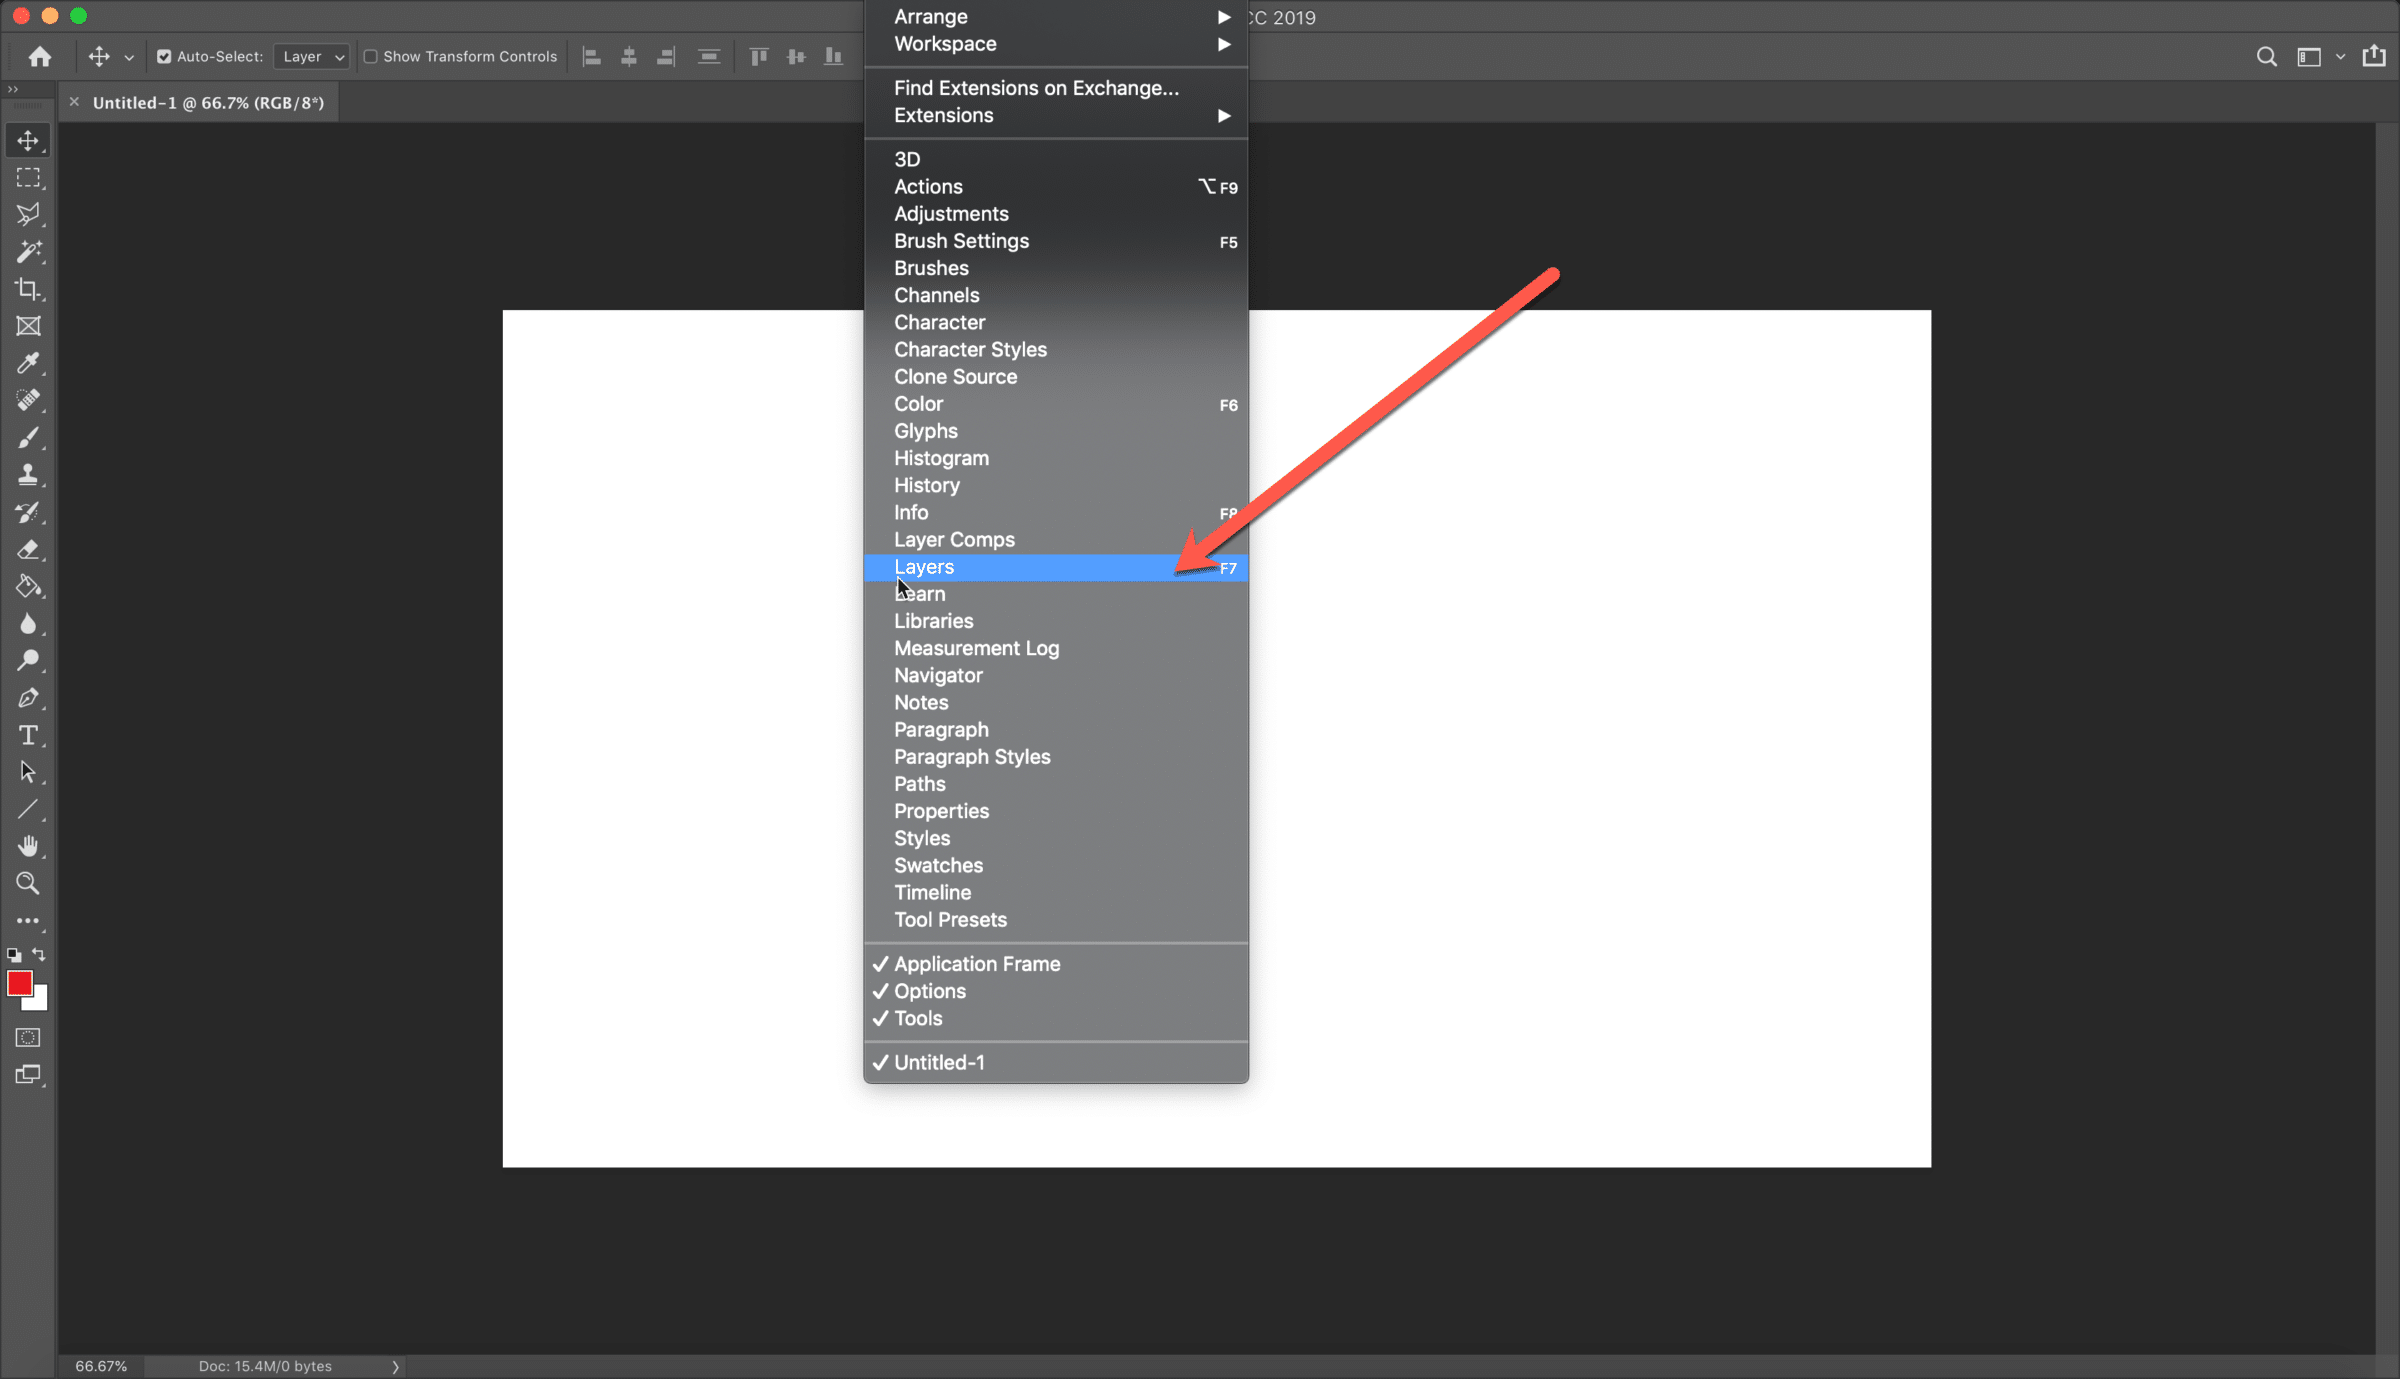
1. Begin with opening a blank document. If the Layers panel isn’t yet visible in your workspace, simply click Window in the application menu, then Layers:
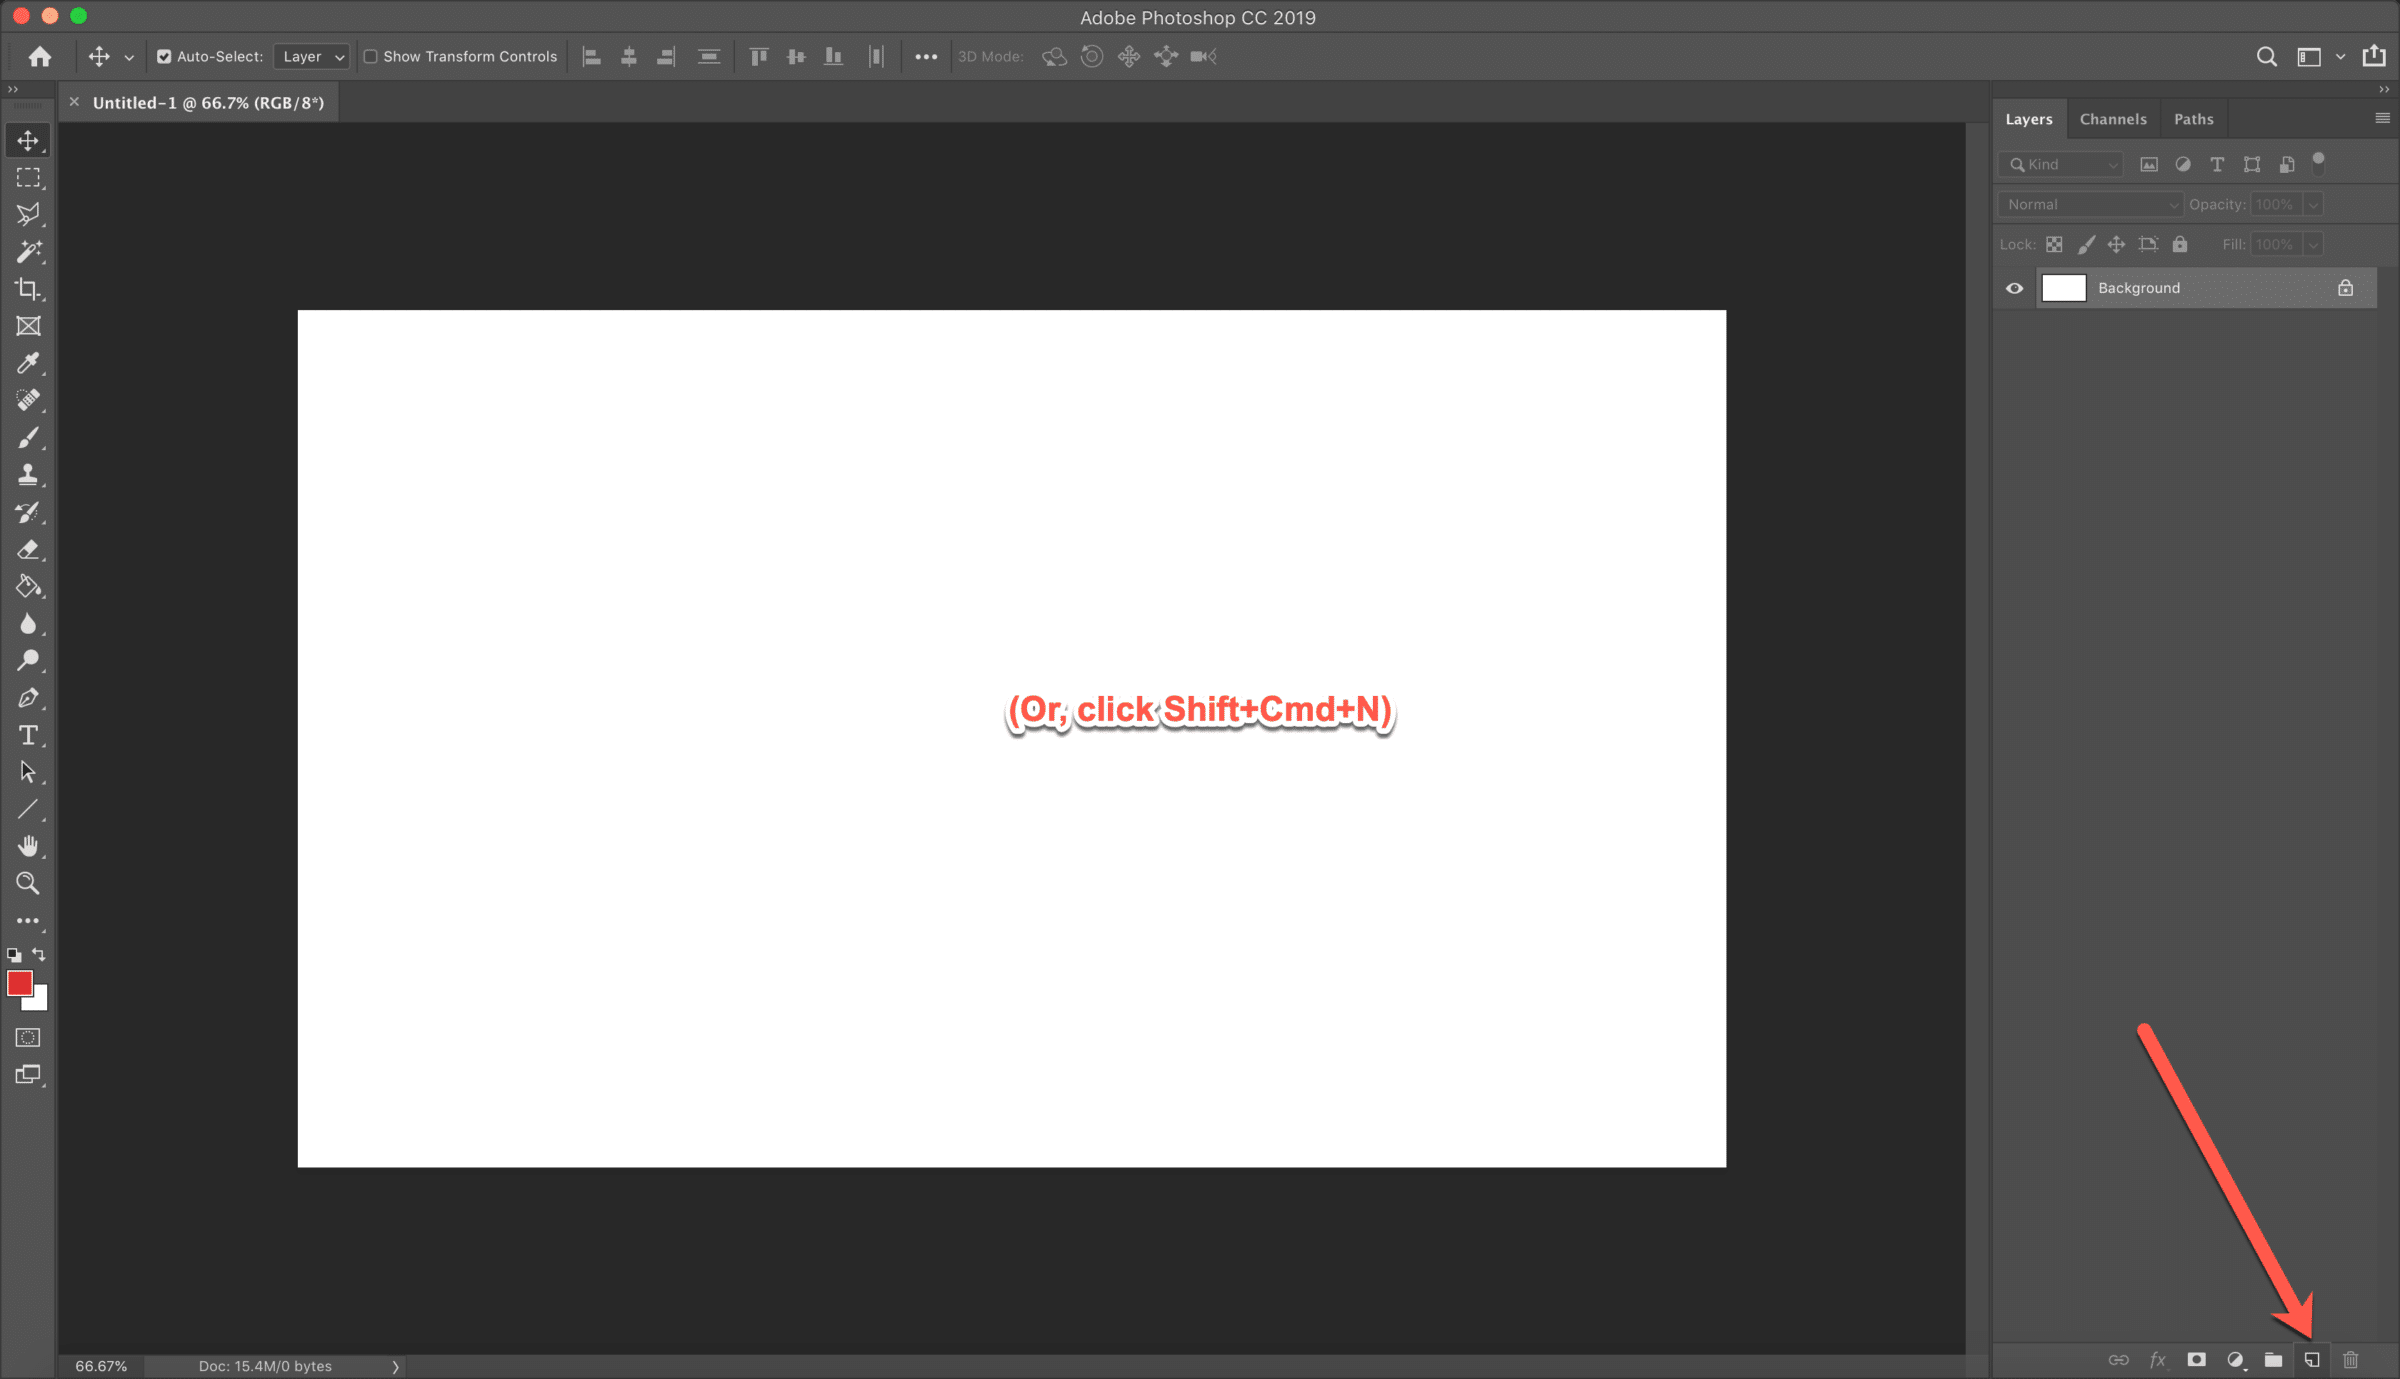
2. You can click the “new layer” icon in the panel, or on a Mac, simply key Shift+Cmd+N:
3. Next, we’ll copy and paste a source image onto a new layer. Open your source image, and click Cmd+C to copy the active layer, or Shift+Cmd+C to copy merged (copying all layers as one.)

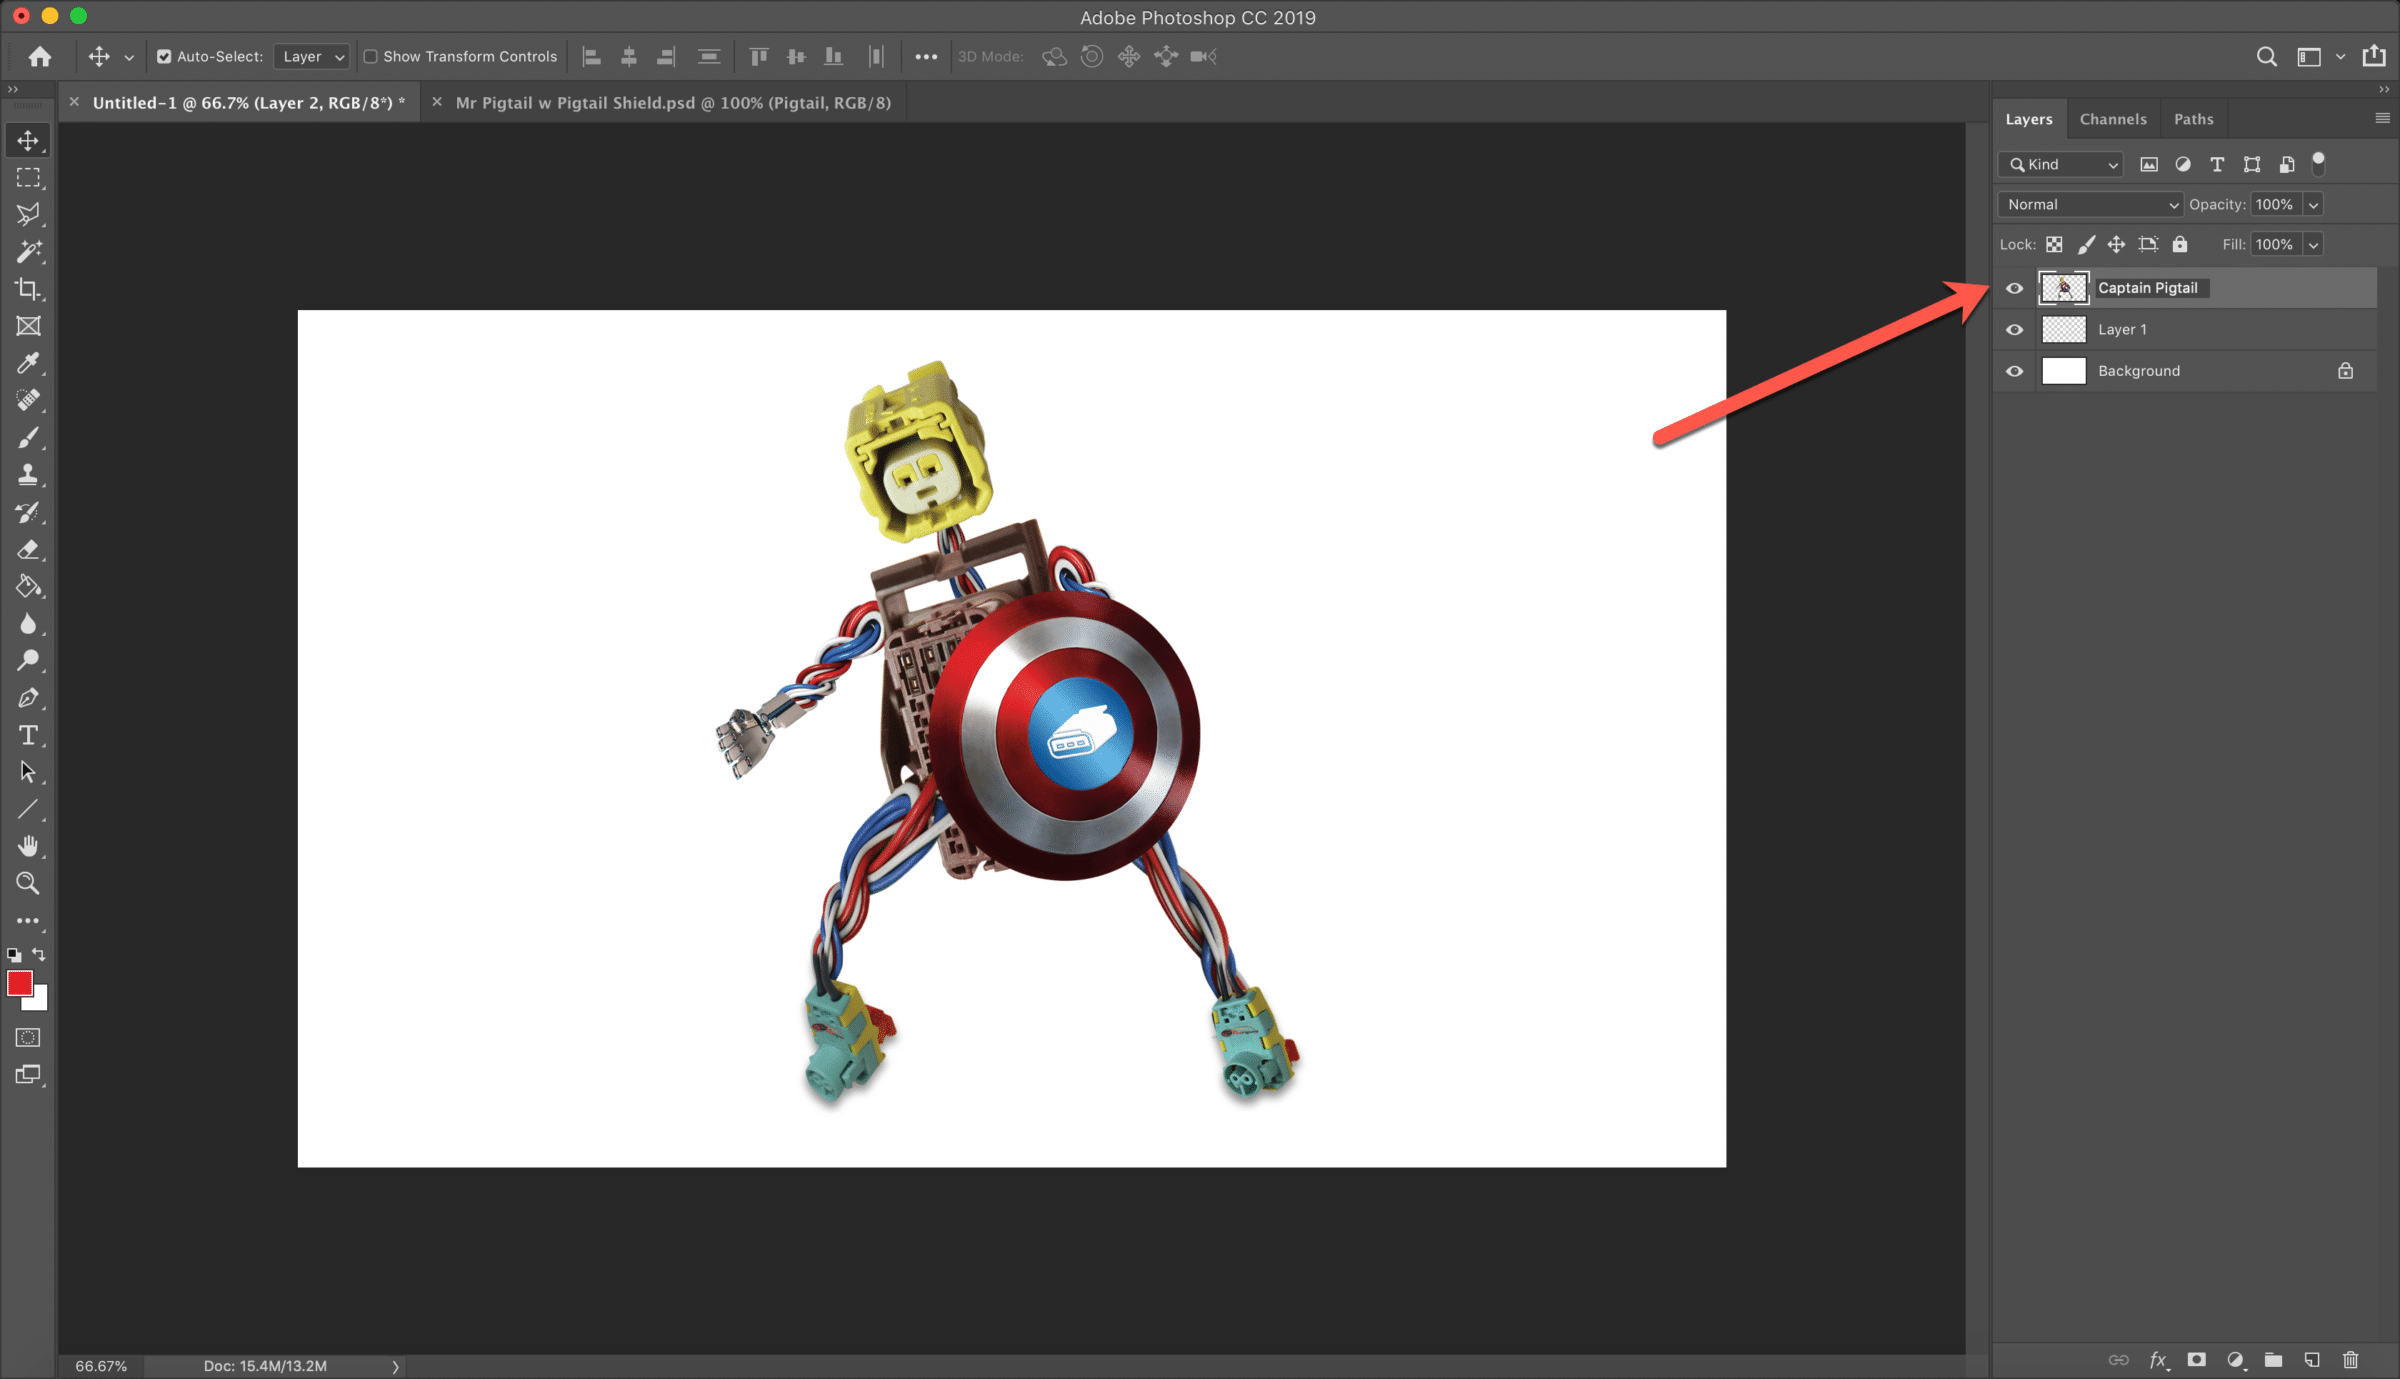
4. Return to our original document and key Cmd+V to paste our copied image onto the canvas. Note that in most cases, Photoshop will create a new layer to paste the contents of the clipboard into.
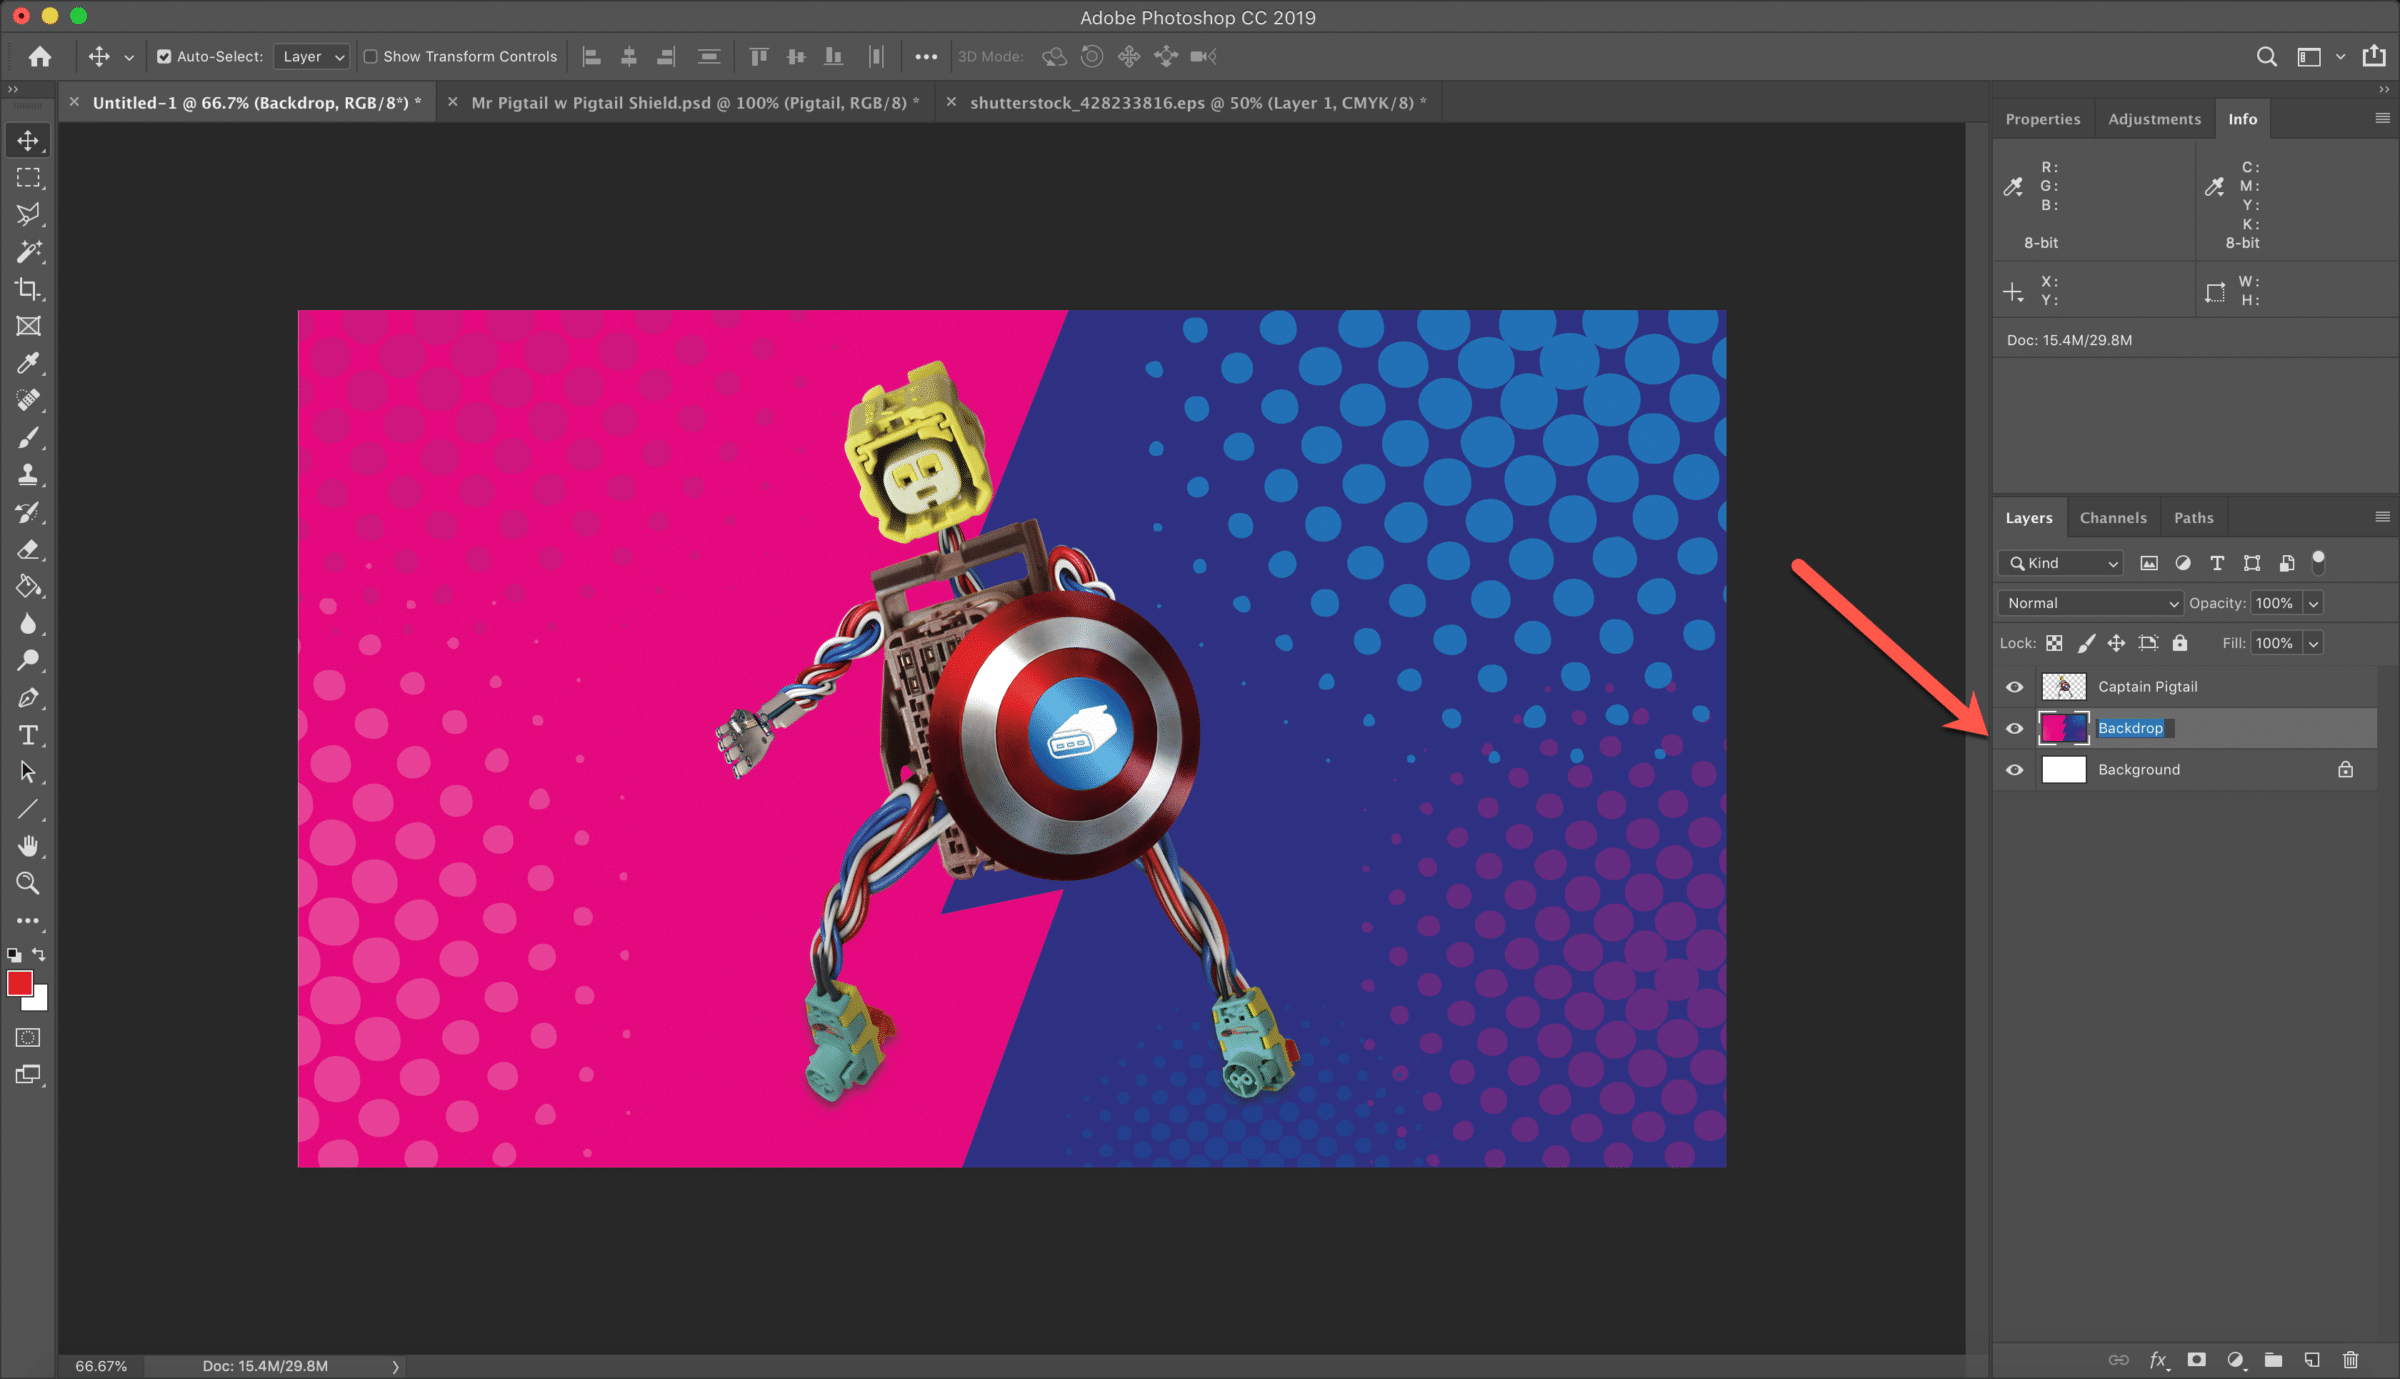
In the Layers pane, you can double-click the layer name itself to rename it for ease of future reference.
5. Next, we’ll copy another source image, this one as a snazzy background behind Captain Pigtails. First, click the Background layer to make it active, then click Cmd+V to paste our new layer on top of it, but behind Captain Pigtails.
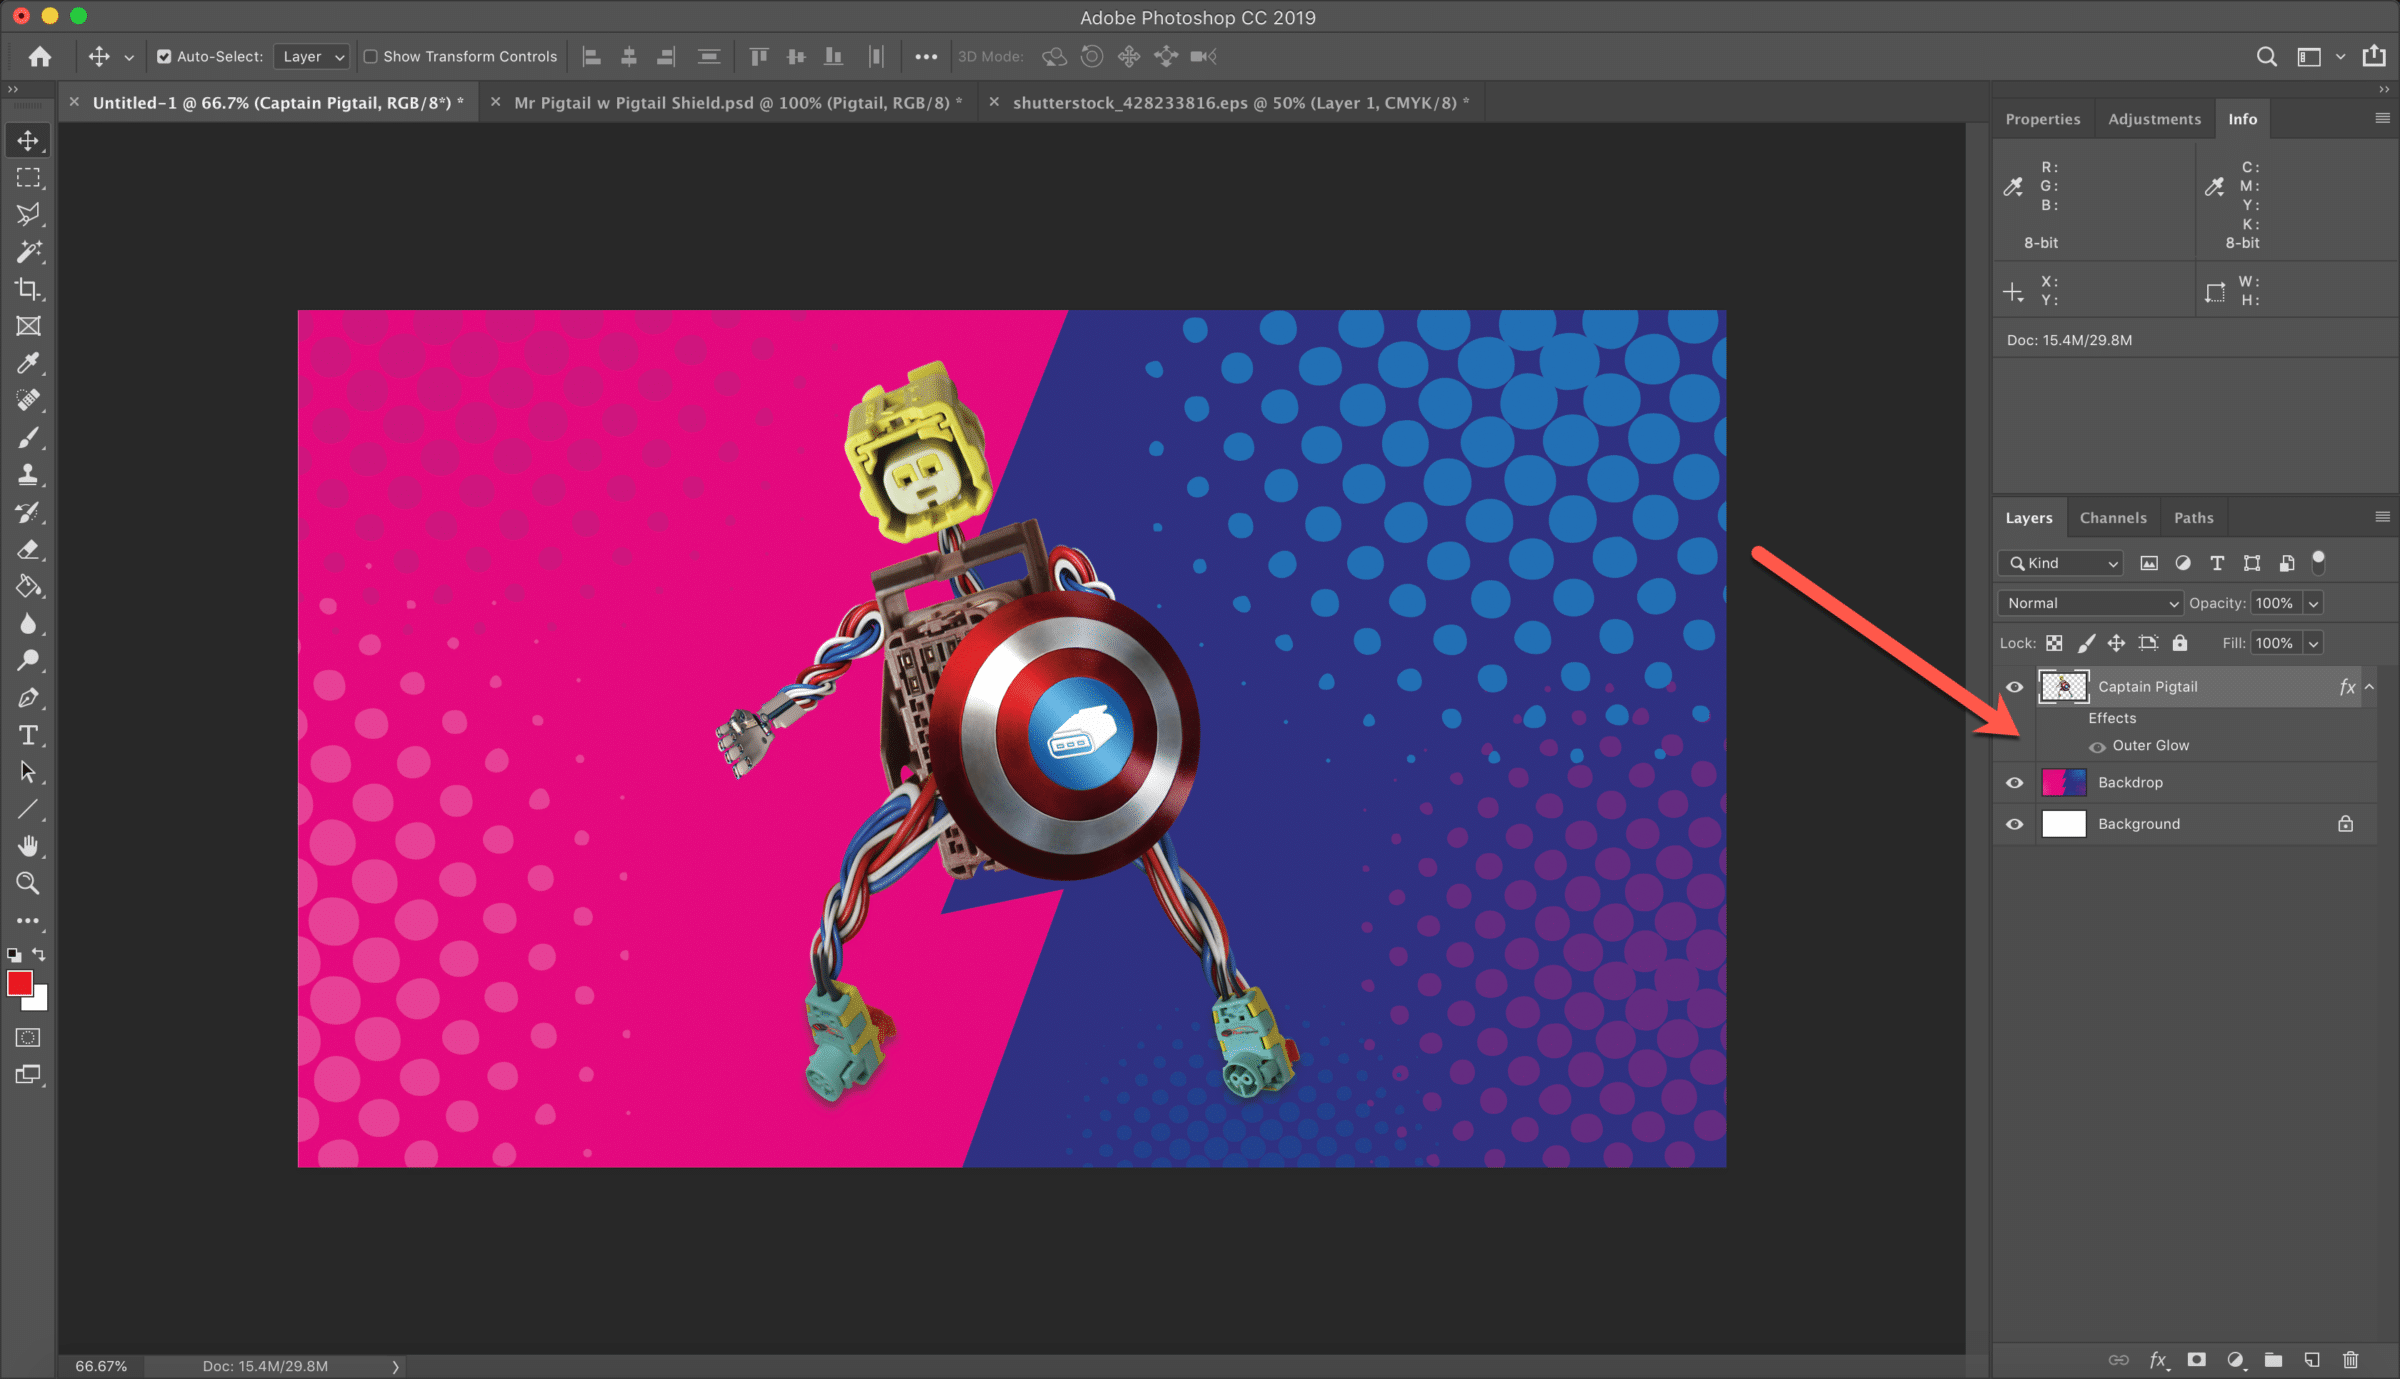
6. Next, we’ll introduce our first layer style.
Again, layer styles provide for non-destructive edits, making it easy to adjust or revoke your changes at any time.
First, re-select the Captain Pigtails layer; then you can either right-click on the layer itself or click Layer > Layer Style from the Application menu.
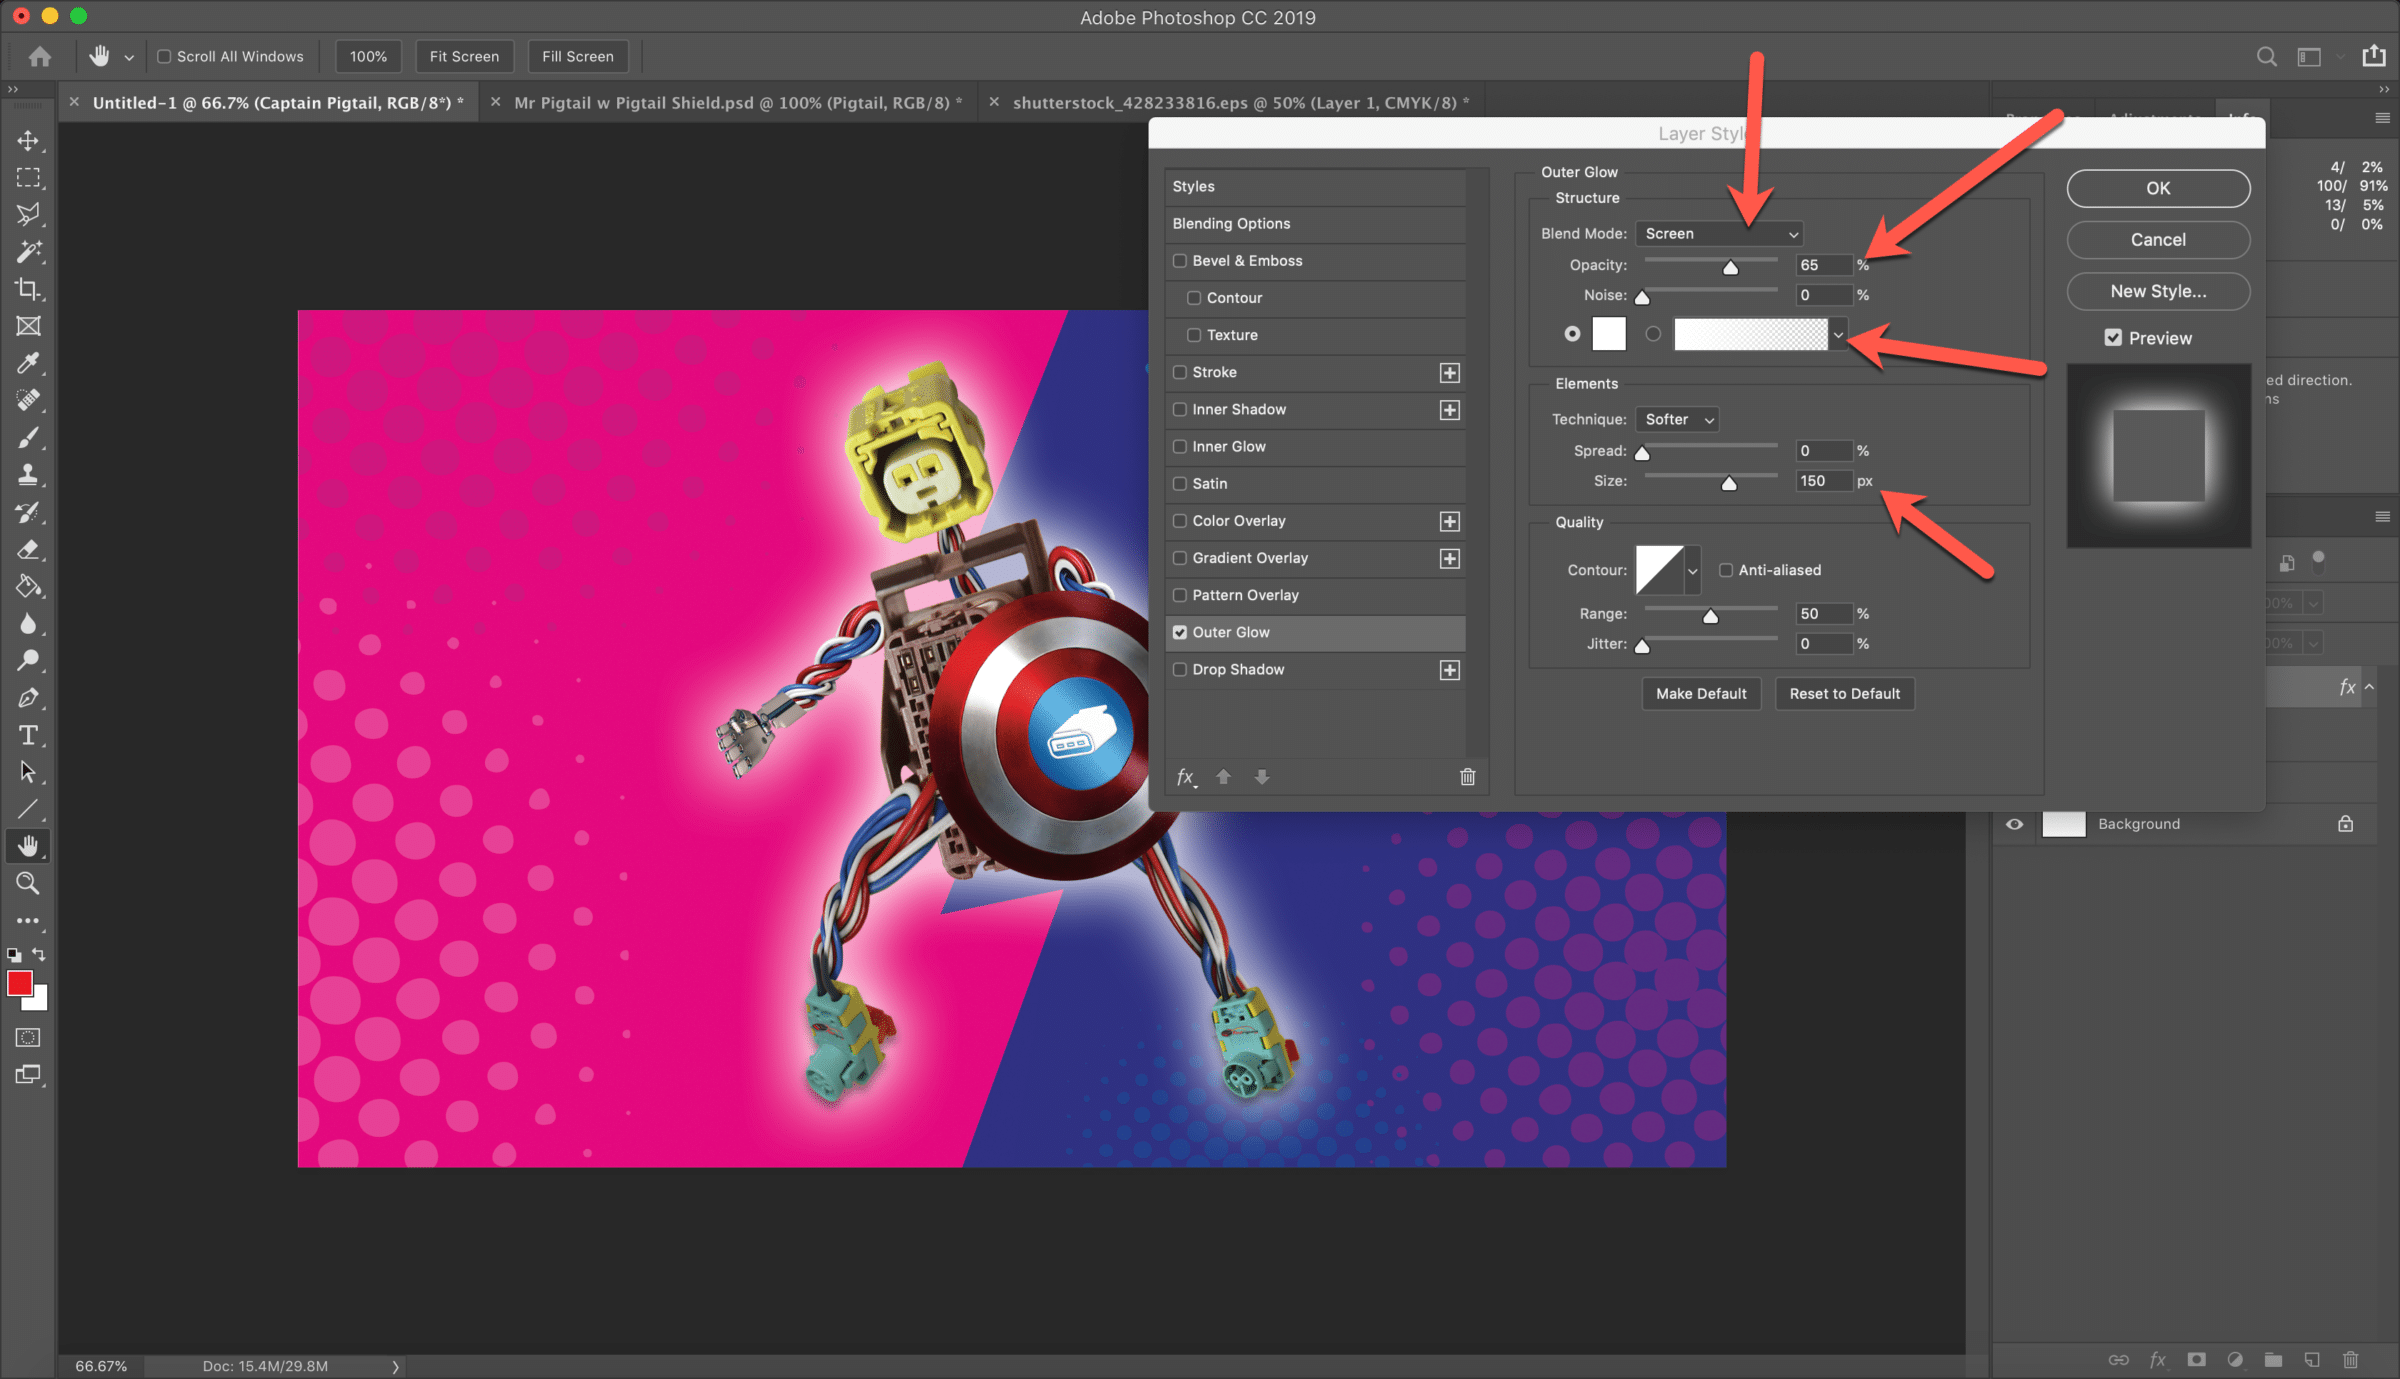
Note the variety of options at our disposal. We’ll lead with an Outer Glow, increasing both the Opacity and Size.
(We’ll review the color and blend mode in a moment.)
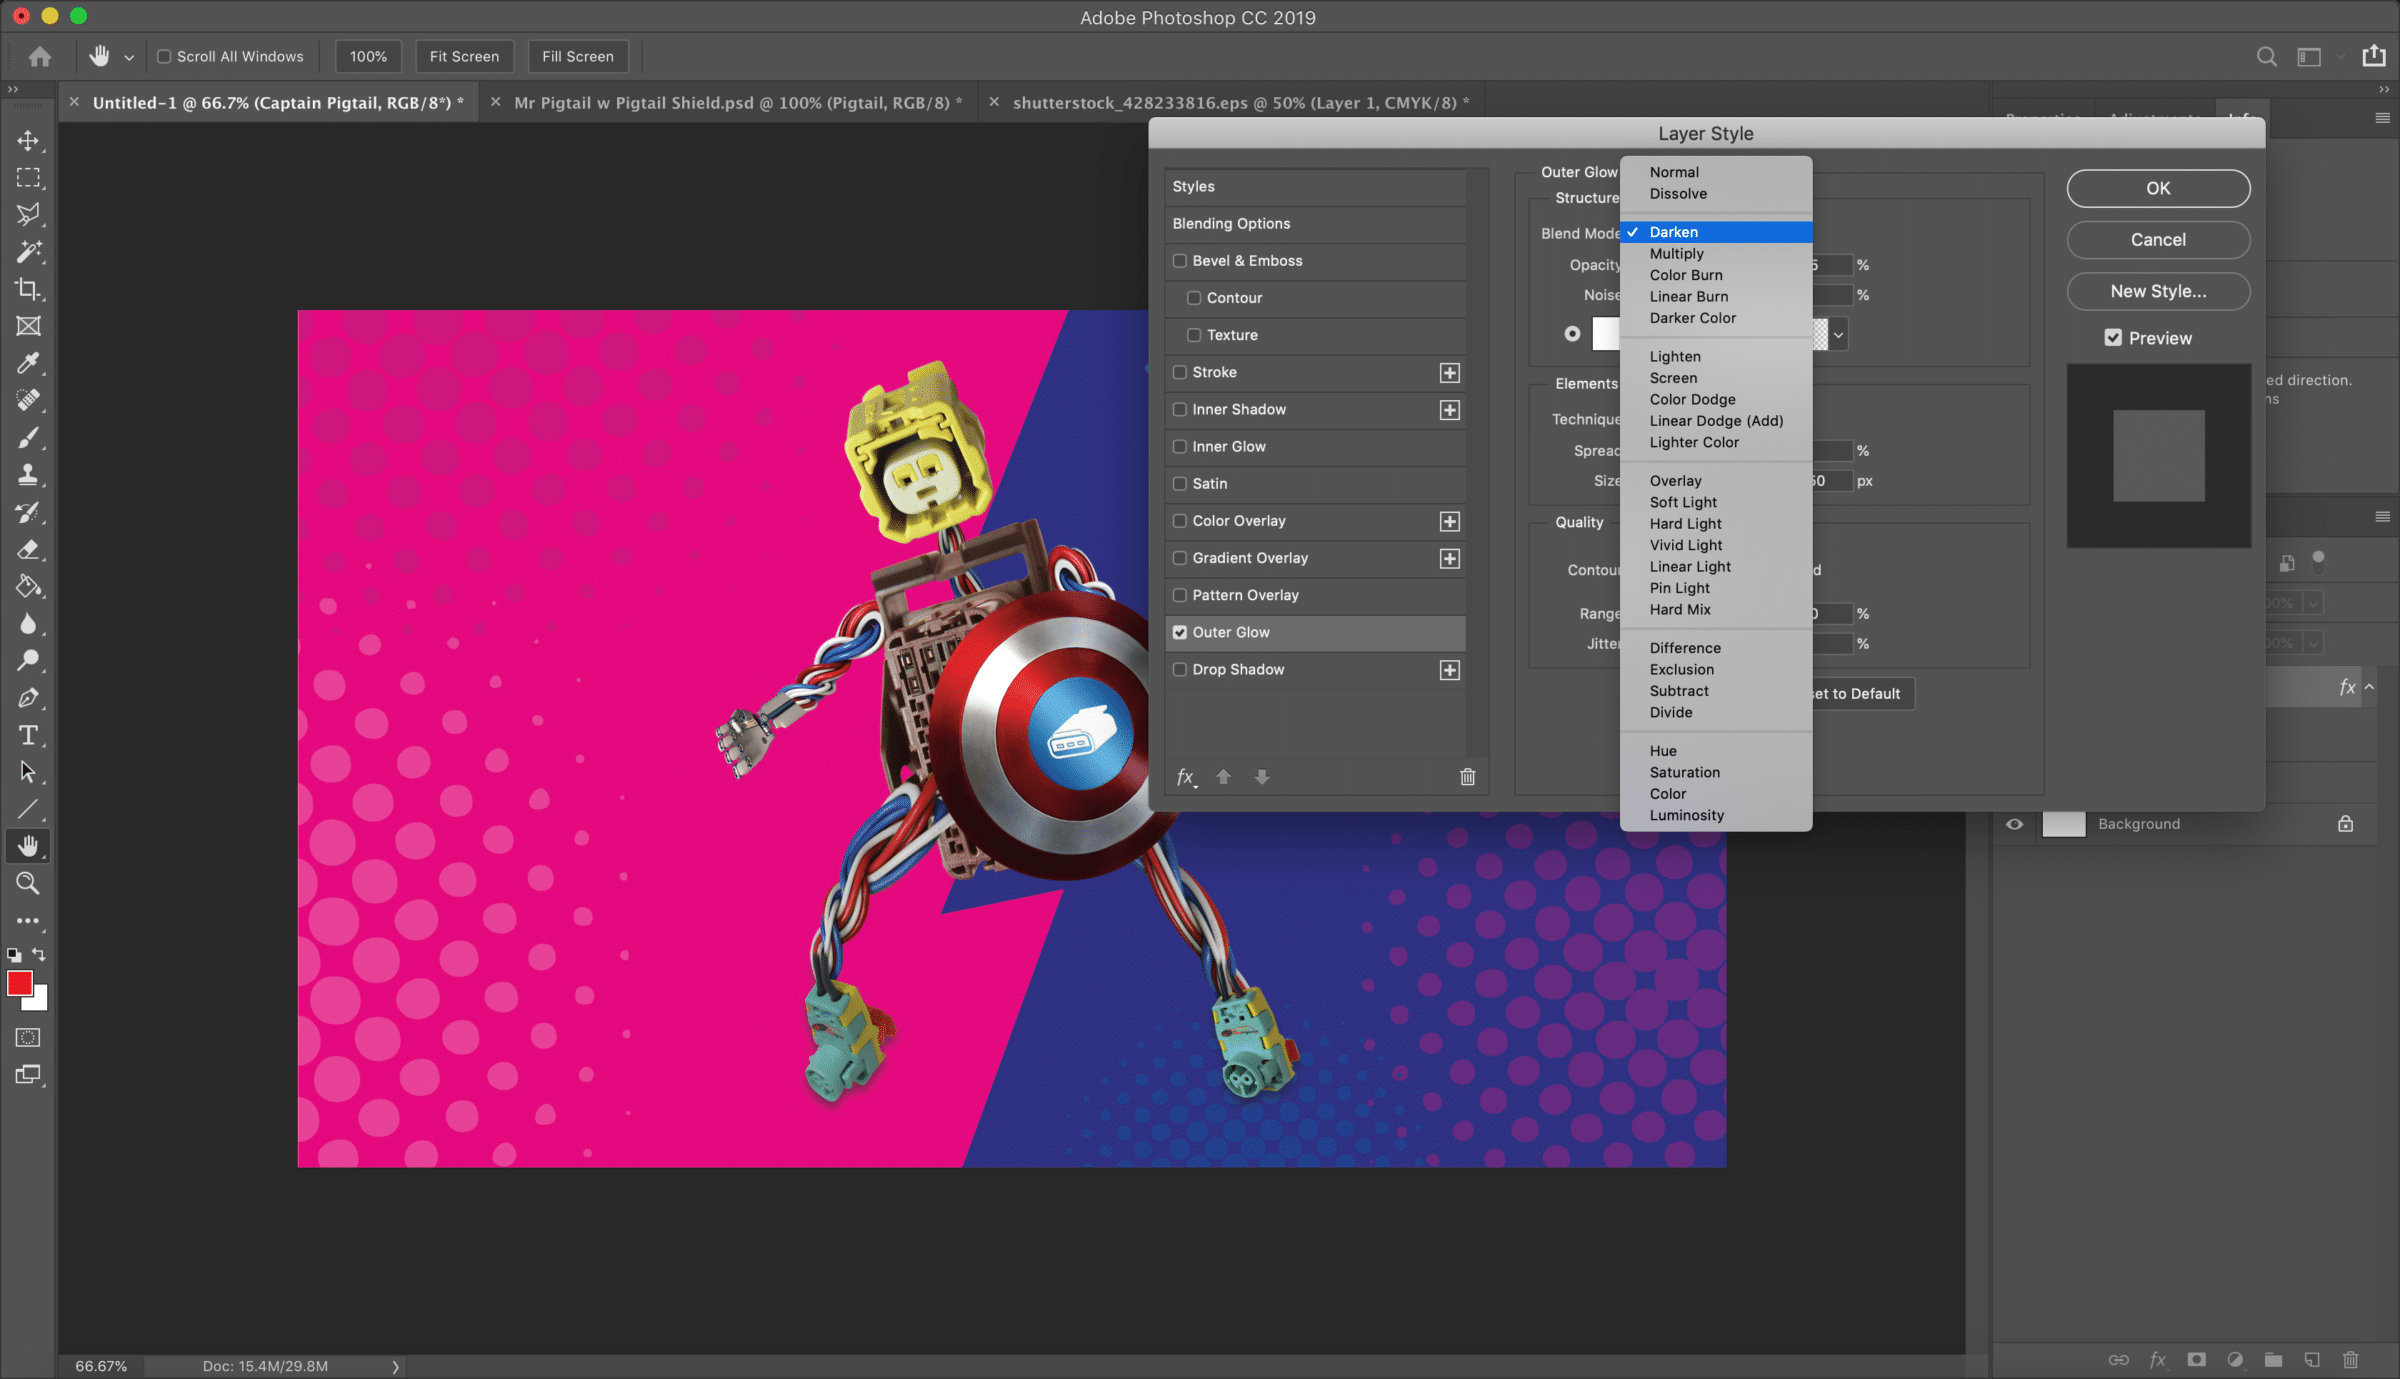
7. Captain Pigtails is now glowing brightly, but what if we want to give him a darker, shadowy aura instead? Change the Blend Mode to Darken and note that now, our glow has disappeared altogether:
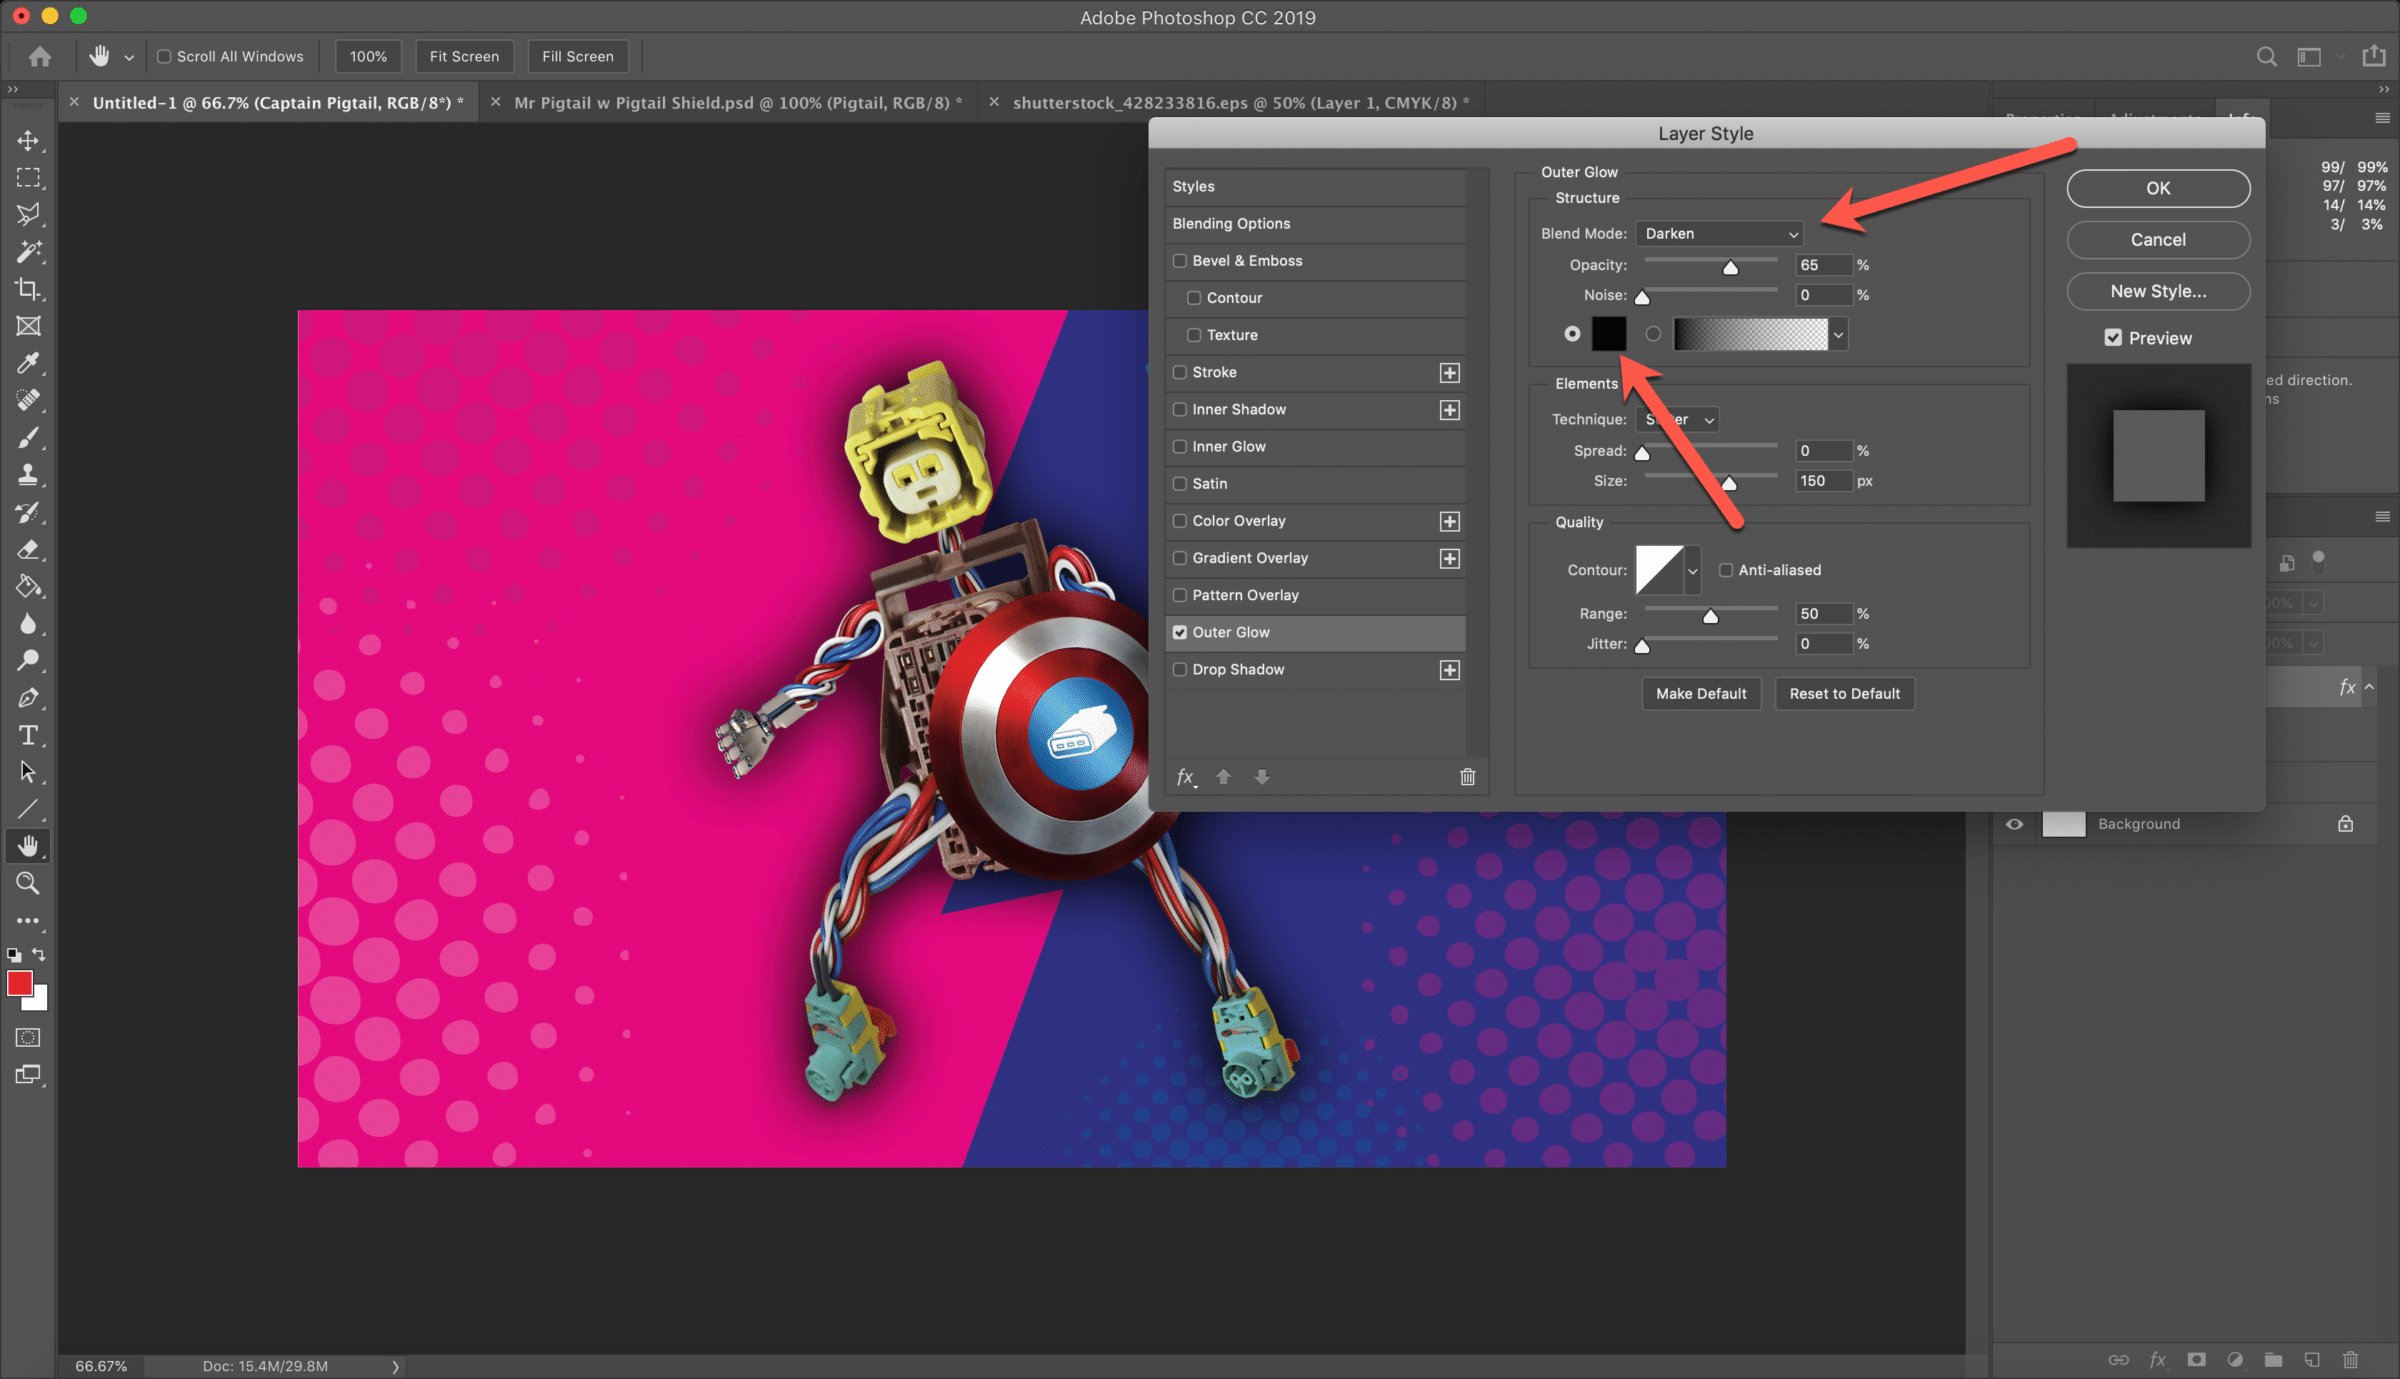
8. Many Blend Modes require either a “light” tone (above 50% gray) or “dark” tone (below 50% gray) in order to impart their effect.
Seen in this light, it makes sense that Darken will only show up if we select a darker color to go with it:
9. Of course, you may decide later that you don’t want him to glow at all; no problem. Just check the eyeball next to any layer or effect to toggle its visibility:
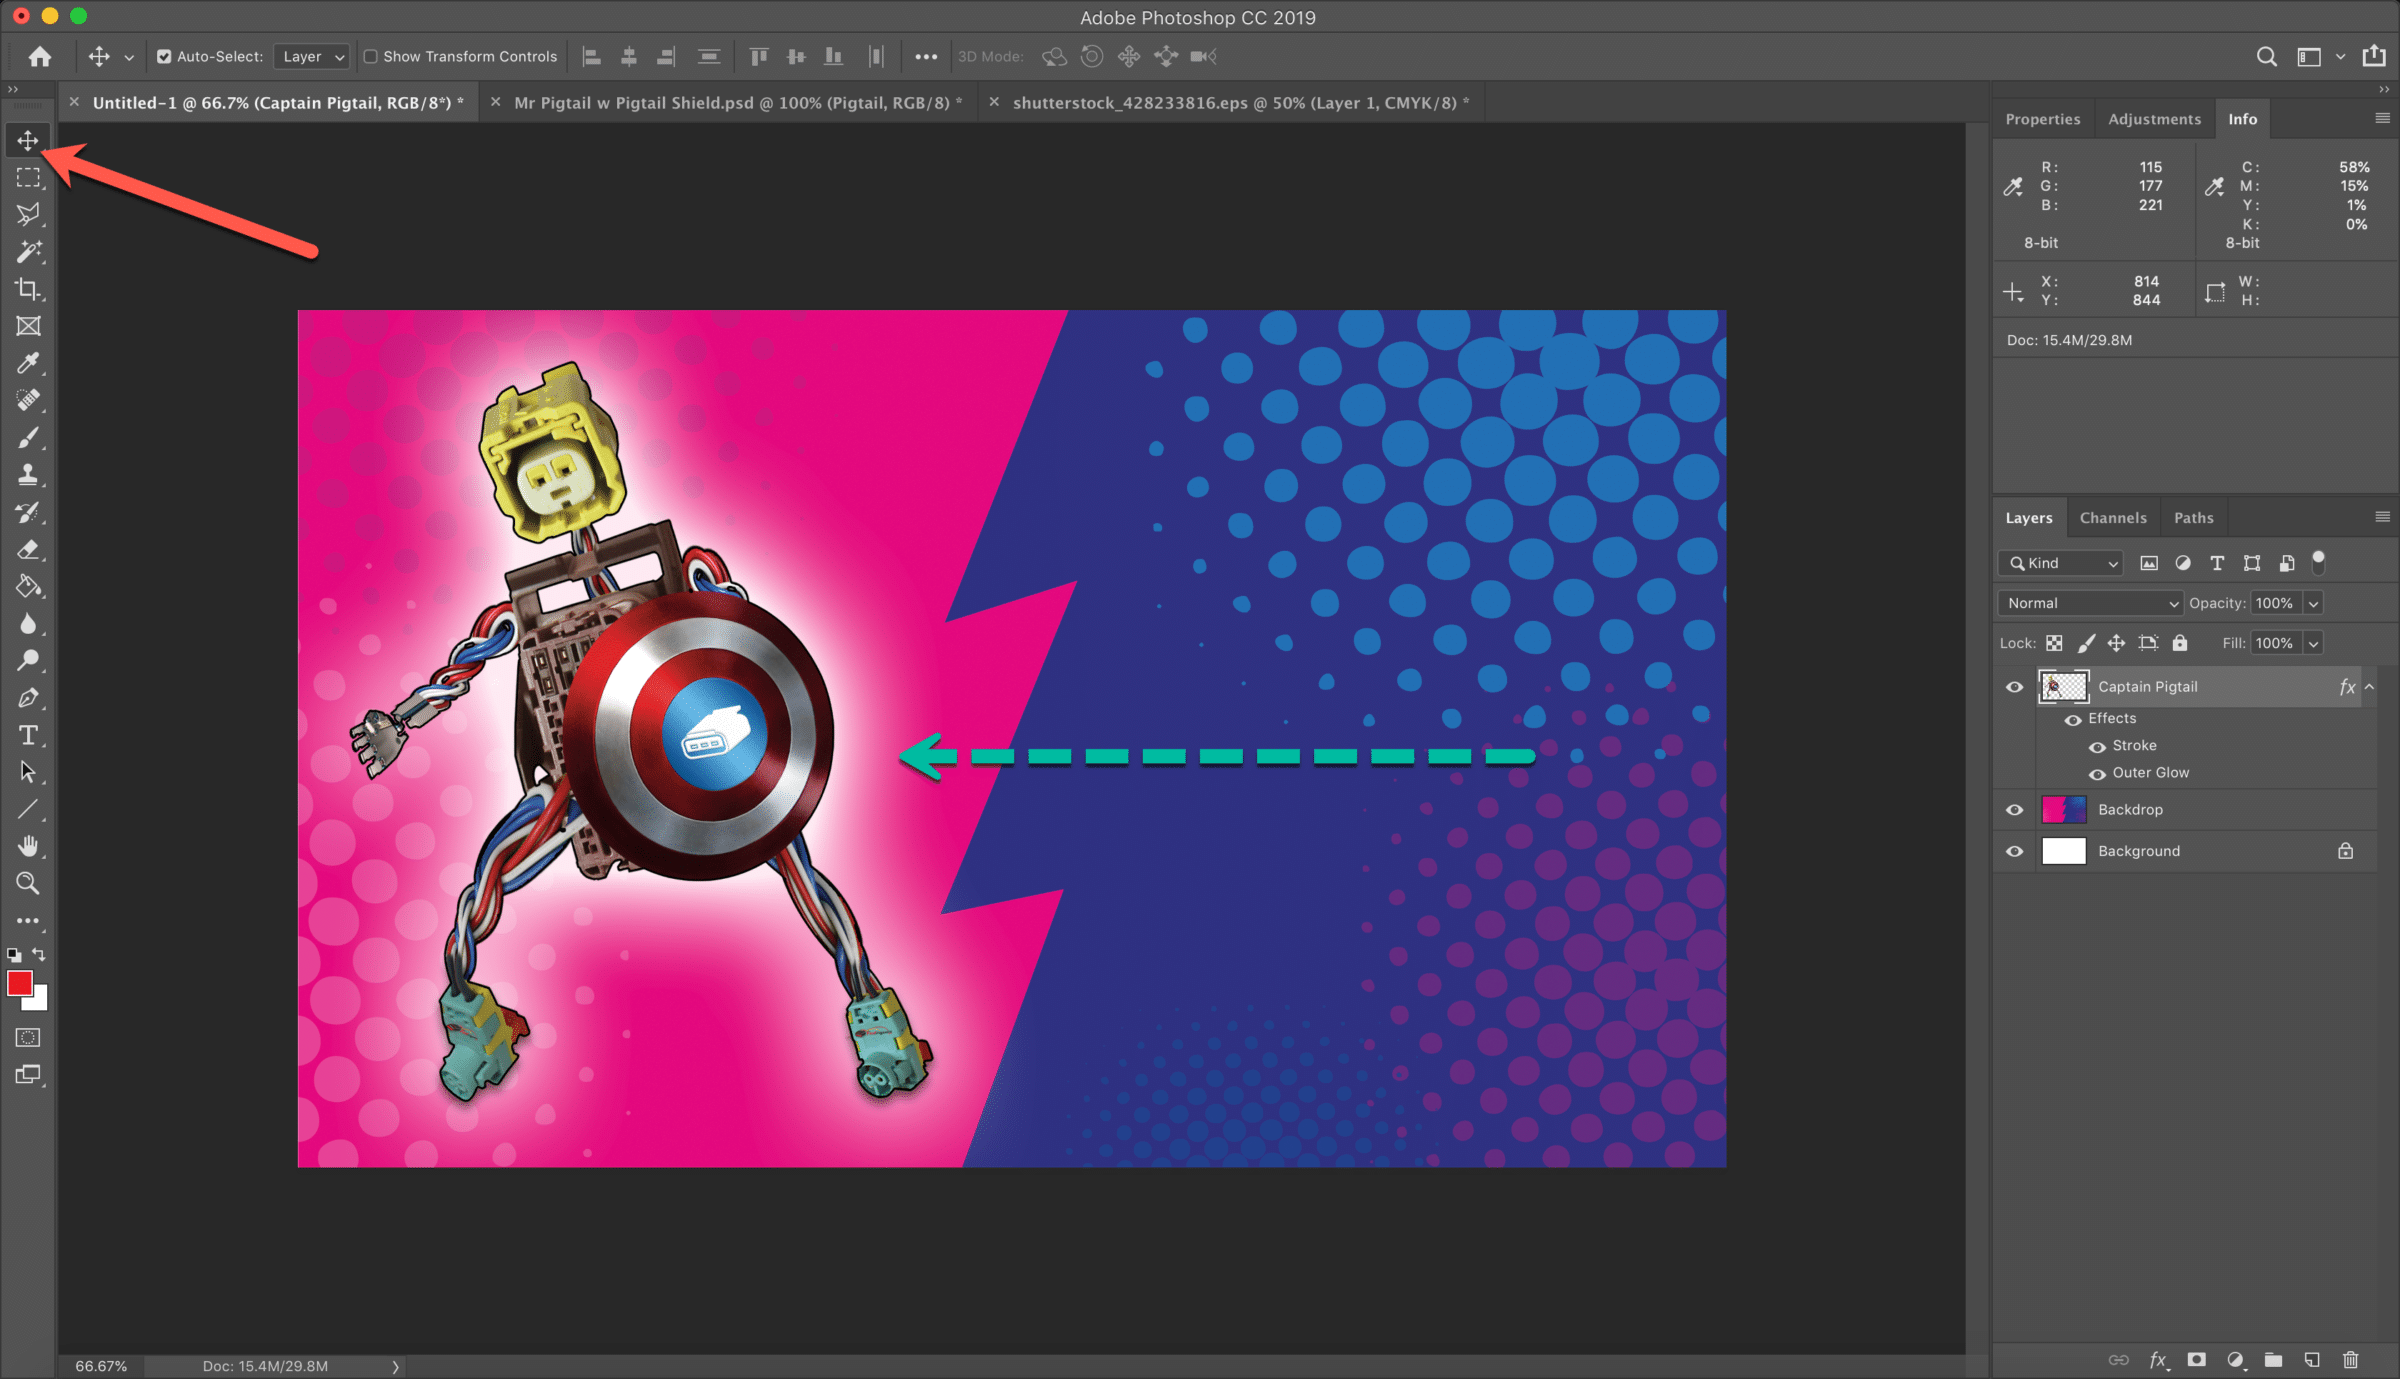
10. Returning to our layer styles, we’ll now add a Stroke (outer line) to the mix; check the box and adjust the Size, Color and any other settings to your liking:

11. Now, how about some text? But first, let’s move Captain Pigtails over to the left. Again, easy to do with layers:
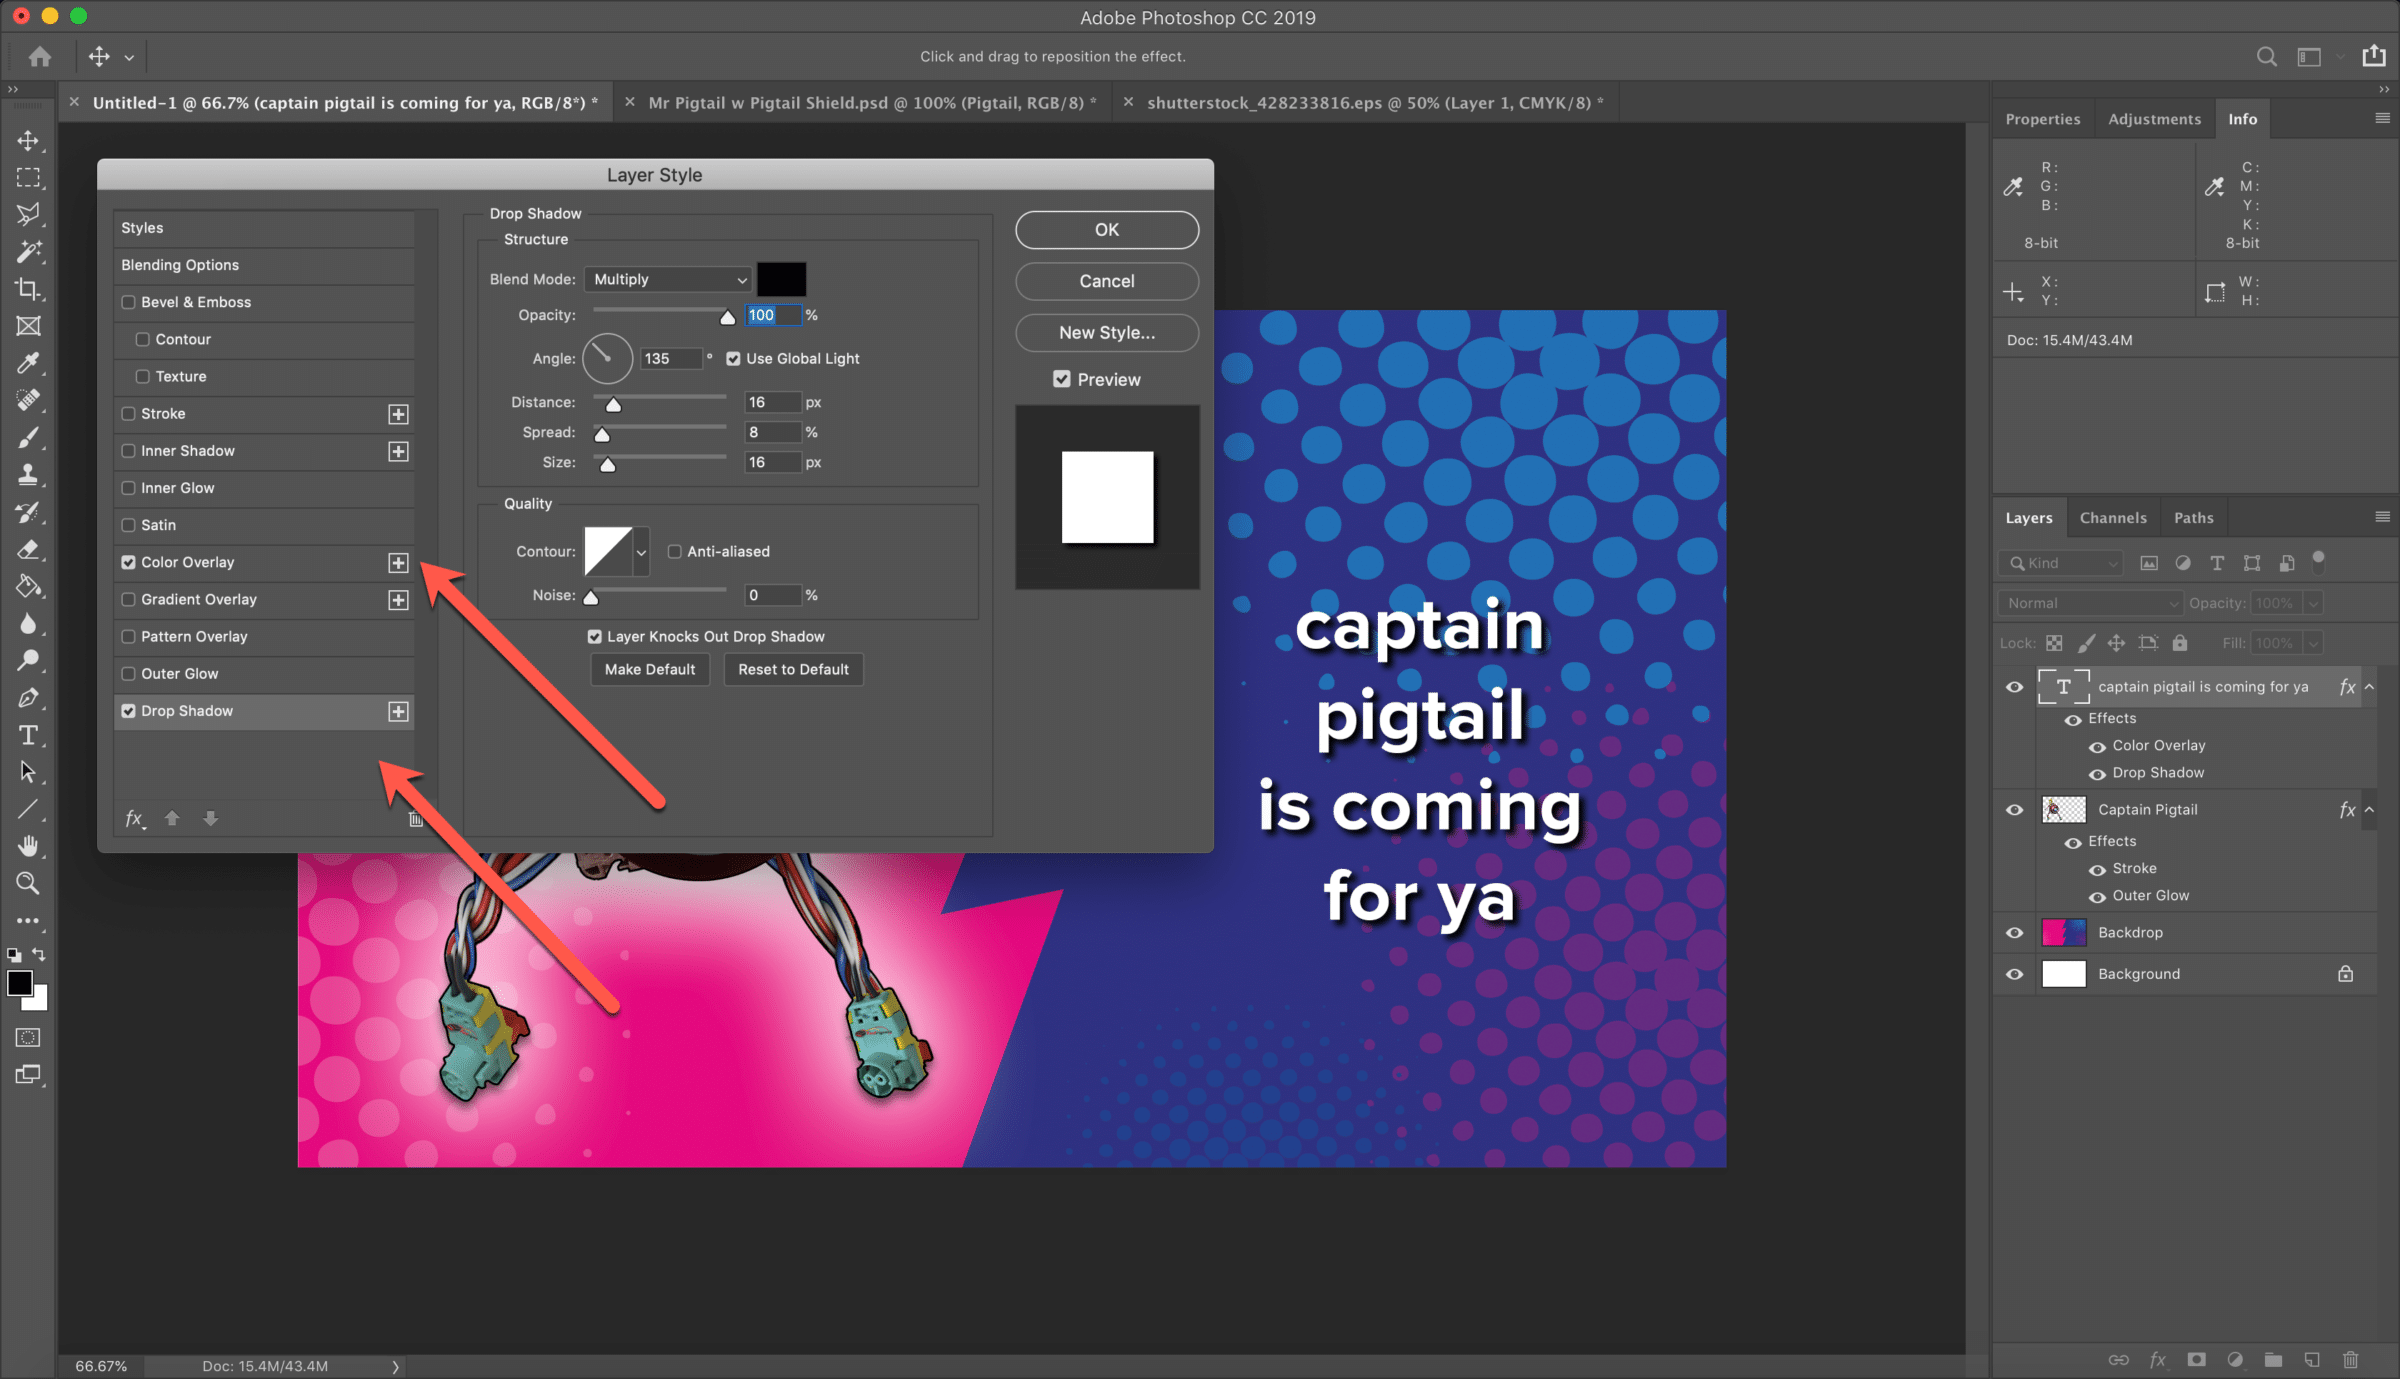
12. We could adjust our text color using the text tool itself or of course, we could apply a Layer Style to the text layer itself:

13. A Color Overlay and Drop Shadow give it a lot more pop:
14. Of course, every superhero whom is cobbled together with connectors needs a shiv-like screwdriver for a weapon! We’ll begin with copying a source image onto a new layer:
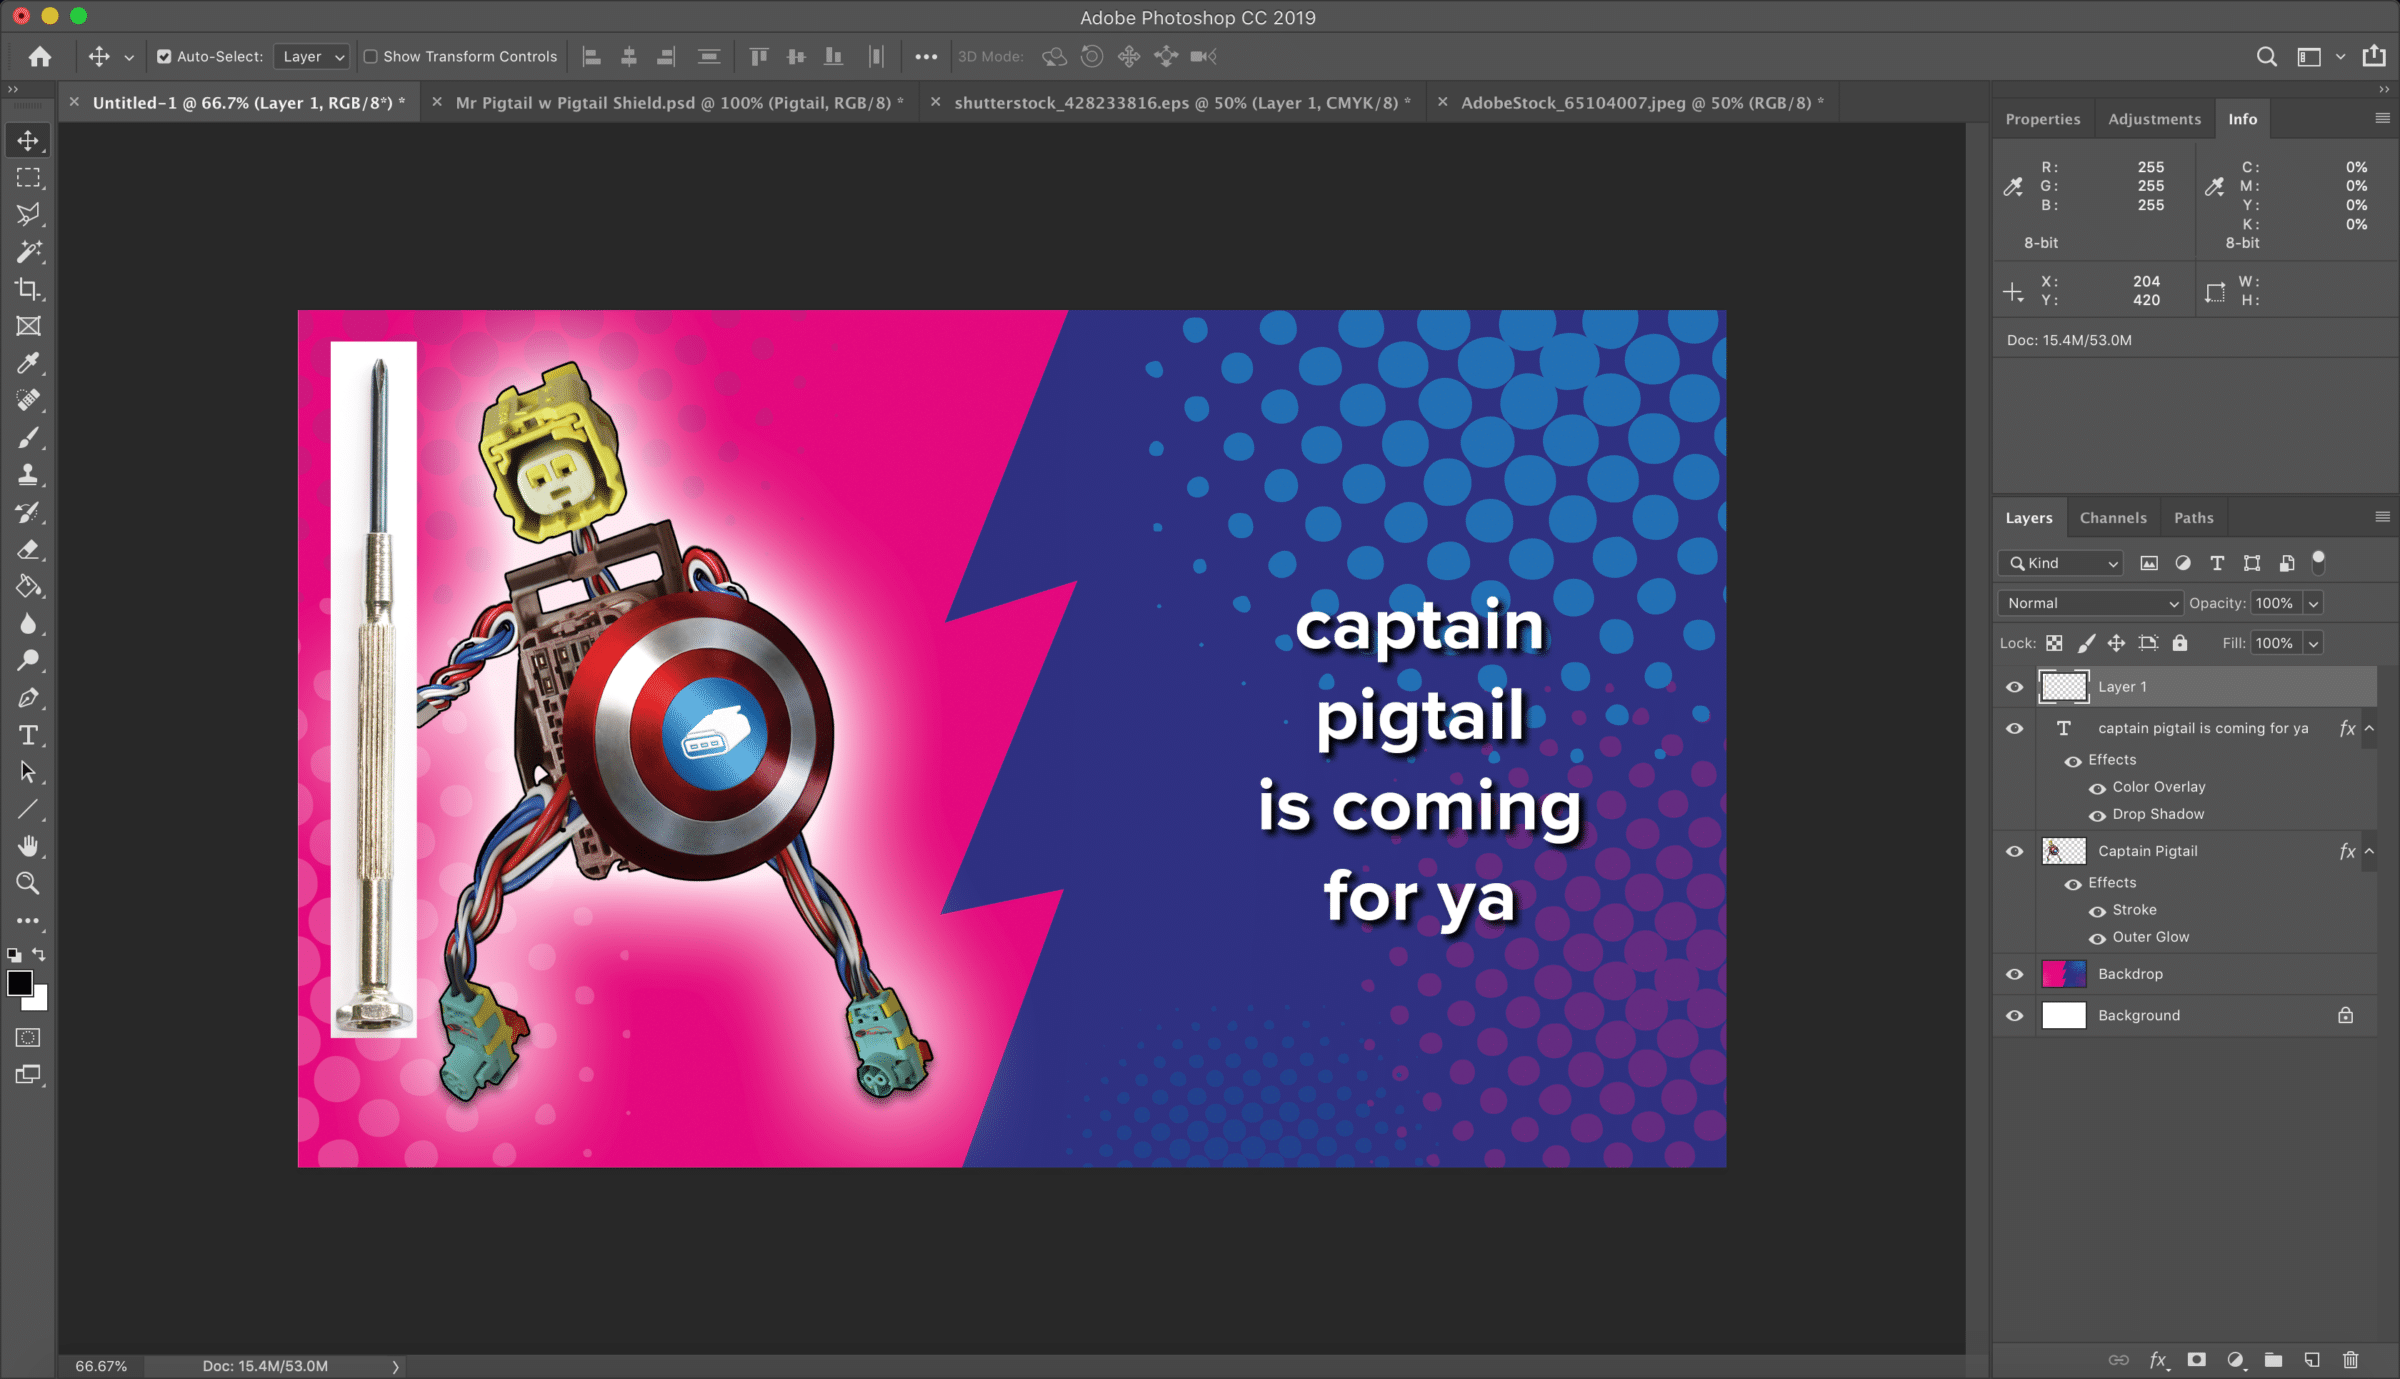
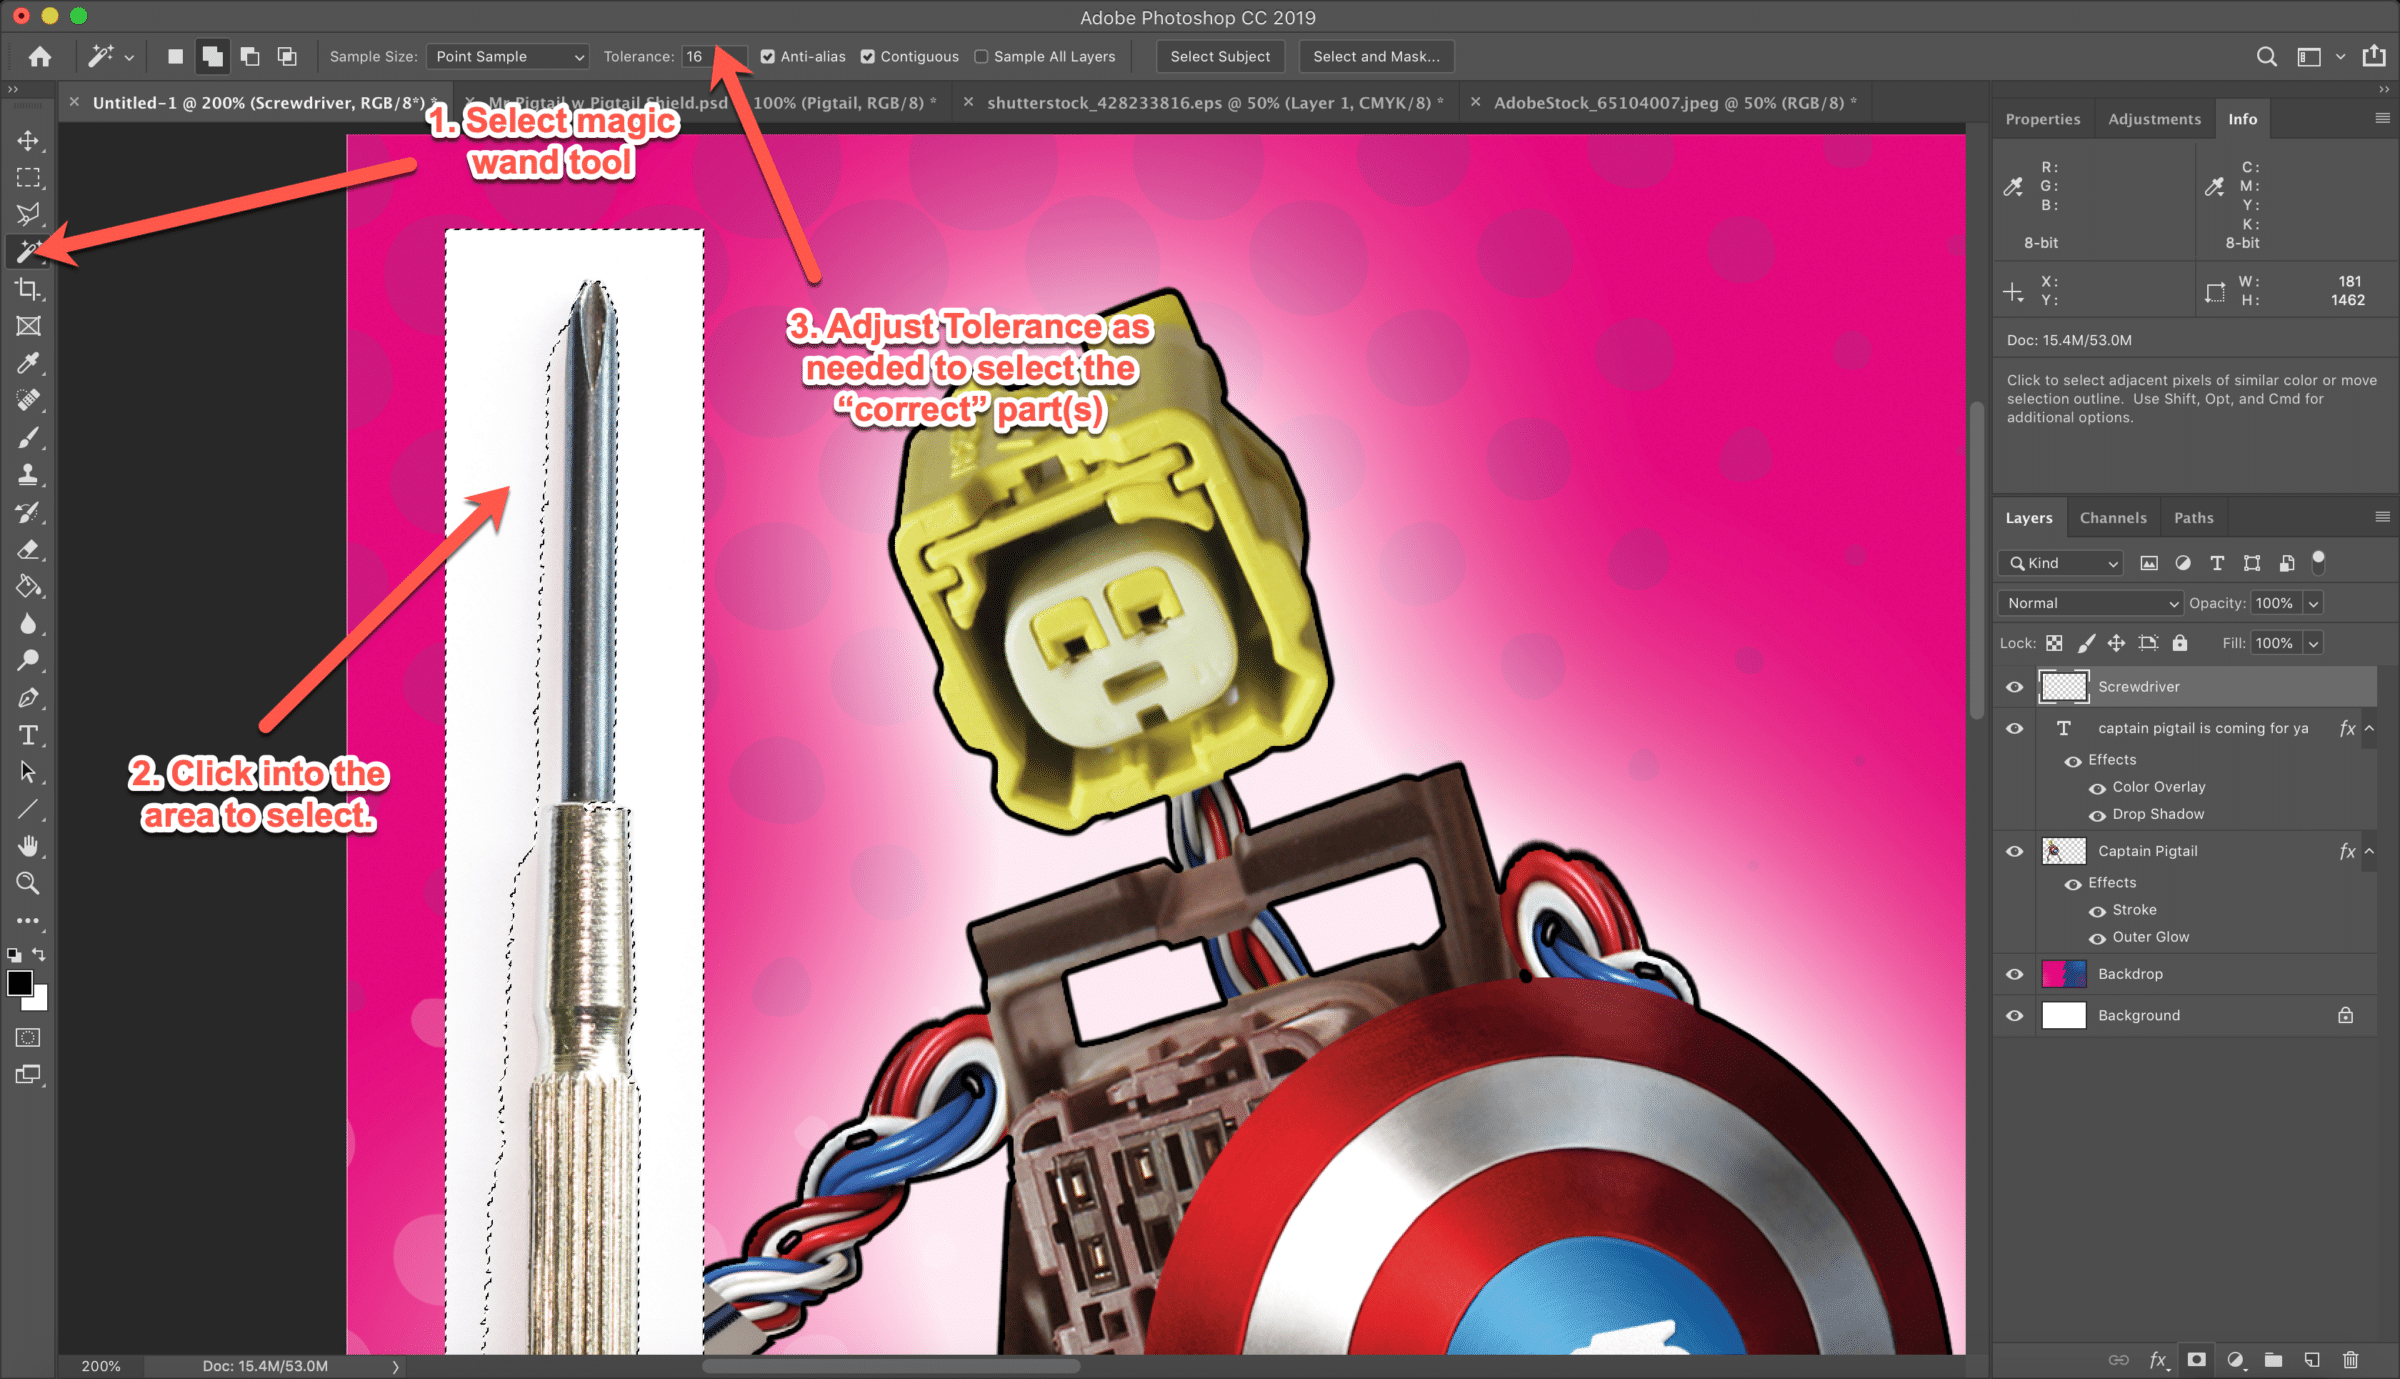
15. In many instances, the Magic Wand is our simplest and most accurate choice for removing unwanted bits of things from an image:
15. But first: in keeping with our theme of “non-destructive edits”, we’ll introduce a layer mask.
A layer mask allows us to selectively “hide” (and unhide) elements of a layer.
When creating a layer mask with an active selection, Photoshop will automatically generate your layer mask from that selection; blacking out anything which is selected in that layer.
Accordingly, we want to first invert the selection; click Selection in the application menu and then Invert. Then add the Layer Mask:

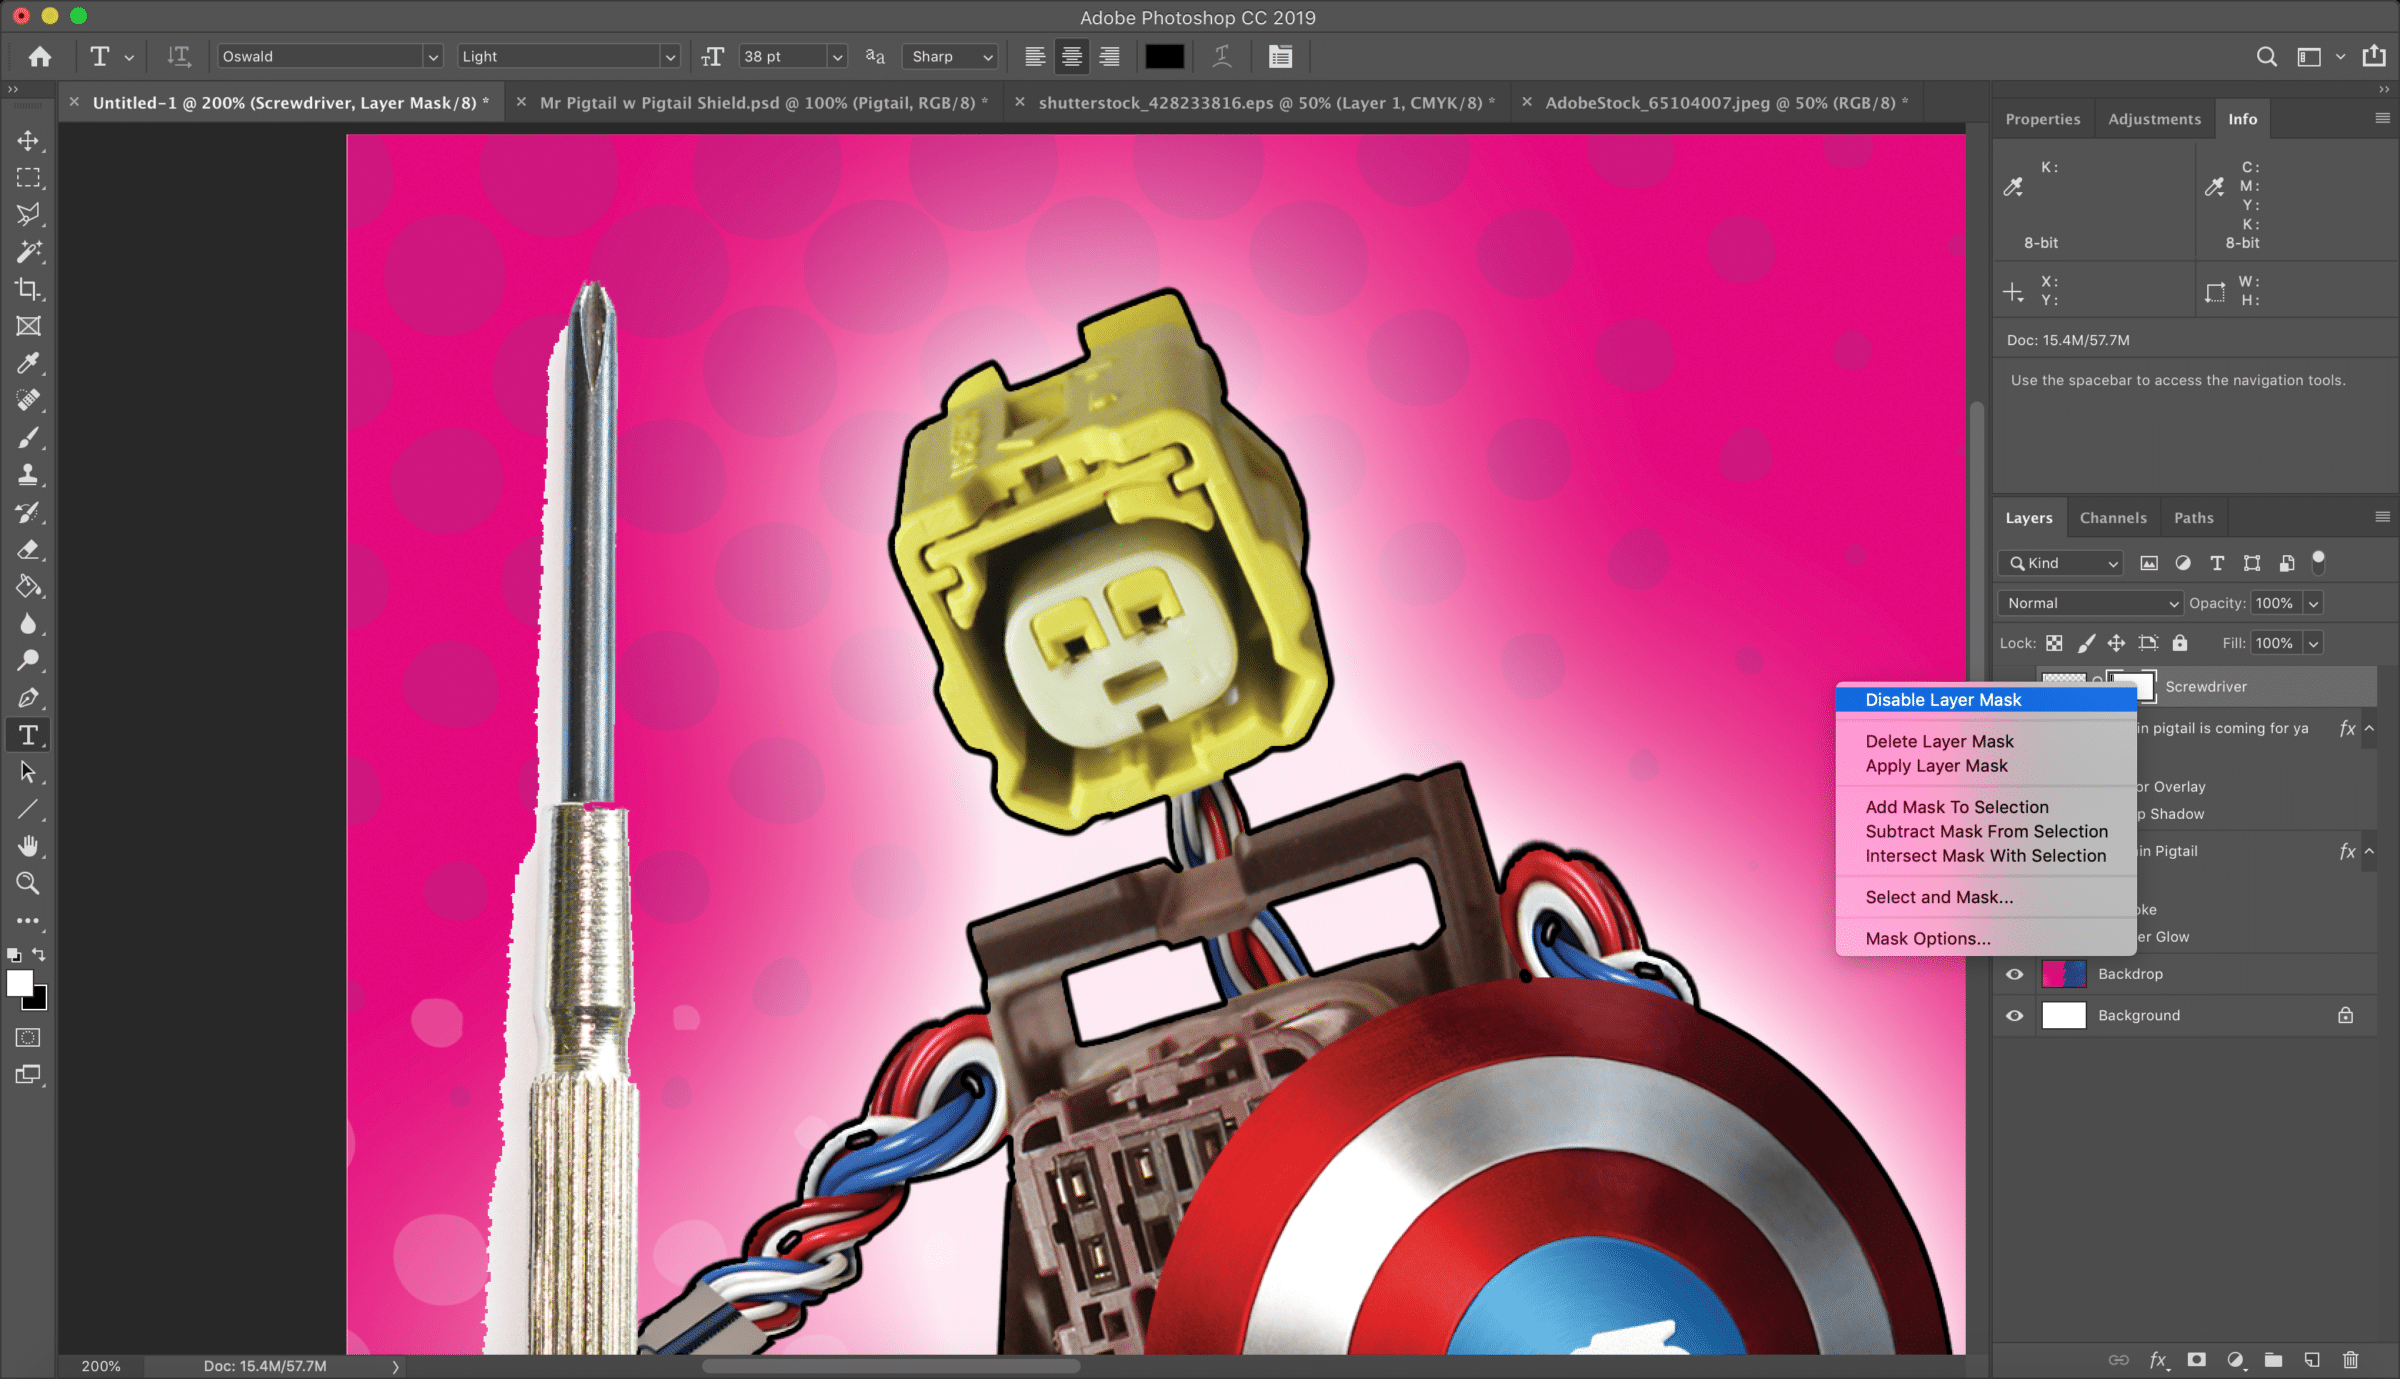
16. Note that the layer mask will appear in the Layers pane as a box next to the layer itself. At any time, you can right-click that box to disable or re-enable the mask itself, or even remove it altogether:
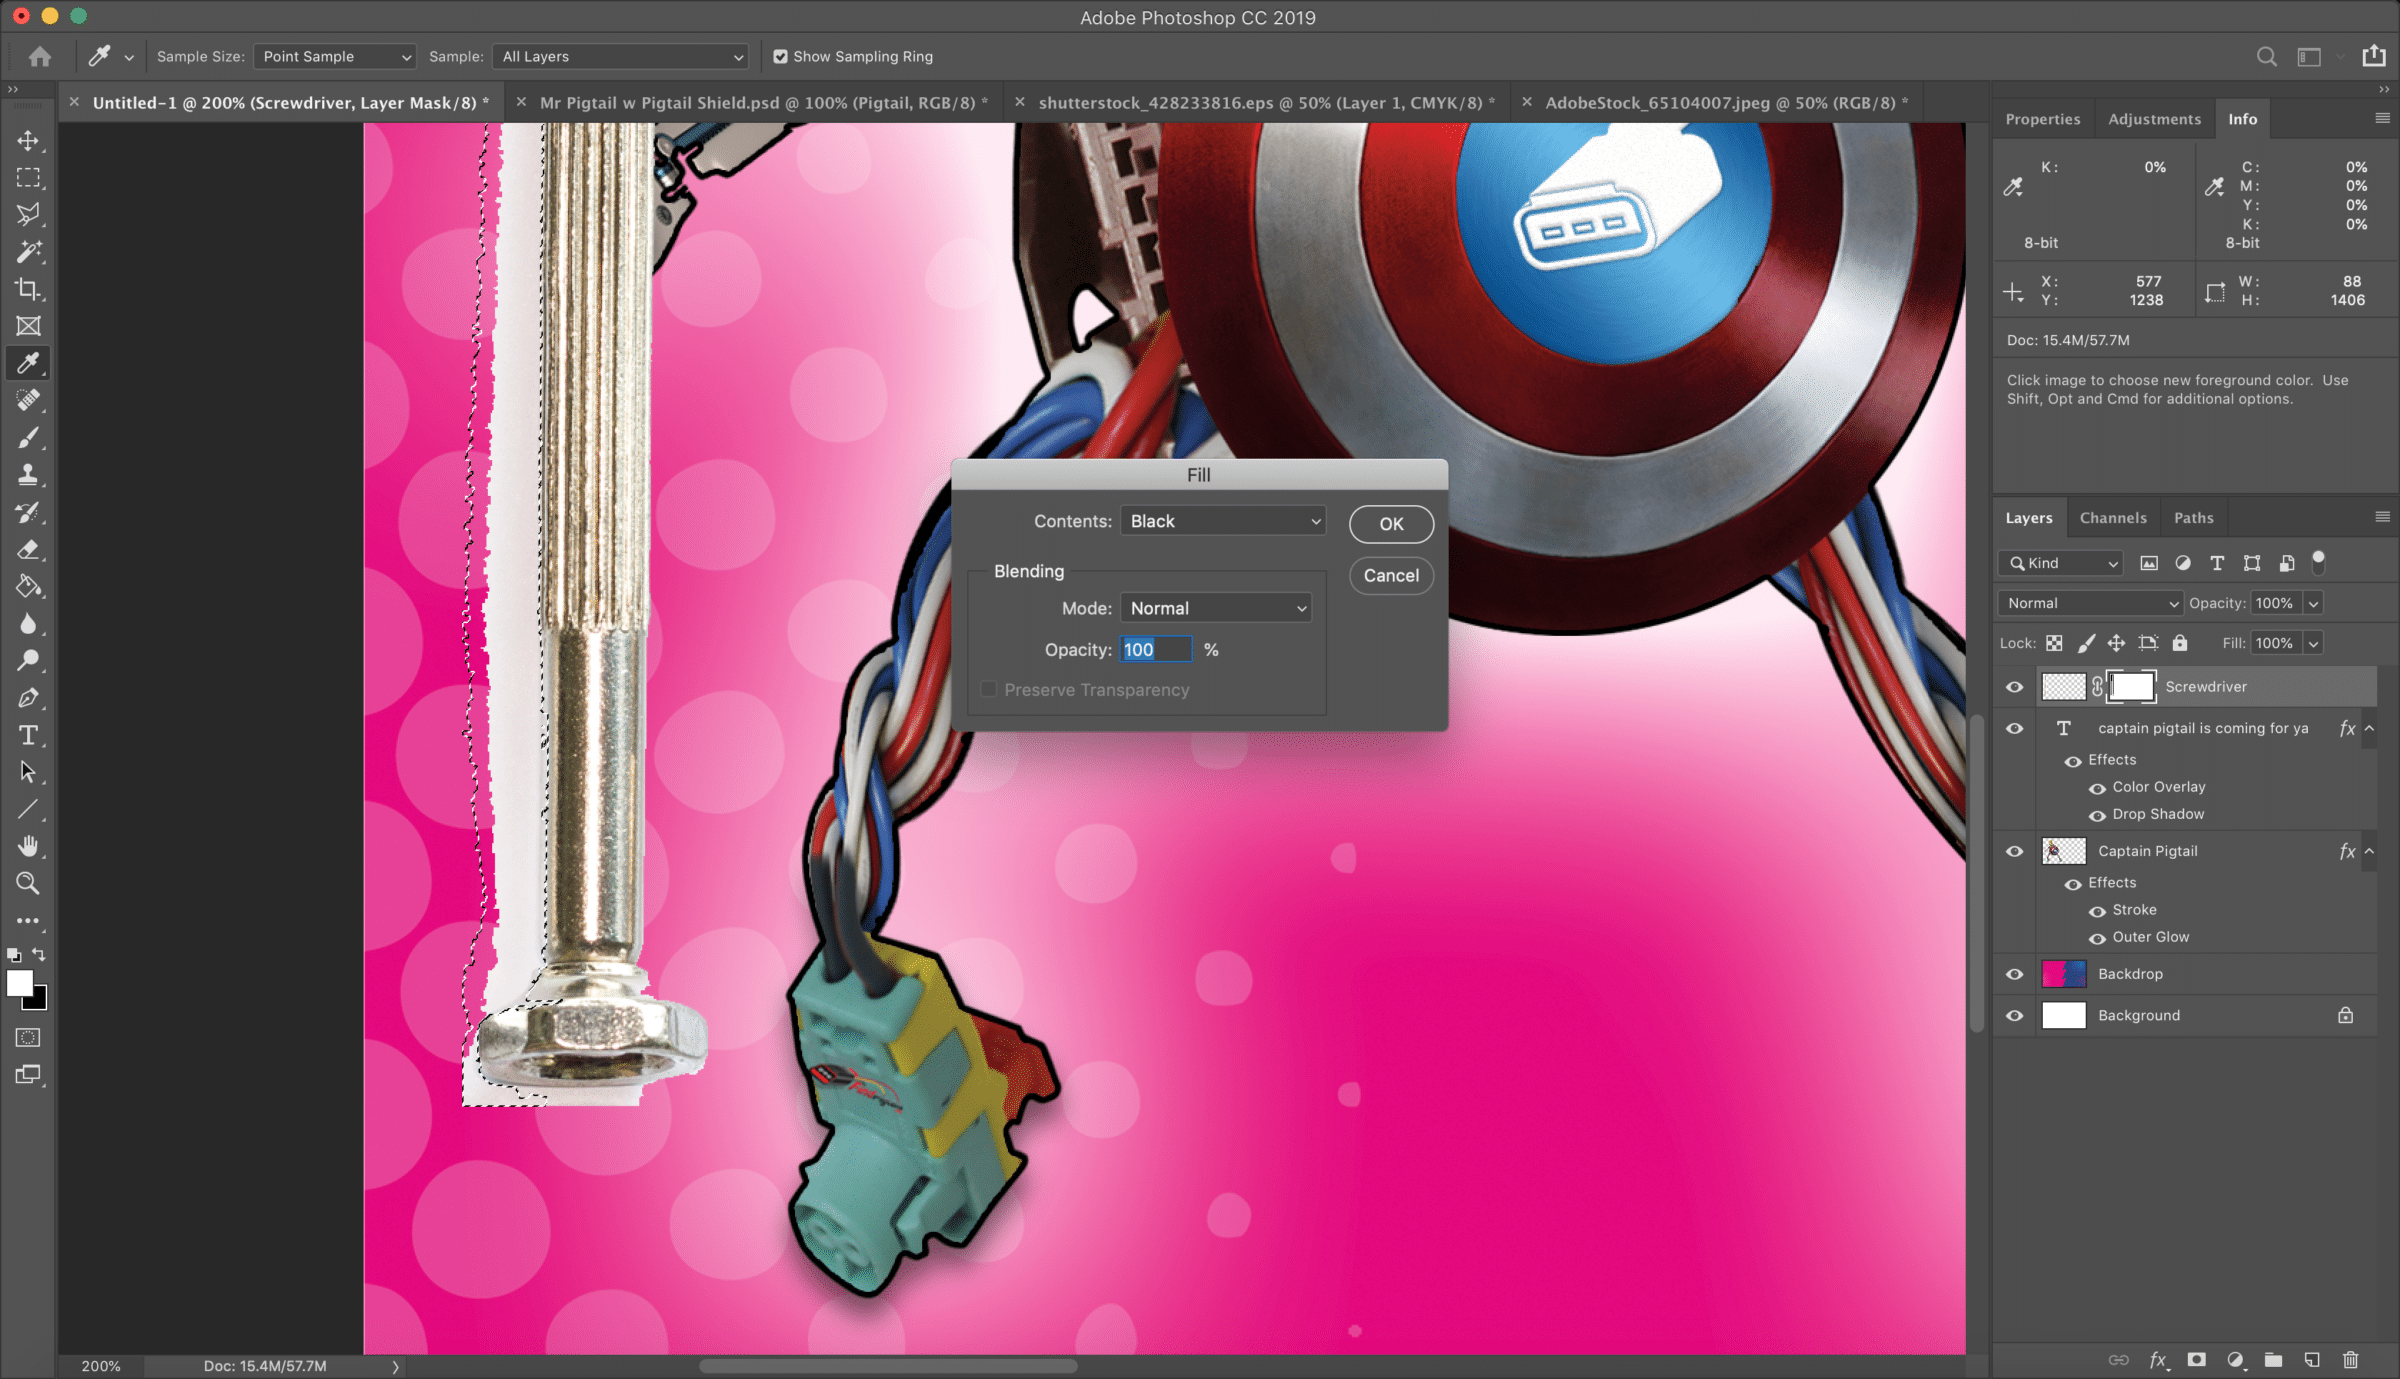
17. Next, we’ll refine our layer mask to continue cutting out the unwanted bits of the original screwdriver source image.
First, ensure that the screwdriver layer itself is active; clicking the layer mask with the Magic Wand will select pixels from the layer mask and not the underlying, source image.
Once you’ve made your selection(s) in the source image layer, then click back over to the layer mask to apply your updates. Again, to hide the corresponding pixels in the source image layer, fill the mask with black; to reveal the pixels, fill the mask with white:
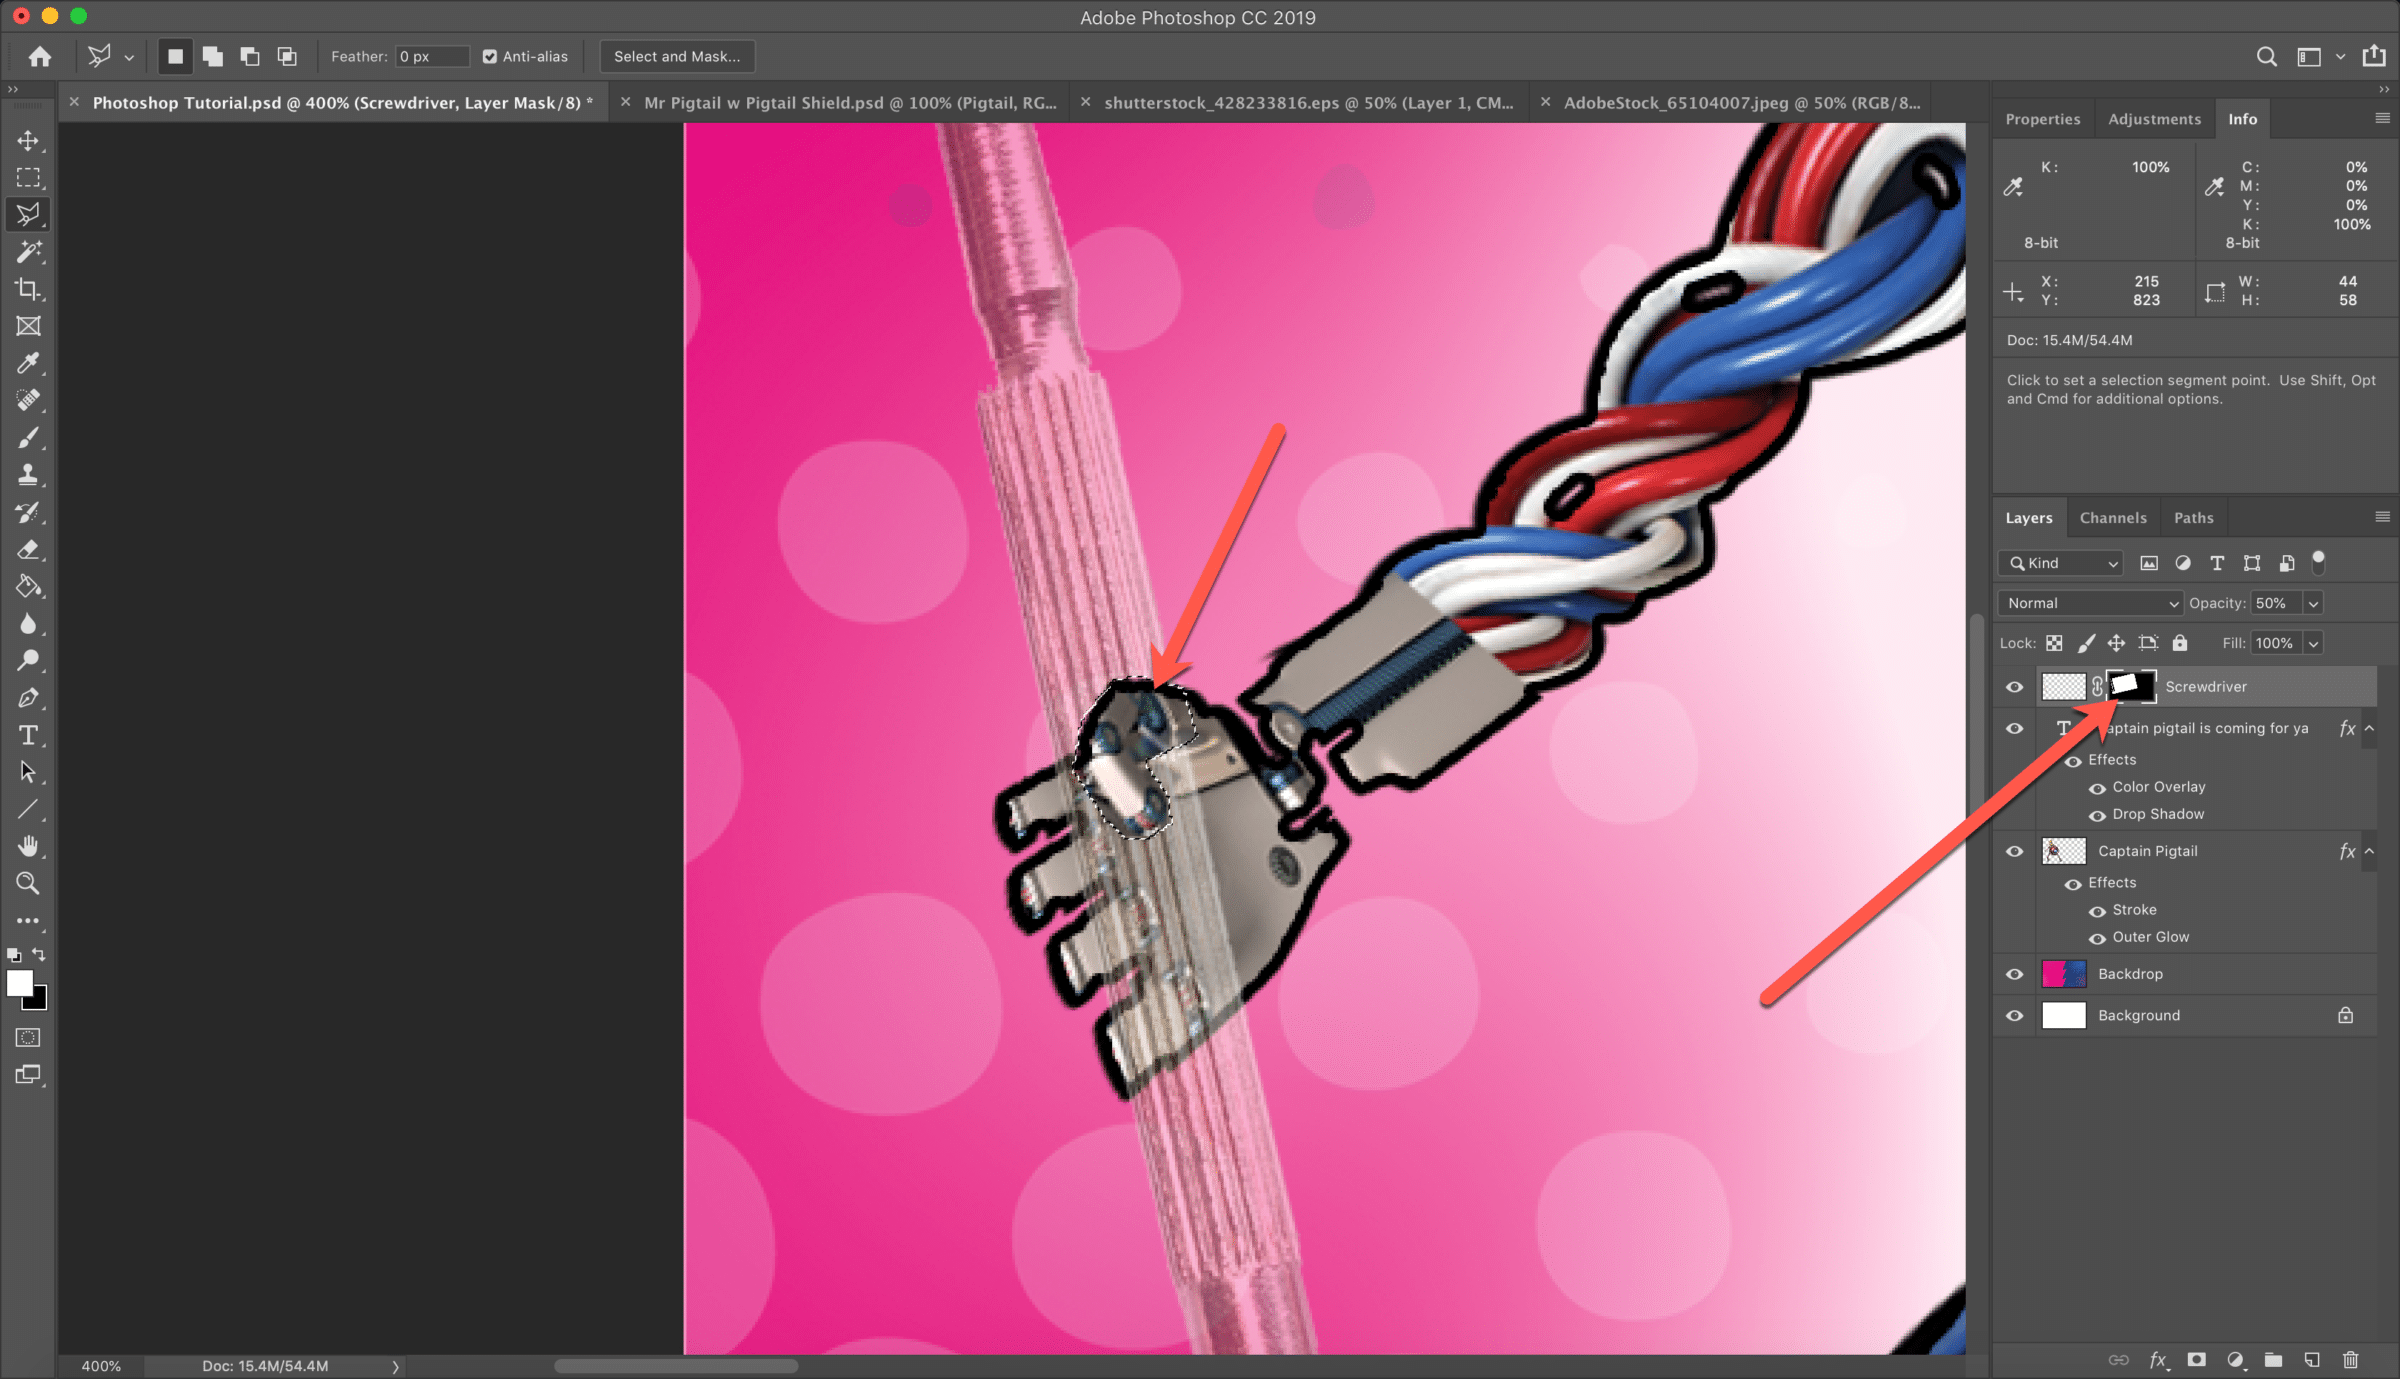
18. Next: to improve the perception that Captain Pigtails is actually holding his weapon, we want to wrap his thumb around it.
Having cut the remaining “fluff” out of our screwdriver layer with the mask, we’ll again click into the source image itself and adjust the Opacity to something like 50%. This allows us to see both the screwdriver itself and the layer(s) underneath it:

19. The Magic Wand probably won’t be of much use in this case; better to trace around the thumb with the Polygonal Lasso.
Once you’re satisfied with your selection, return to the screwdriver’s layer mask and fill the selection with Black. (Again, hiding the screwdriver within the blackened out selection.)
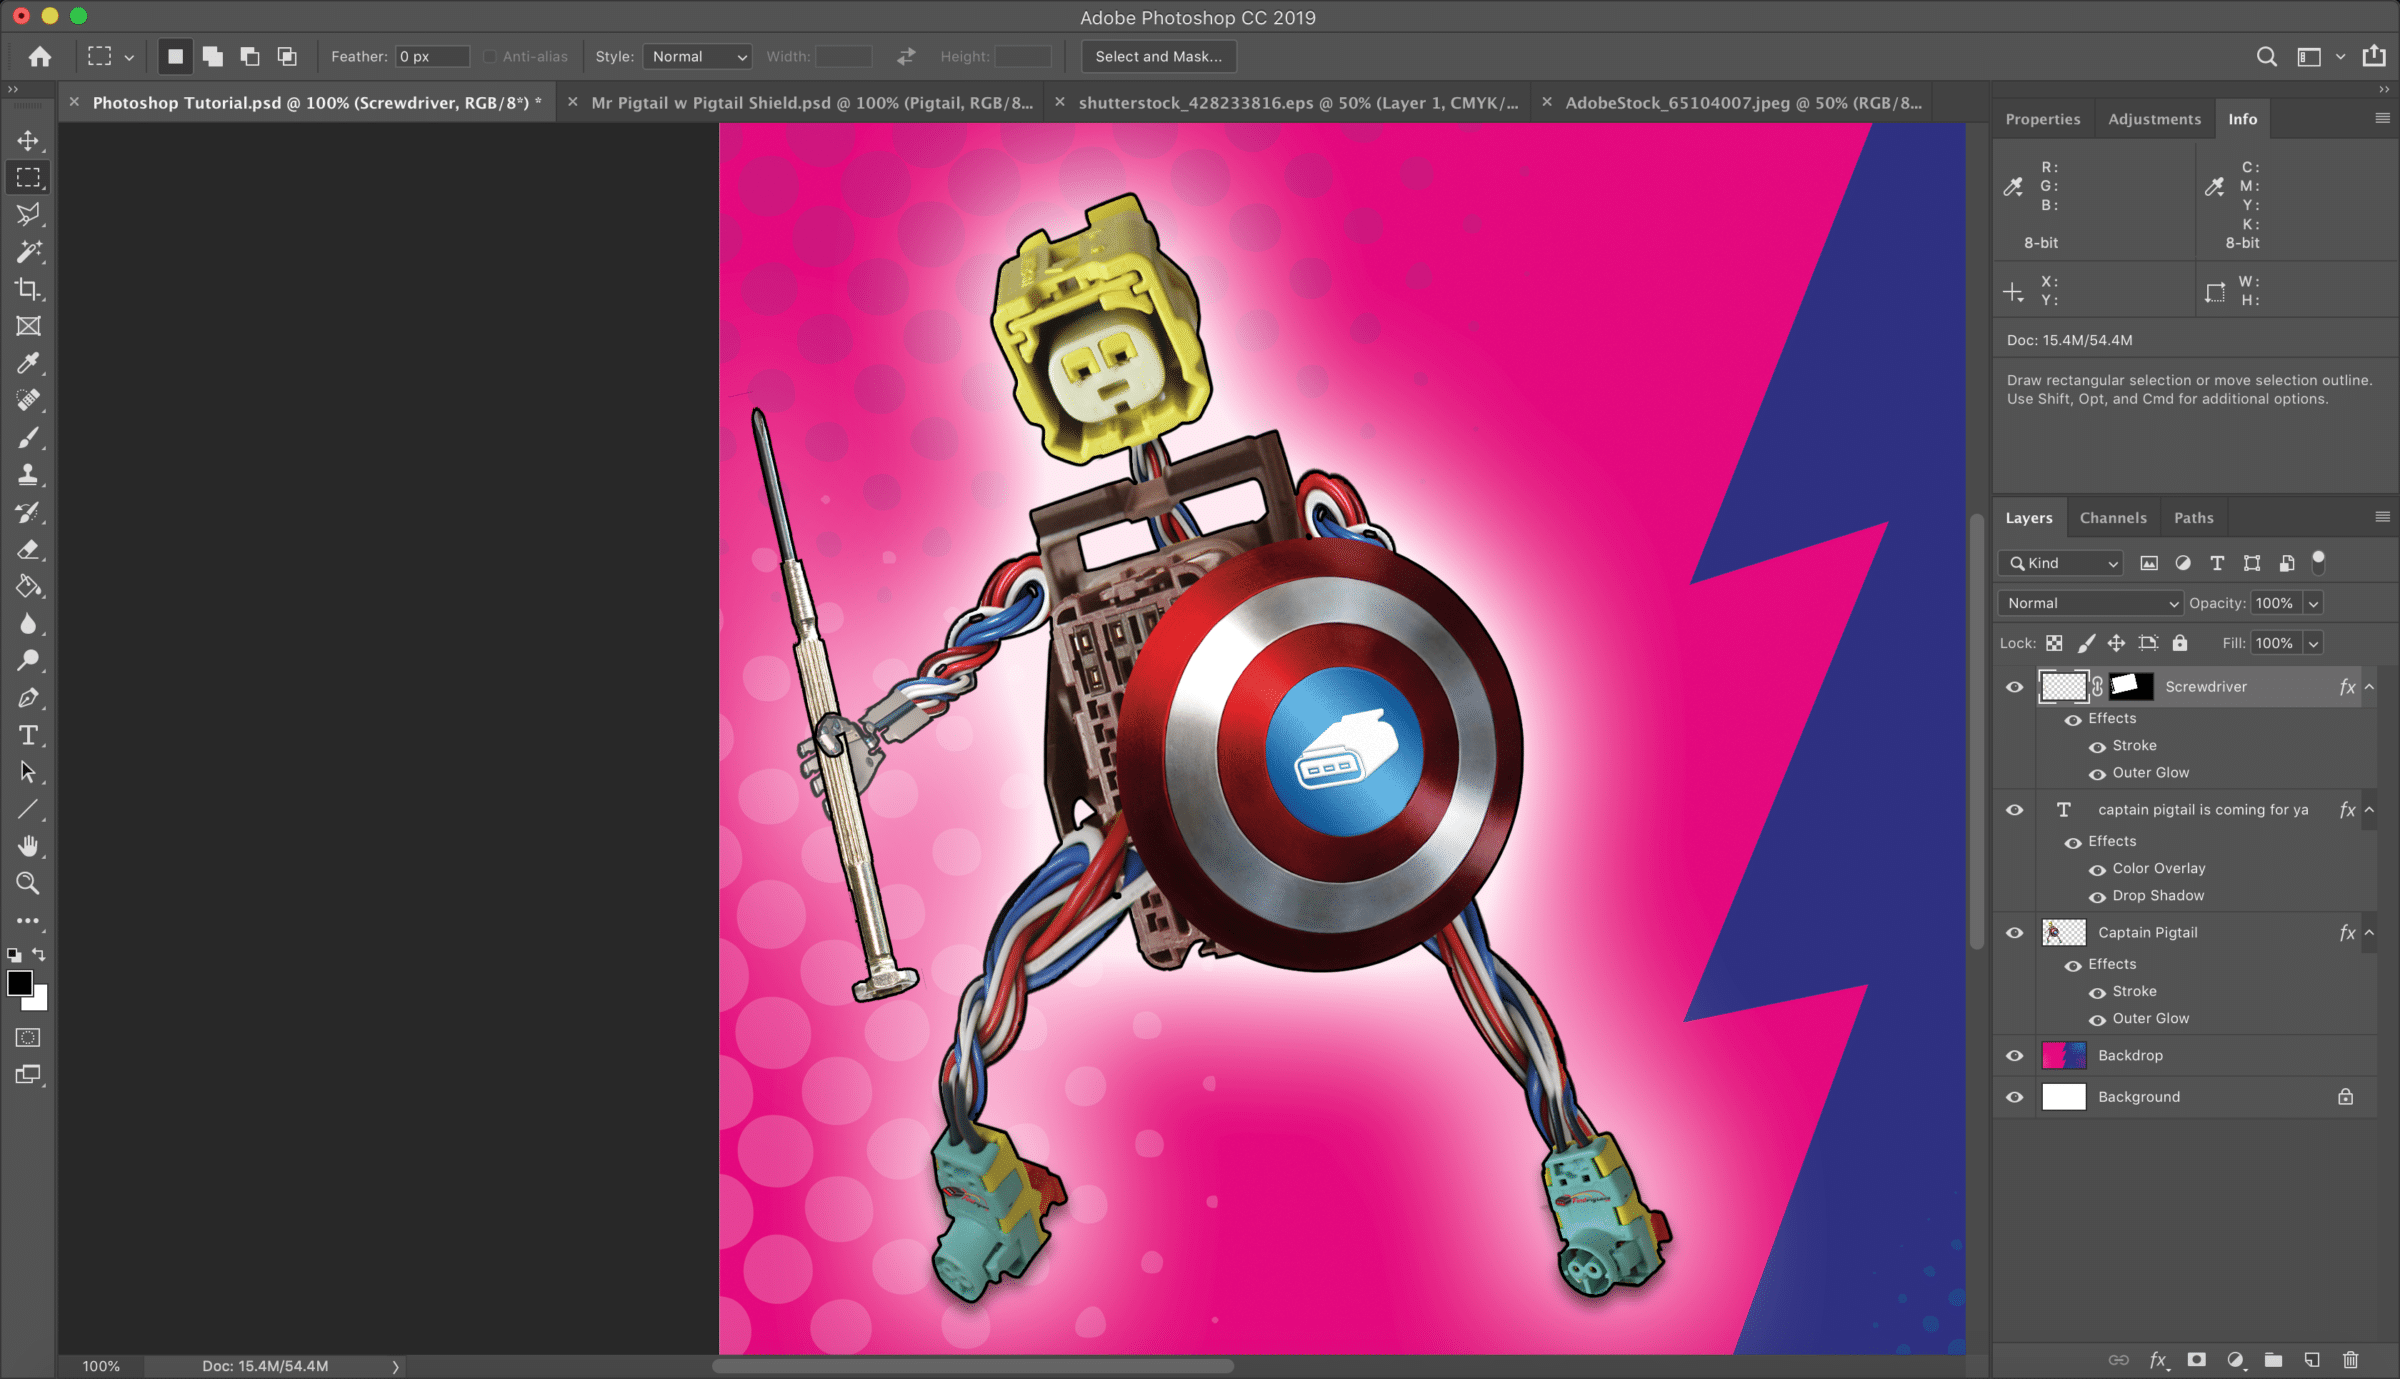
20. Restore the screwdriver layer to 100% to see the completed effect.
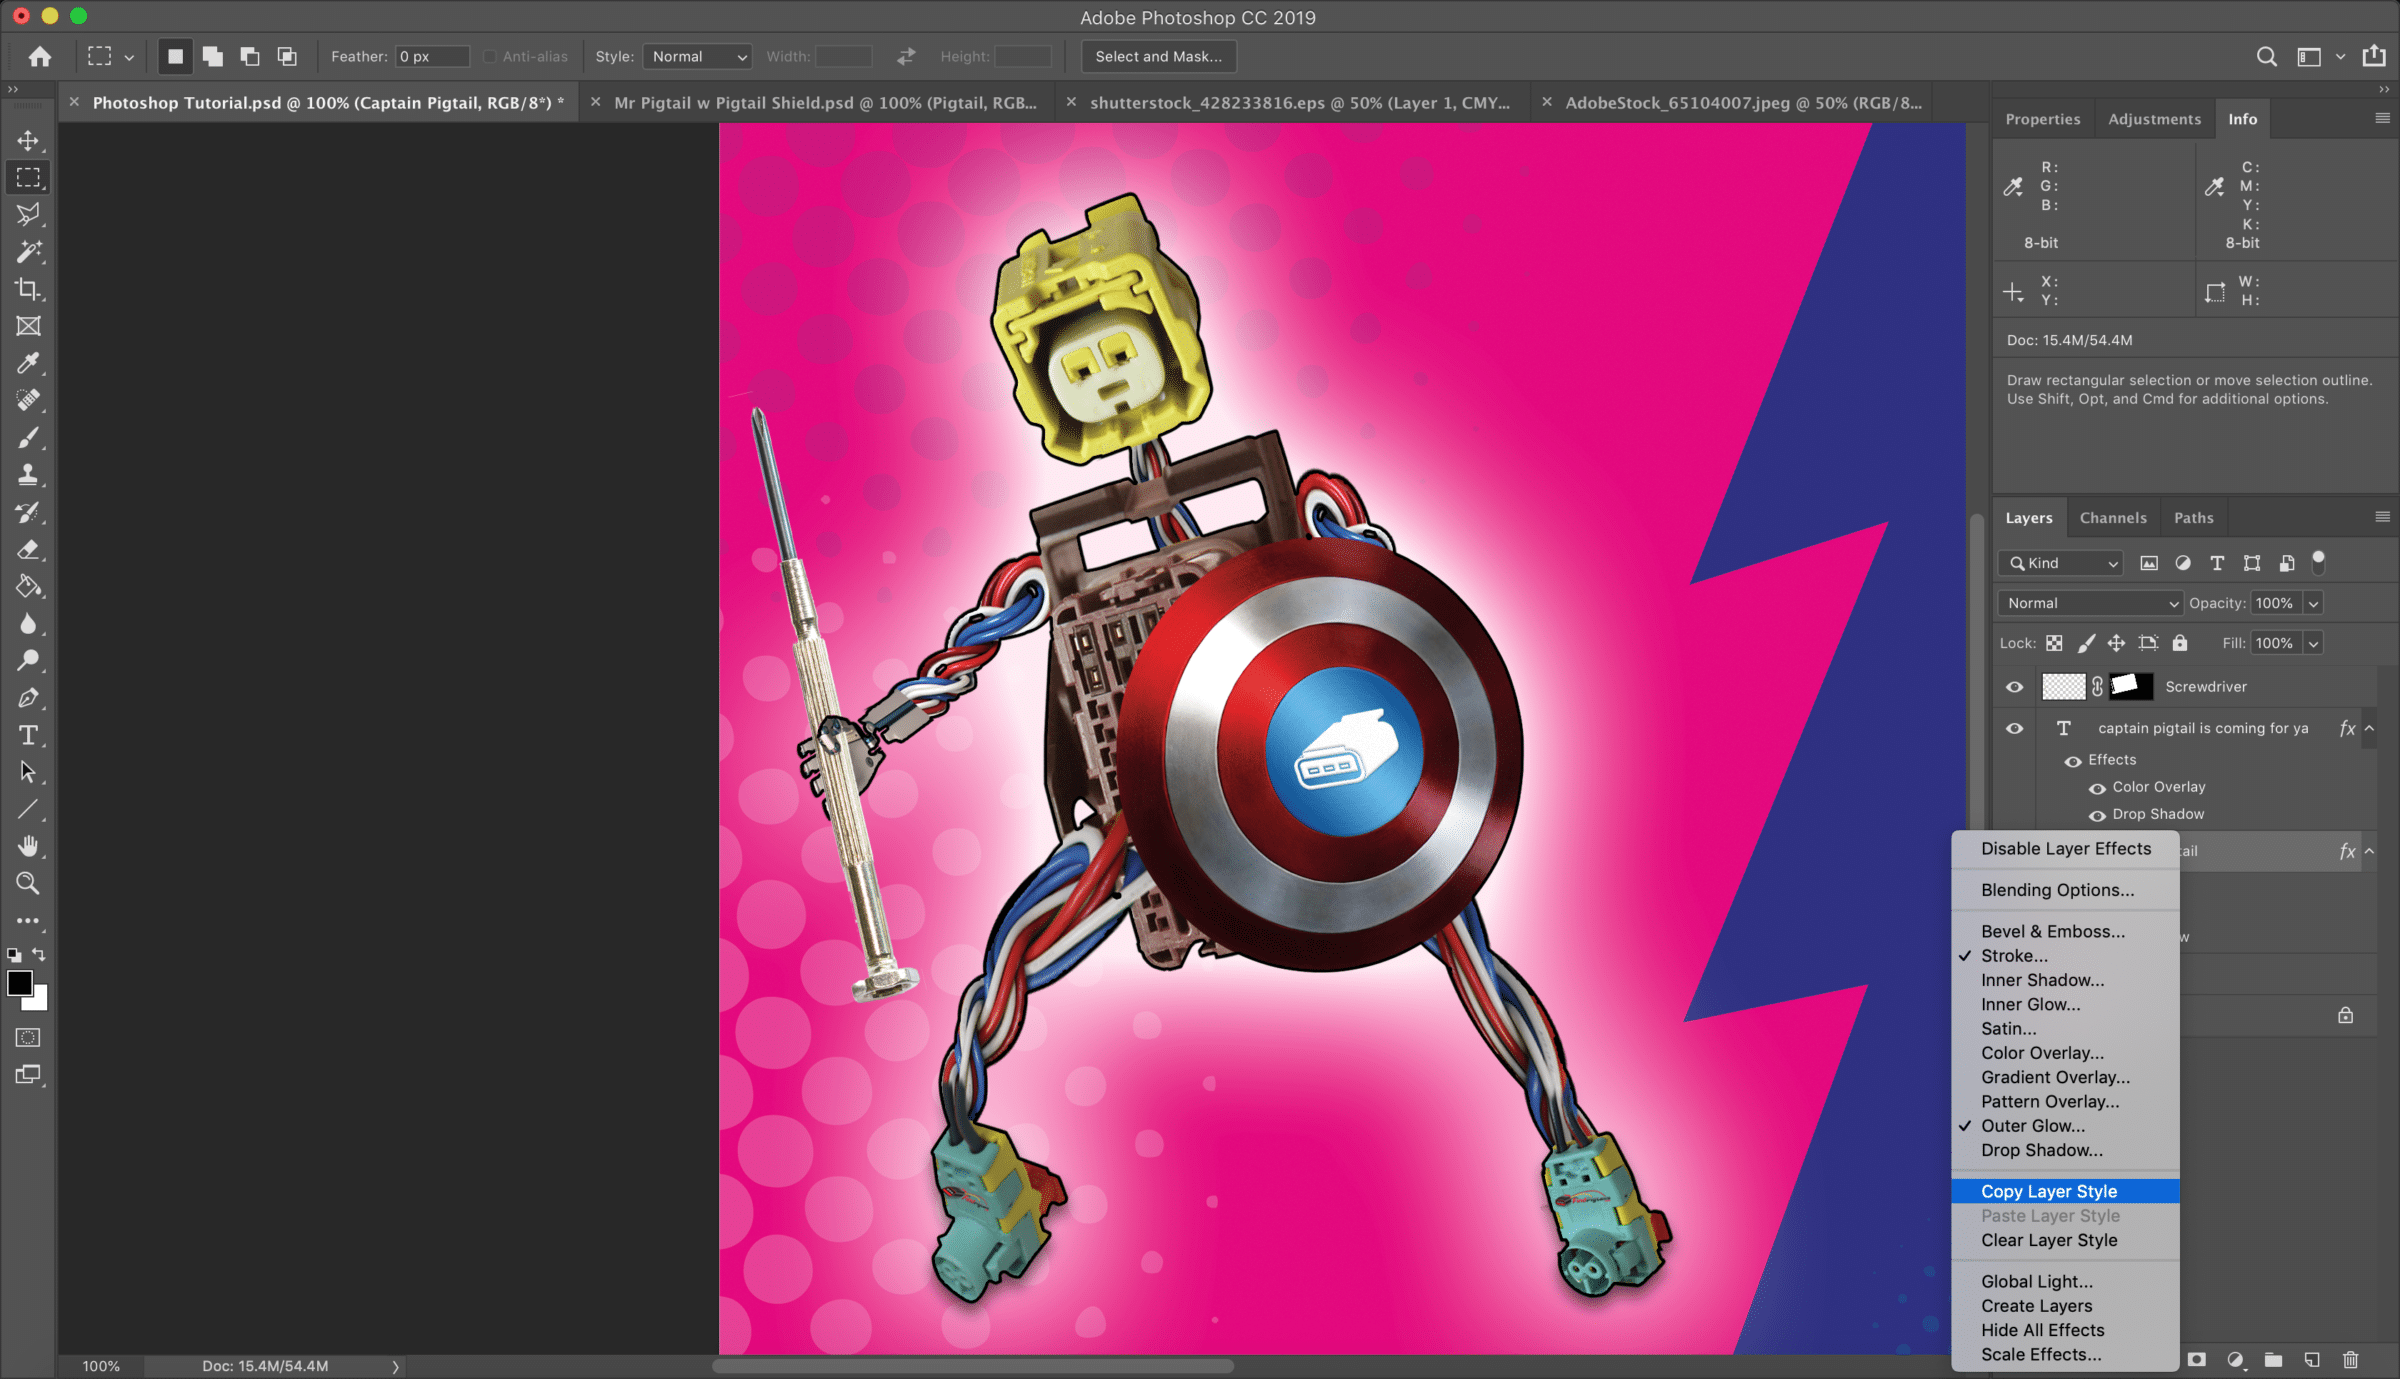
Next, we’ll copy the same glow-and-outline style that we’ve applied to Captain Pigtails to the screwdriver too. Right click the Captain Pigtails layer and select Copy Layer Style …
21. (Note that both the stroke and outer glow are applied with respect to the mask as well, e.g. the black outline around Captain Pigtails’ thumb.)
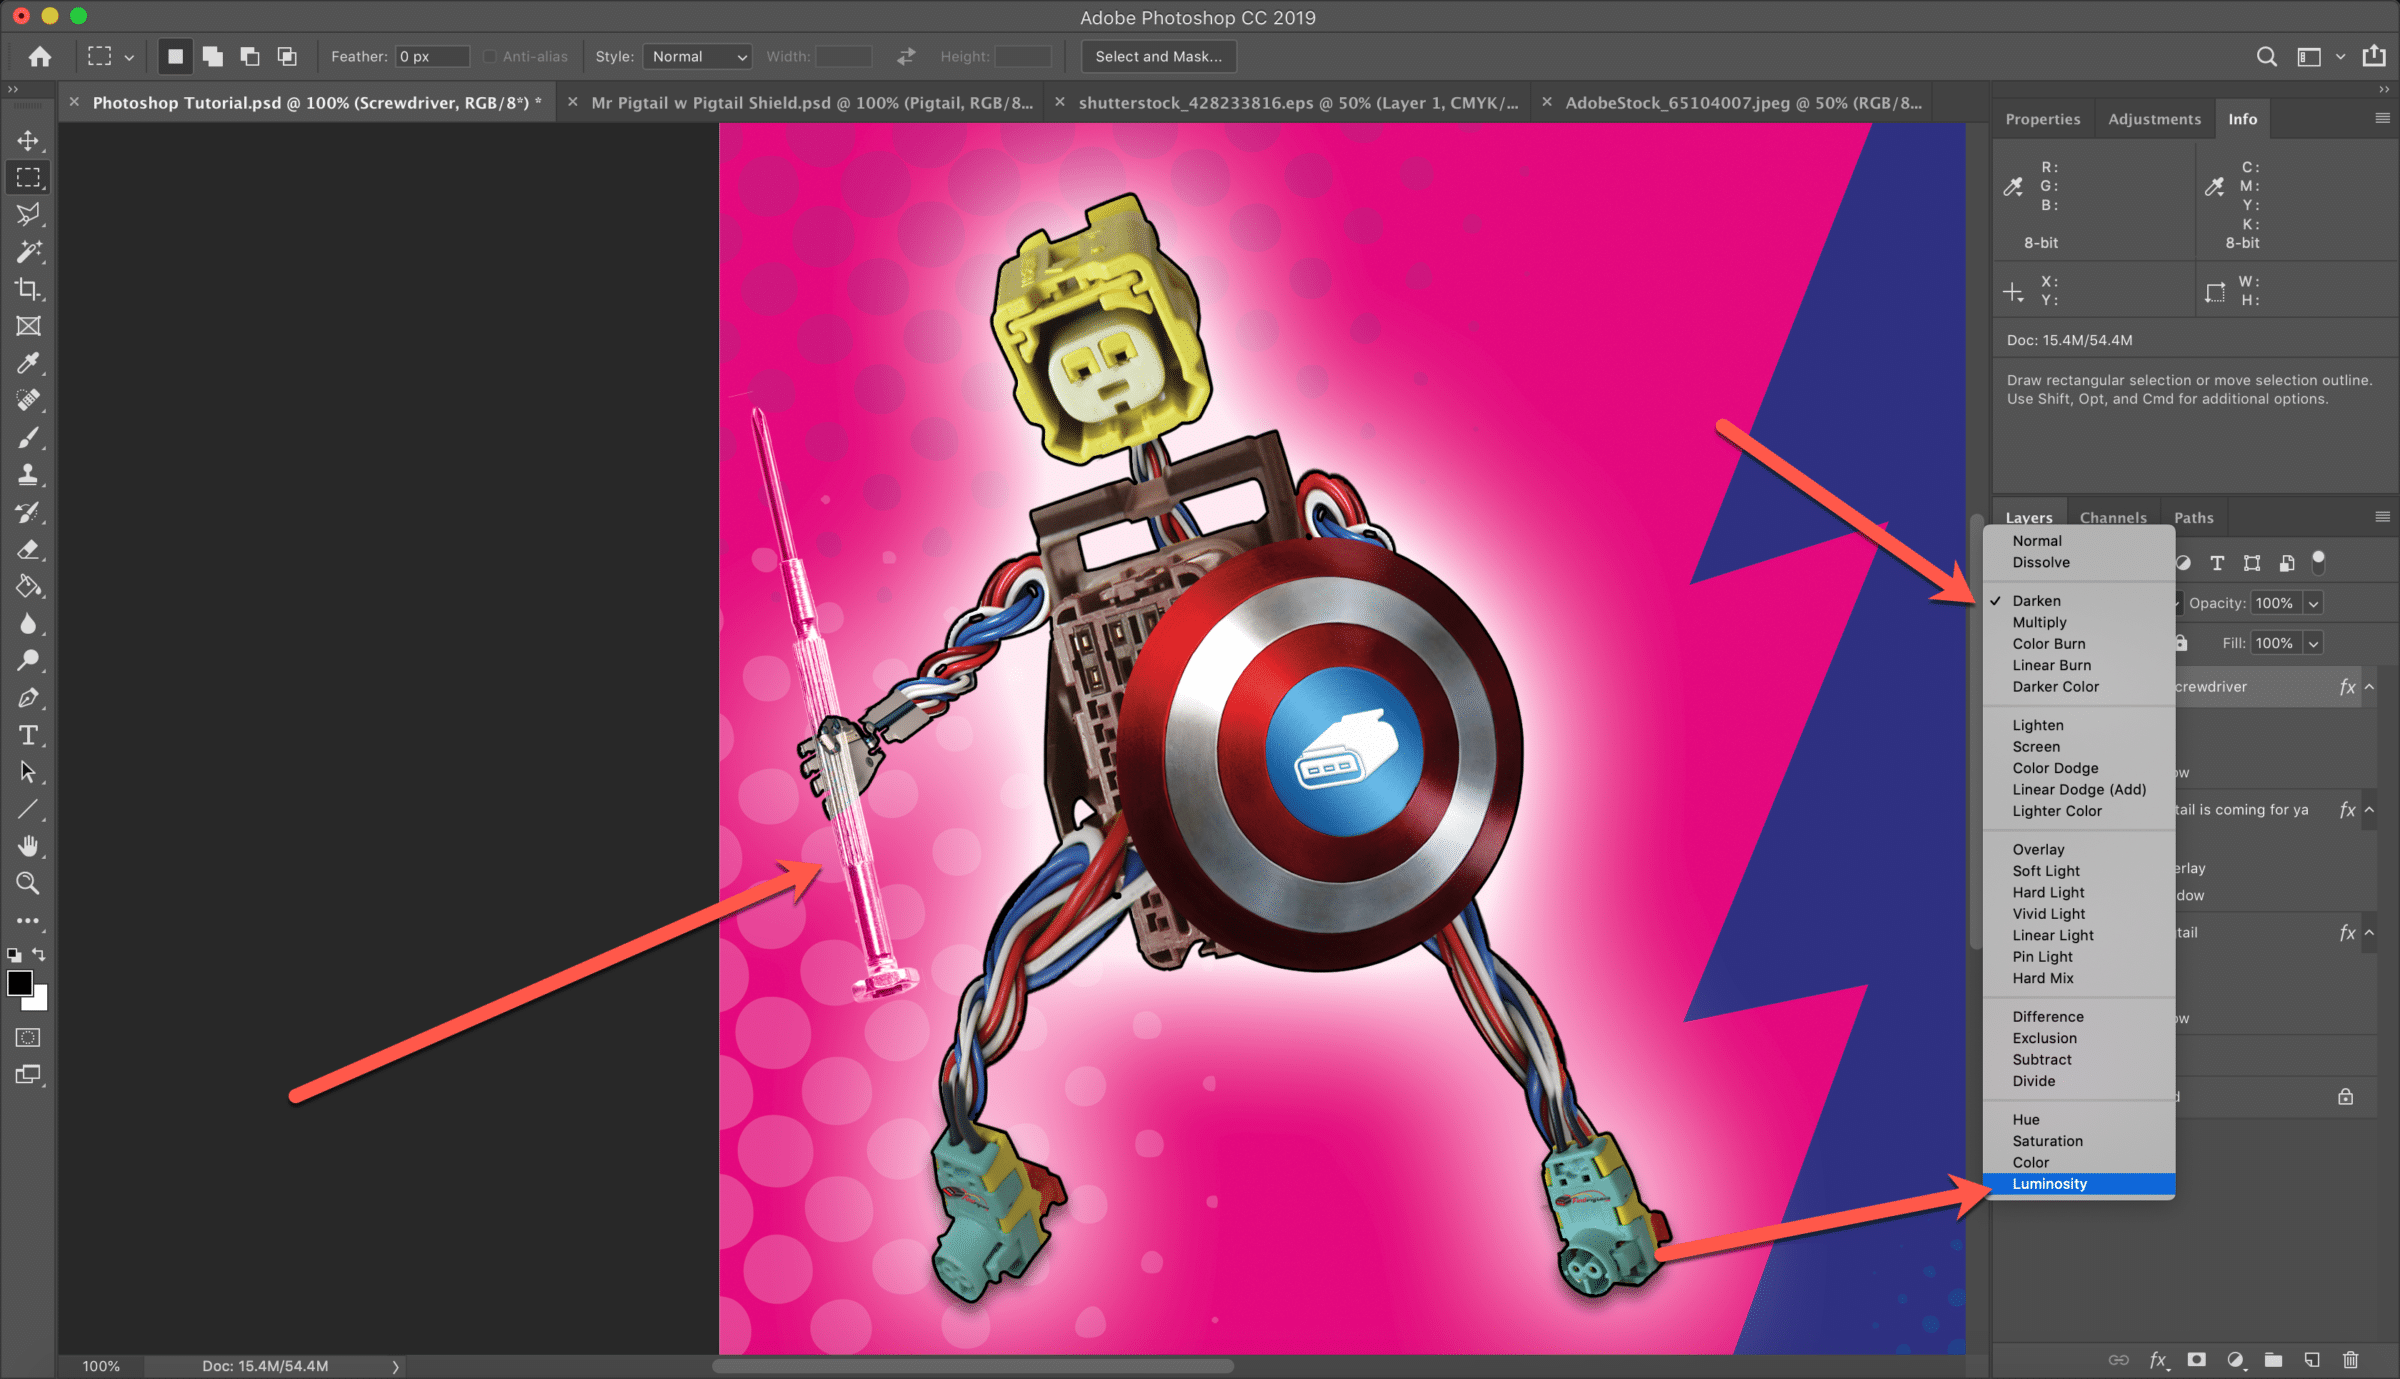
22. A quick word about Blending Modes:
Photoshop provides Blending Modes which dictate how a layer is “superimposed” over the layer(s) underneath.
It’s often worth taking a few moments to experiment with the different modes, although in practice, I tend to use Normal, Darken, Lighten, Overlay or Luminosity in almost all cases.
Although this isn’t a great demonstration, let’s select Luminosity for the time being:
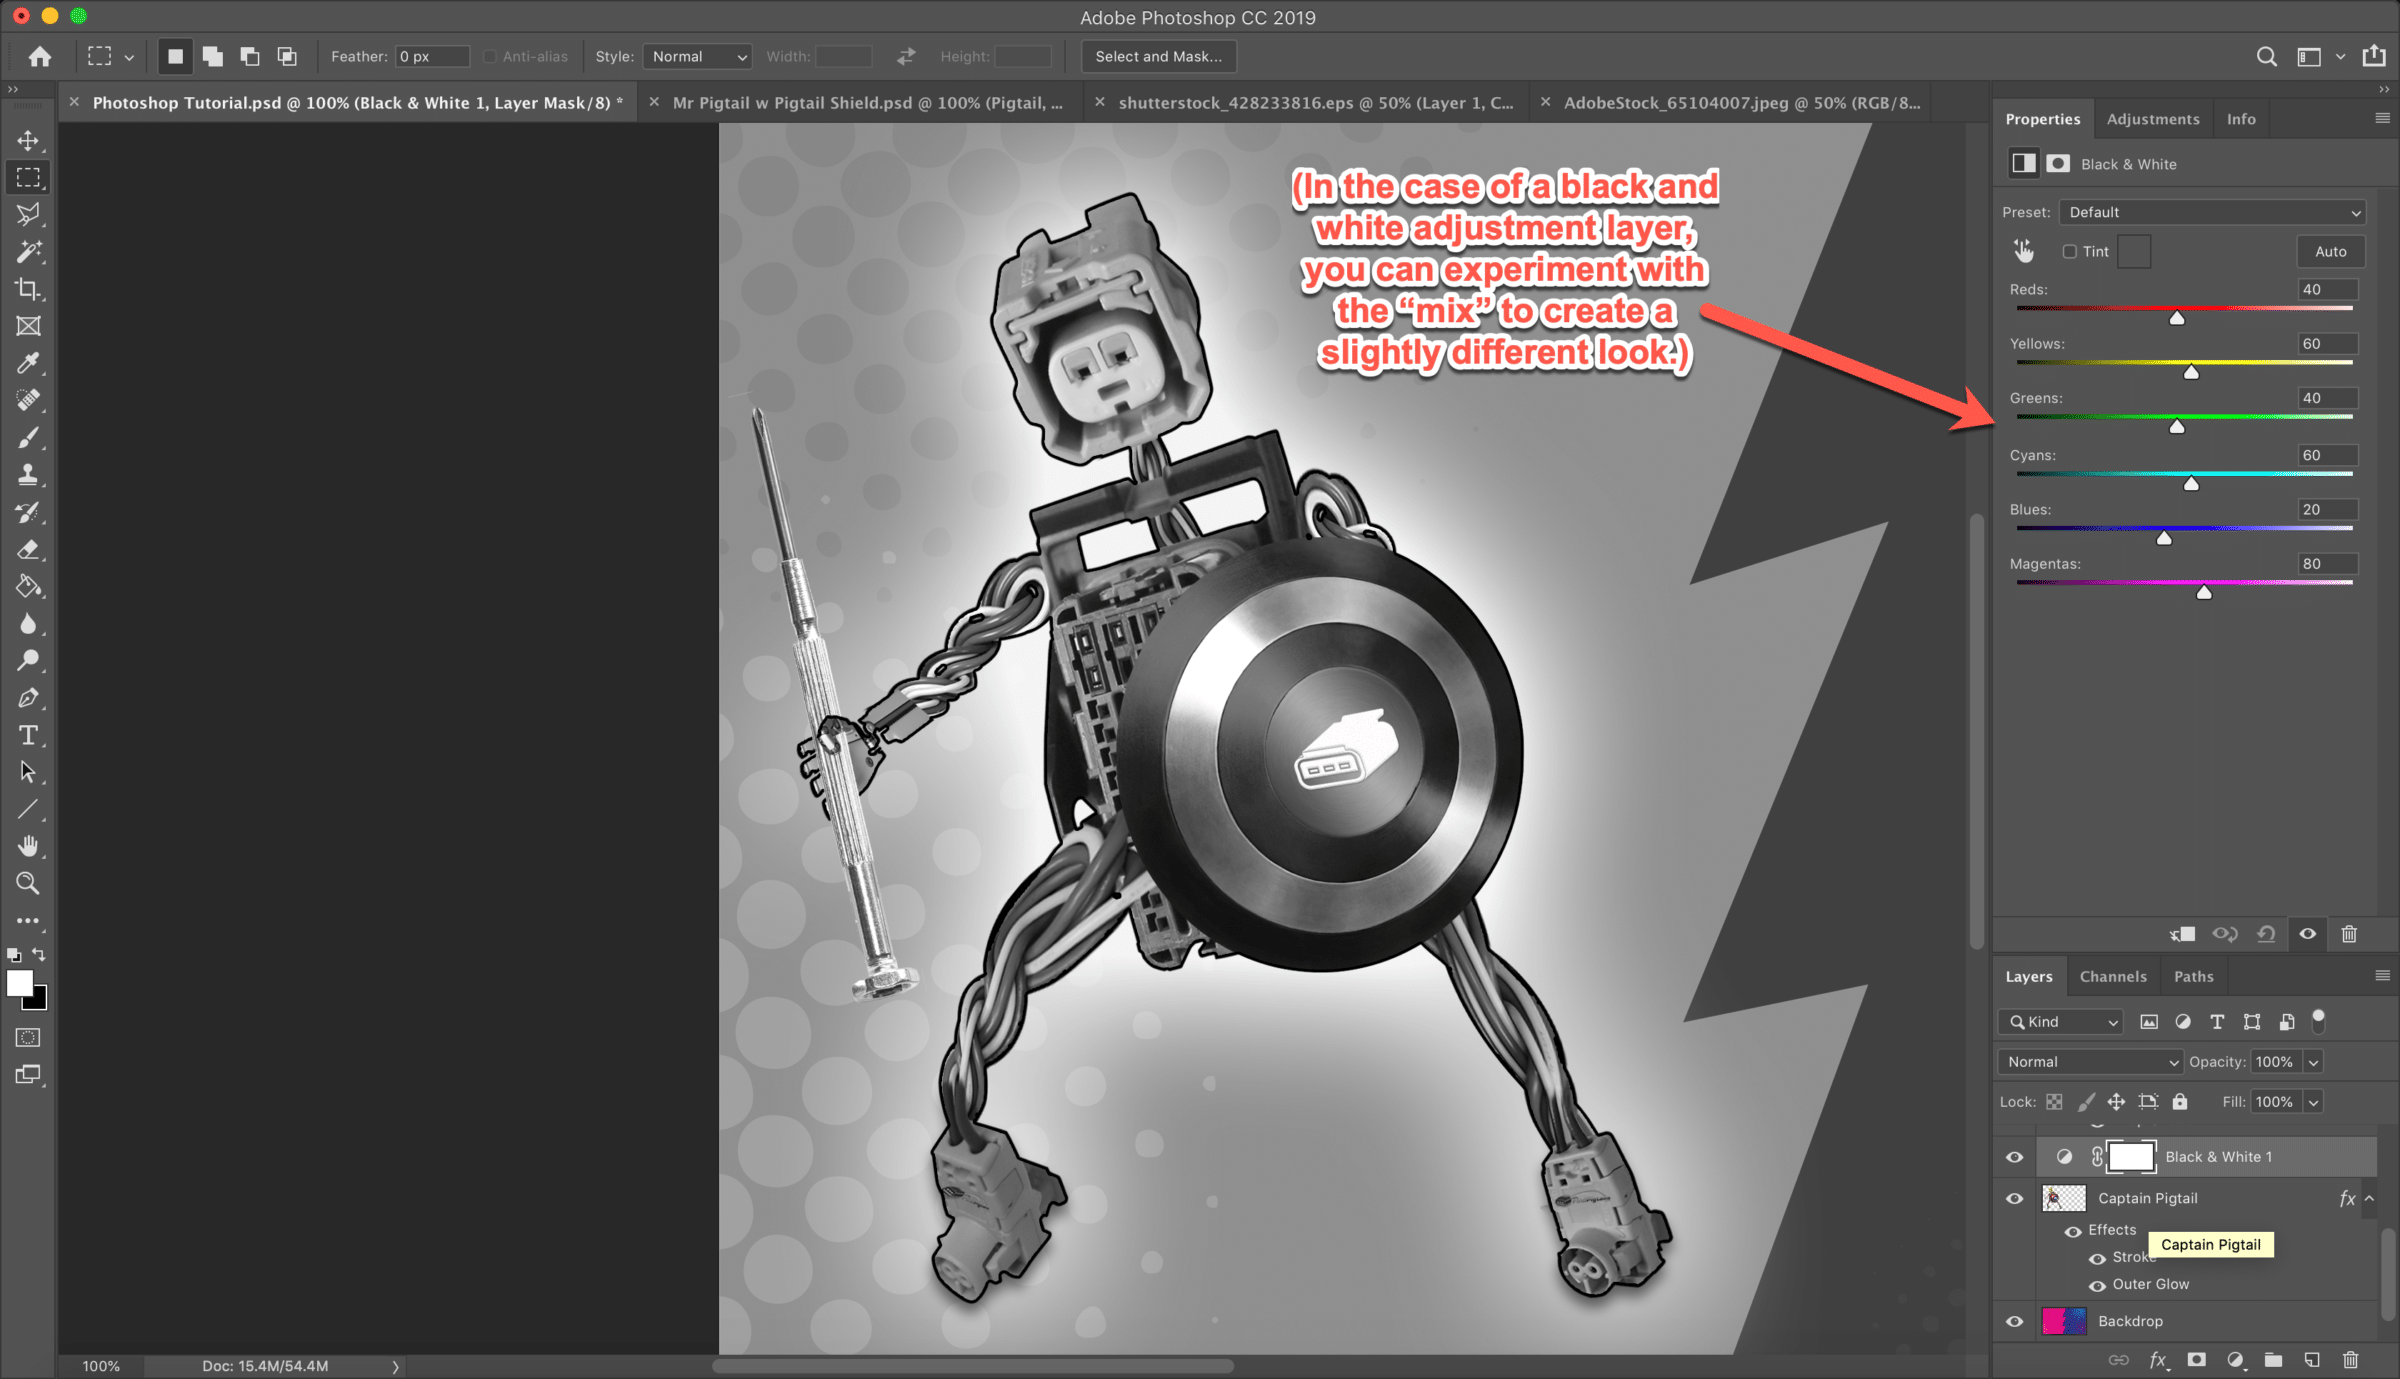
23. Finally, we’ll take a look at Adjustment Layers.
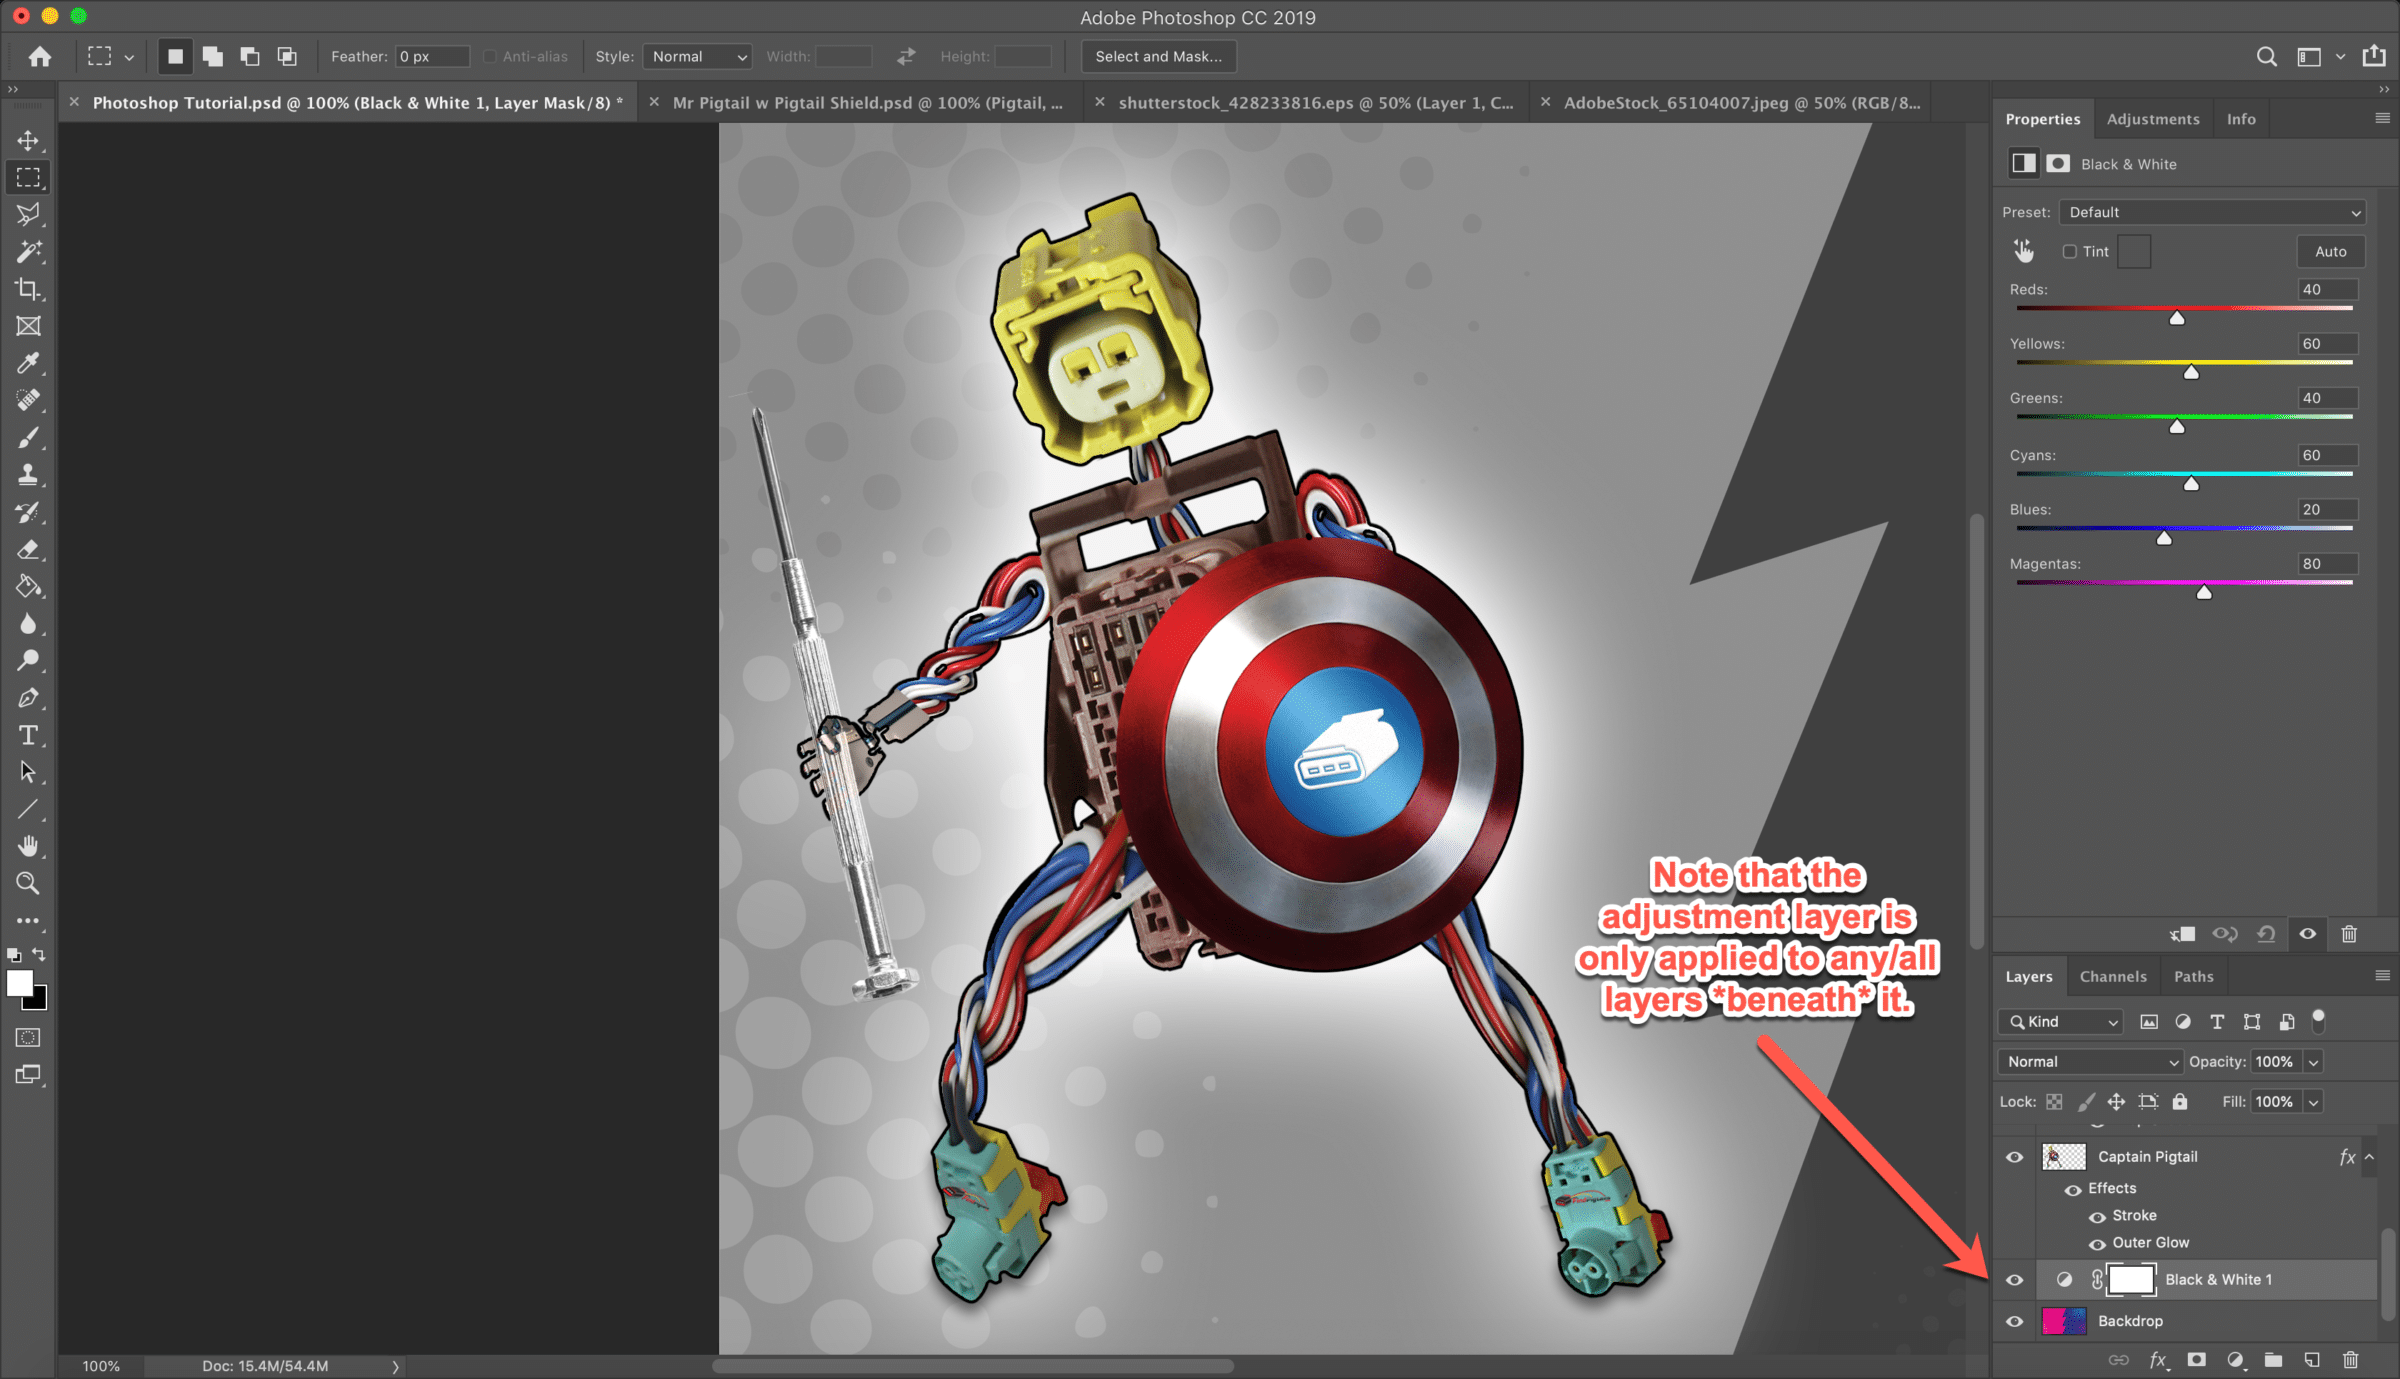
In the Layers pane, click the “Adjustment Layer” icon and select Black and White:

24. This is–again–a quick and effective way to convert your image–or parts of it–to black and white in a non-destructive fashion.
25. In Photoshop, the effects of an adjustment layer are only applied to any layers underneath of it in the Layer stack. Try moving the adjustment layer beneath Captain Pigtails:
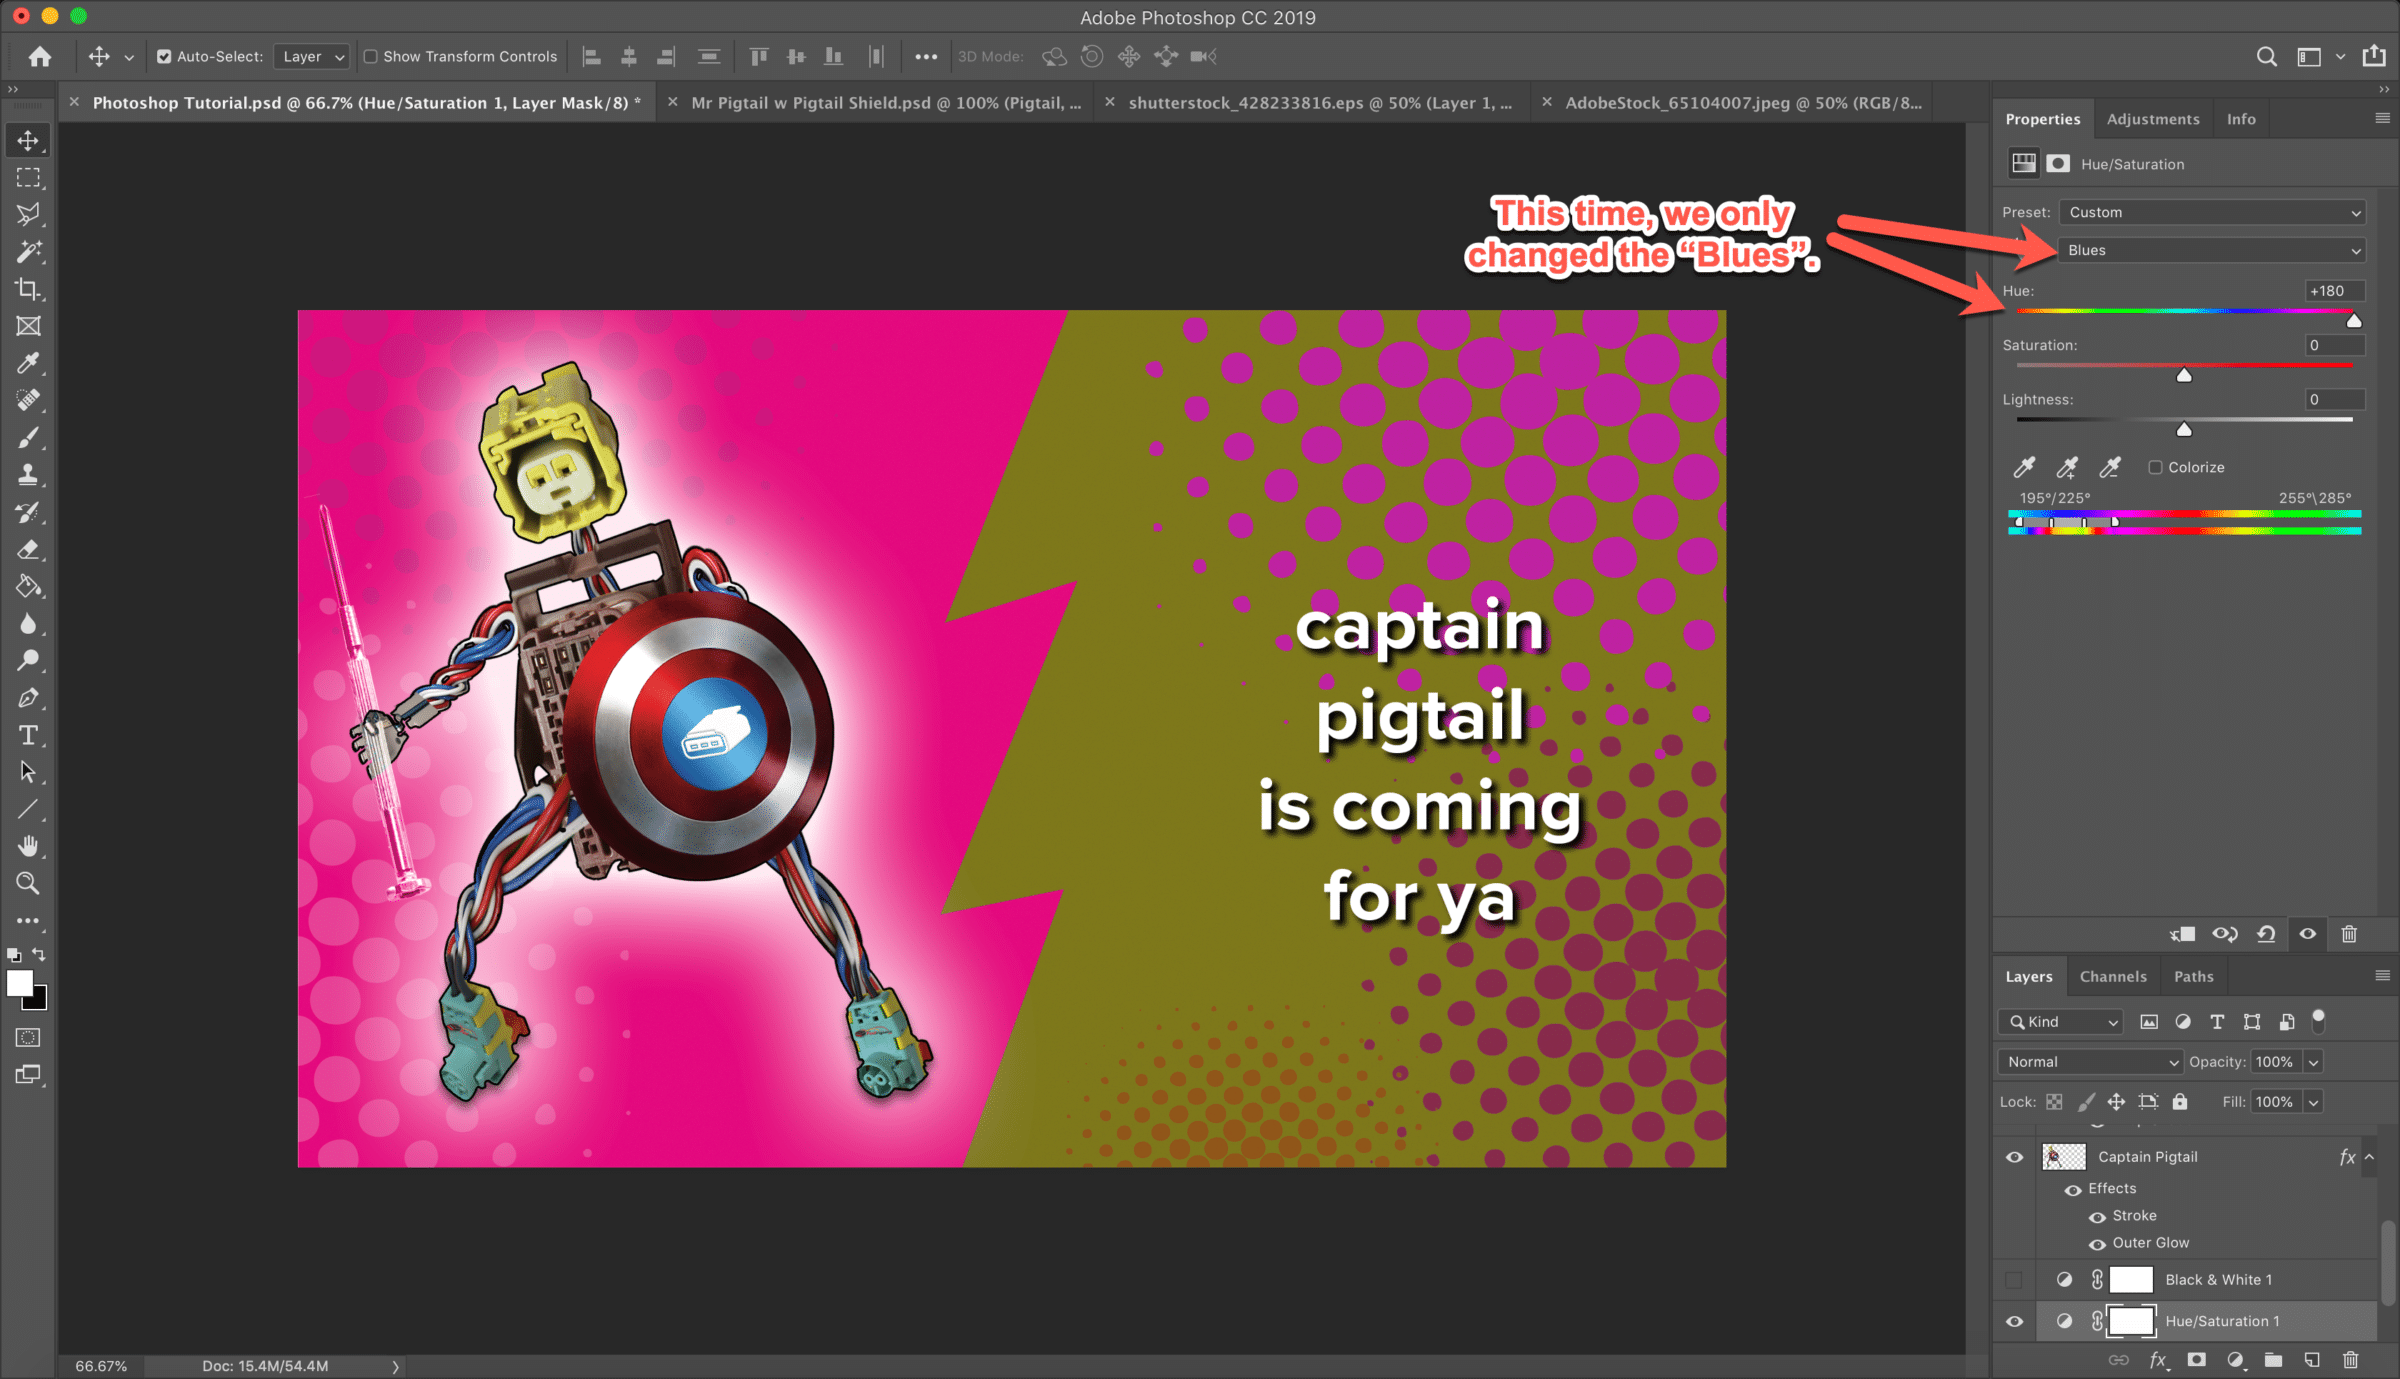
26. The Hue/Saturation adjustment layer is another powerful option, offering the capability to selectively adjust swaths of color.
If “Master” is selected, all color ranges will be updated:
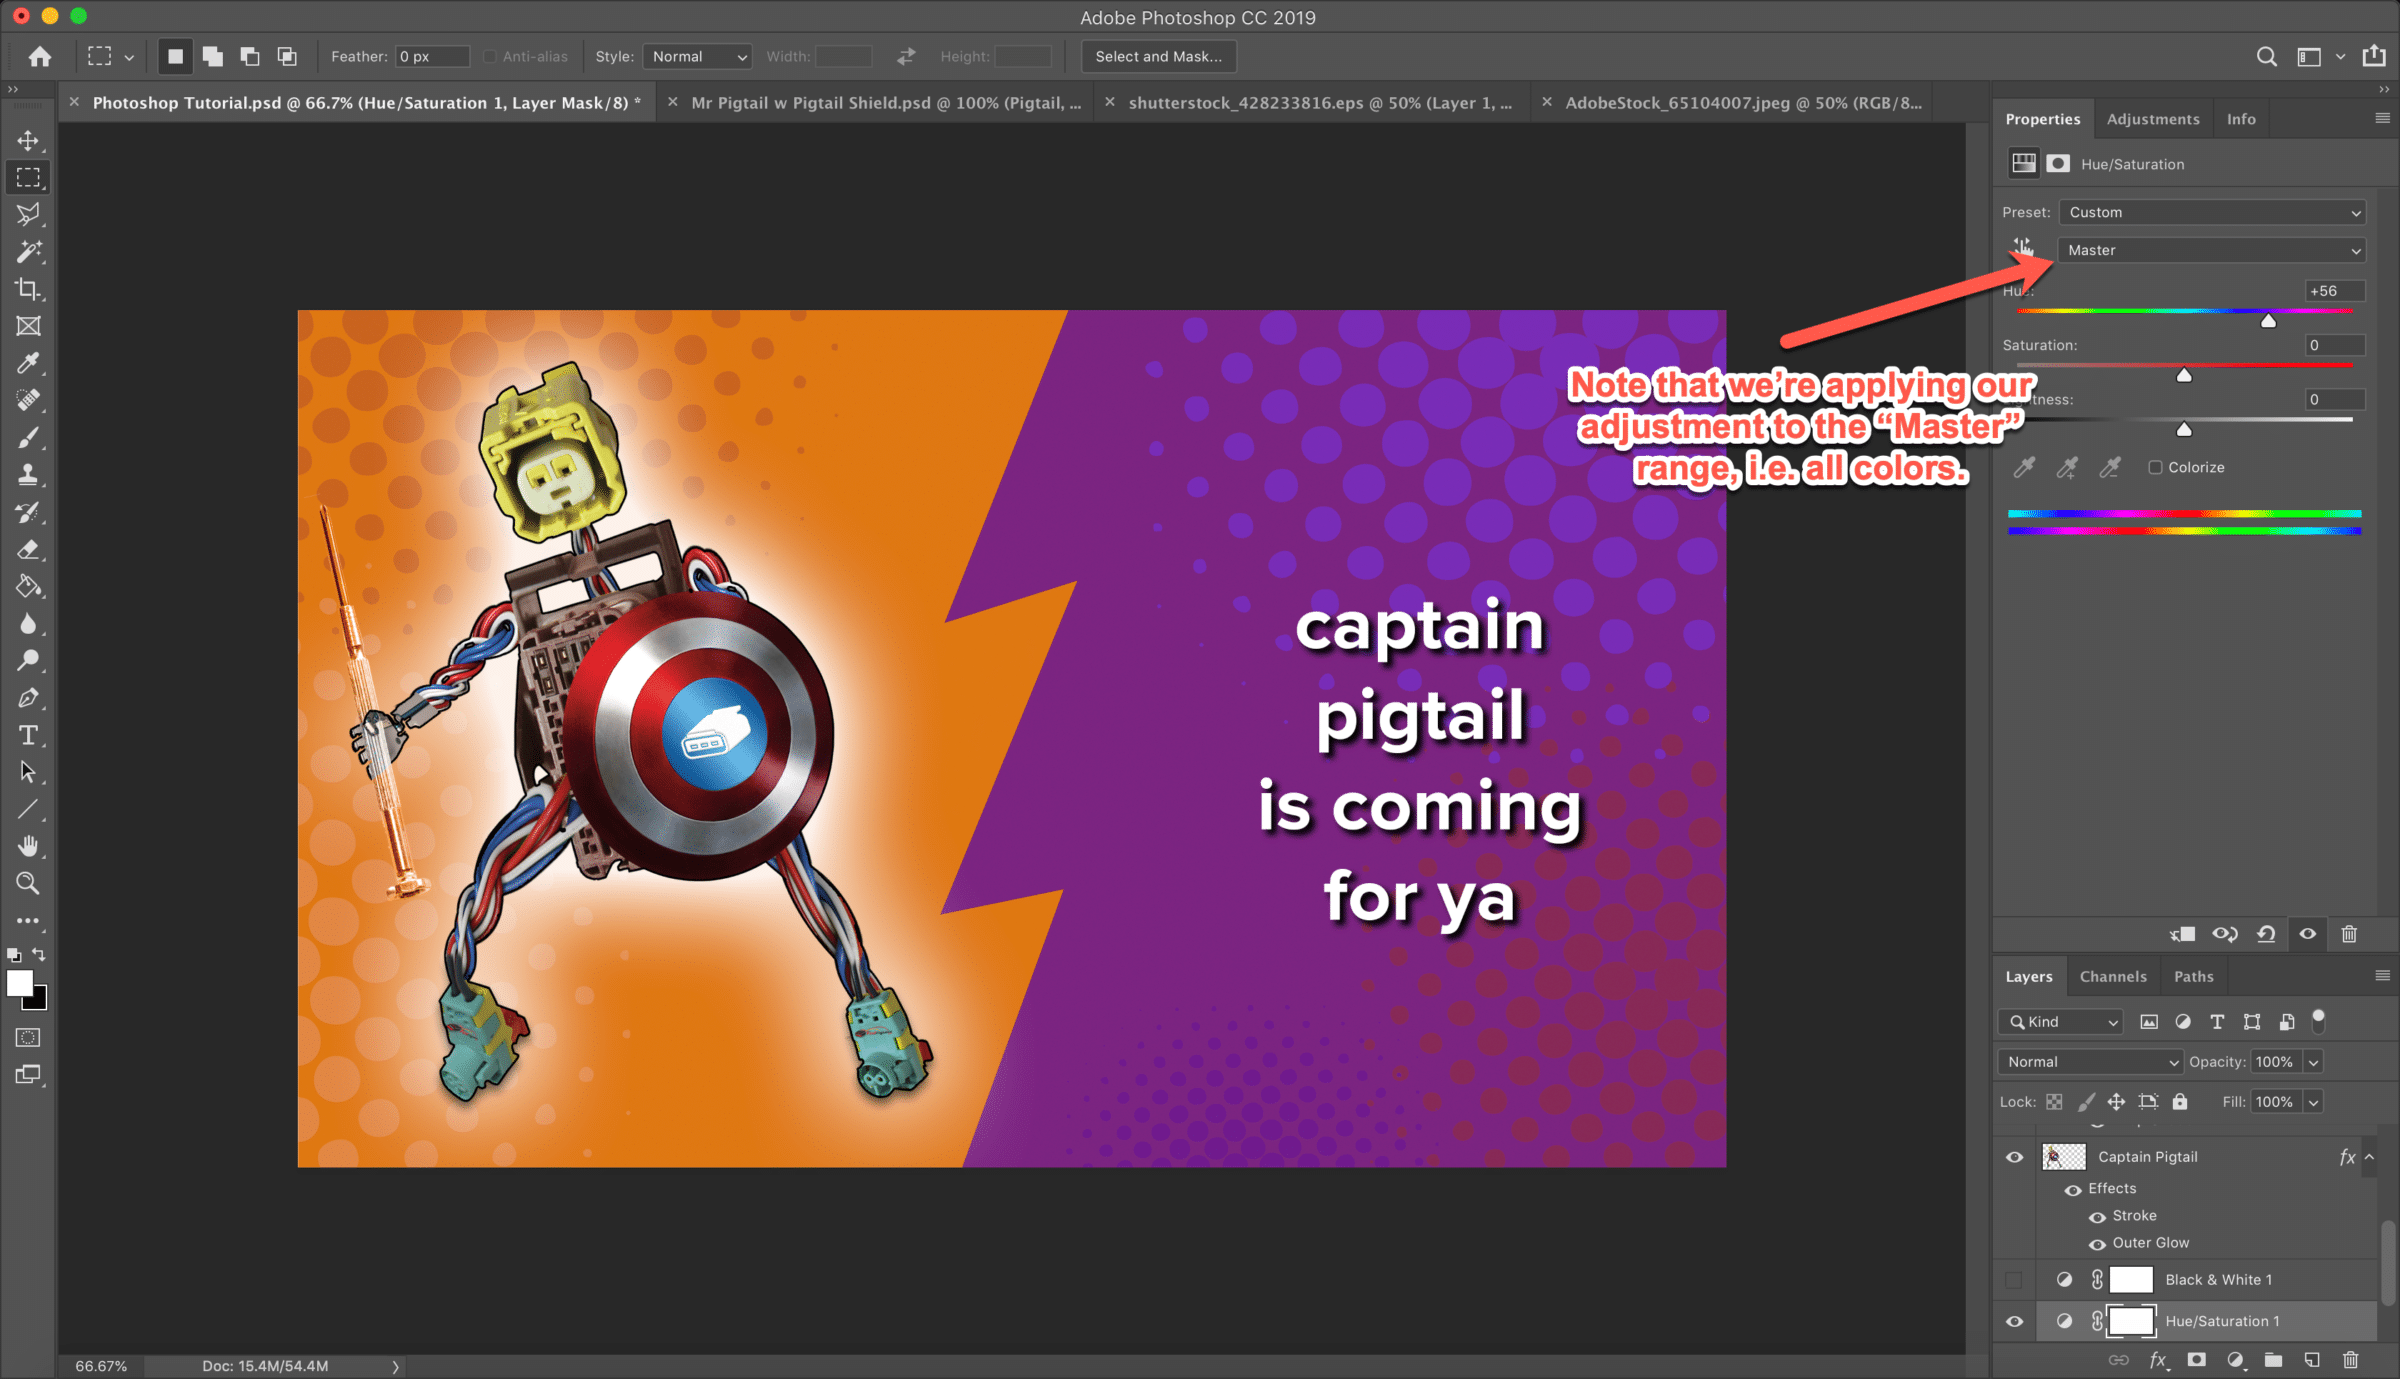
27. You can also select a specific color range, e.g. Blues, to adjust only the Blue spectrum: